Adding a Domain Forwarder
From XMission Wiki
You can add a new domain name to forward to another domain or even a directory within another domain. To go to a specific page on another website, that requires an advanced setup in a .htaccess file. We recommend independent research for such advanced needs. First, ensure you are logged into your account at the Shared Hosting login page.
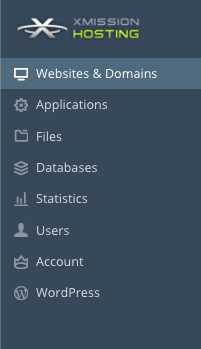
- From the side panel, click on the "Websites & Domains".
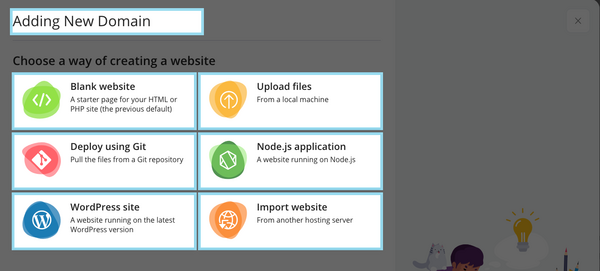
- Next choose "Add Domain" button.
- You will see the following: Choose Blank Website
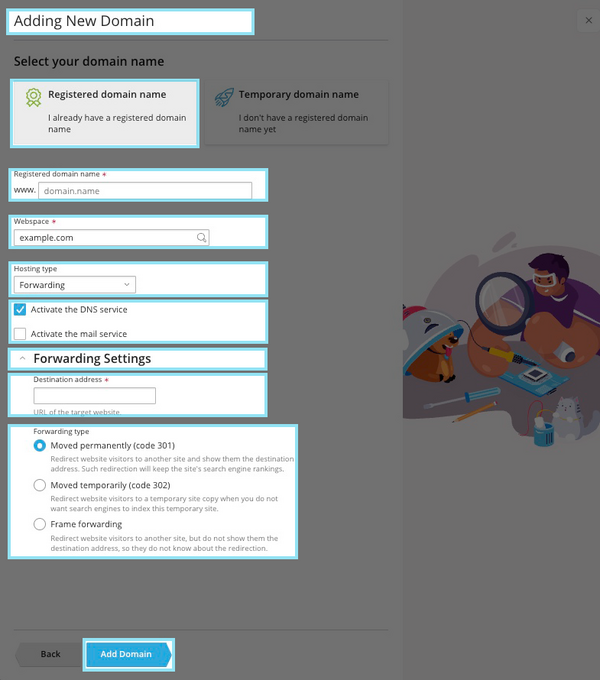
- On this screen, you will need to complete the following information. A brief description of each follows the image.
- Registered Domain name - This is the name of your new domain. In this example, we would be adding the domain "example-domain.com."
- Webspace - This should be your primary domain and will be automatically selected
- Hosting type = Choose Forwarding from the dropdown
- Activate the DNS service - Most likely, you will be using XMission for DNS and so the box shown above should be selected.
- Activate the mail service - Uncheck this box, your hosting platform does not come with mail servicing. Zimbra Hosted Email is an add-on service.
- Click on Forwarding Settings
- Destination address - This is where the new domain will forward to. You can have it forward either to another domain entirely or a sub-directory of another domain. *Forwarding type
- Moved permanently (code 301) - Redirect website visitors to another site and show them the destination address. Such redirection will keep the site's search engine rankings.
- Moved temporarily (code 302) - Redirect website visitors to a temporary site copy when you do not want search engines to index this temporary site.
- Frame forward - Redirect website visitors to another site, but do not show them the destination address, so they do not know about the redirection.
- Once you've entered the correct information for your new domain, simply click "OK." You will see the following text indicating your new domain has been created successfully!
- Administration/Logging in
- Adding a Domain
- Adding a Subdomain
- Adding a Domain Alias
- Adding a Domain Forwarder
- Adding MySQL Databases
- Adding/Managing DNS Records
- Managing Domain/Users
- Managing FTP Access/Users
- PHP Settings
- Previewing the Website
- Secure Your Sites
- Web Statistics
Additional Development Help
Applications
Domain Management


