Difference between revisions of "Hosted Email:Calendar Sync OSX"
From XMission Wiki
(Created page with "If you have a Zimbra Business Premium or a Personal Premium account, these instructions will show you how to sync your calendar ==Calendar Sync== * Click on the '''APPLE ICON...") |
(→Calendar Sync) |
||
| Line 21: | Line 21: | ||
* After you click Create - your Calendar will be start to sync. | * After you click Create - your Calendar will be start to sync. | ||
| + | |||
| + | [[Category: Zimbra]] | ||
Revision as of 15:15, 16 May 2014
If you have a Zimbra Business Premium or a Personal Premium account, these instructions will show you how to sync your calendar
Calendar Sync
- Click on the APPLE ICON in the top menu bar
- Next click on SYSTEM PREFERENCE
- Choose INTERNET ACCOUNTS
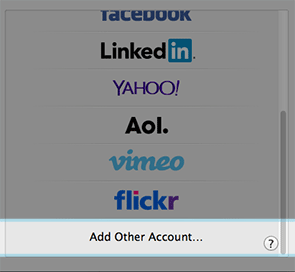
- Select Add Other Account you will have to scroll down to see it
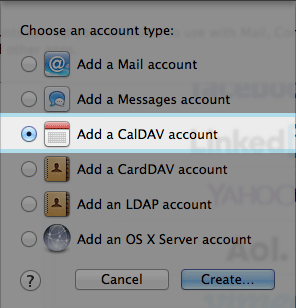
- Next Choose Add a CalDAV account
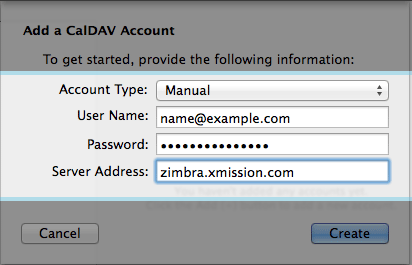
- Next Choose Manual from the Account Type: dropdown and fill in all fields
- Account Type: - Manual
- User Name: - your full email address
- Password: - your email password
- Server Address: - zimbra.xmission.com
- After you click Create - your Calendar will be start to sync.


