Hosted Email:Outlook 2013
Please note: All XMission Zimbra Premium and XMission Personal Premium Zimbra account customers should use the Zimbra Outlook Connector for Windows
All XMission Zimbra Base account customers should use the following instructions:
To add an email address in Outlook 2013, first go to the File menu option near the upper left-hand corner within Outlook as seen below.

With Info selected, click Add Account.

Select Manual setup or additional server types and click Next.

Select POP or IMAP and click Next.

Fill out the information on this window as seen in the example below (with your own unique E-mail address, username, and password) and then click on the More Settings... button.

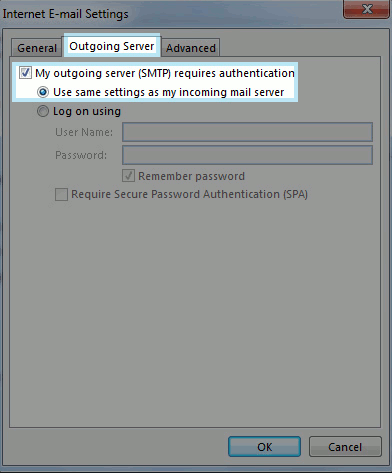
Go to the Outgoing Server tab and check the box that says My outgoing server (SMTP) requires authentication and ensure Use same settings as my incoming mail server is selected underneath that.
 ]
]

Now, go to the Advanced tab and change the Outgoing server (SMTP) port to 465 and select SSL for the preferred type of encryption. Then, simply click OK.

You will be returned to original "Account Settings" screen. From here, simply click Next.
Outlook will now test your account settings. Once it has succeeded, simply click Close from the test window and then Finish to complete the process.