Difference between revisions of "Hosted Email:iOS"
From XMission Wiki
(redo) |
|||
| Line 1: | Line 1: | ||
| − | + | ==== Download the Profile ==== | |
| − | + | Download the XMission email profile by loading this webpage on your device and then | |
| − | + | '''[https://asset.xmission.com/xmission-zimbra-premium-signed.mobileconfig tapping here]'''. | |
| − | |||
| − | |||
| − | |||
| − | |||
| − | |||
| − | |||
| − | |||
| − | |||
| − | |||
| − | |||
| − | |||
| − | |||
| − | |||
| − | |||
| − | |||
| − | |||
| − | |||
| − | |||
| − | |||
| − | |||
| − | |||
| − | |||
| − | |||
| − | |||
| − | |||
| − | |||
| − | [[Category:Client Email Configuration| | + | |
| − | [[Category: | + | ==== You will see the "Install Profile" for XMission launch. Tap the '''Install''' button. ==== |
| + | [[Image:Ios-zimbra-premium-1.png]] | ||
| + | |||
| + | ==== Enter your device's lock code or password. ==== | ||
| + | [[Image:Ios-zimbra-premium-2.png]] | ||
| + | |||
| + | ==== Enter your email address: ==== | ||
| + | |||
| + | If you have purchased Hosted Email for another domain other than @xmission.com, enter that email address with that domain. | ||
| + | |||
| + | [[Image:Ios-zimbra-premium-3.png]] | ||
| + | |||
| + | ==== Enter your email address again: ==== | ||
| + | If you have purchased Hosted Email for another domain other than @xmission.com, enter that email address with that domain. | ||
| + | |||
| + | [[Image:Ios-zimbra-premium-4.png]] | ||
| + | |||
| + | |||
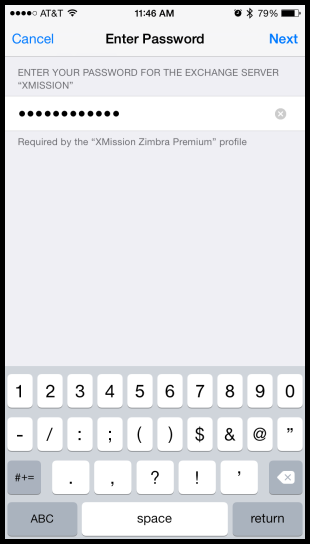
| + | ==== Enter your password: ==== | ||
| + | |||
| + | [[Image:Ios-zimbra-premium-5.png]] | ||
| + | |||
| + | [[Category:Client Email Configuration|XMission Email|iPhone / iPad]] | ||
| + | [[Category:XMission Email|iPhone / iPad]] | ||
Revision as of 13:56, 1 July 2015
Contents
Download the Profile
Download the XMission email profile by loading this webpage on your device and then tapping here.
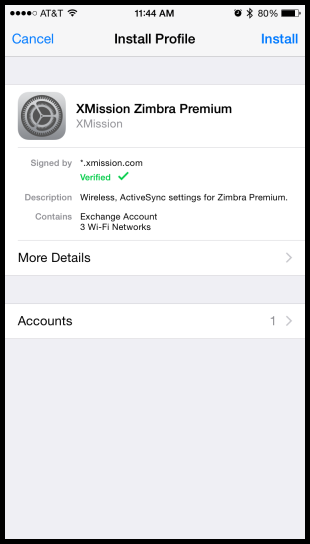
You will see the "Install Profile" for XMission launch. Tap the Install button.
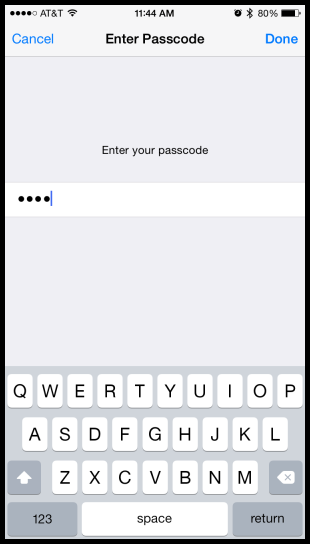
Enter your device's lock code or password.
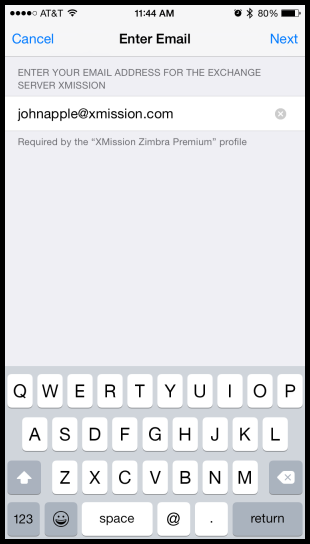
Enter your email address:
If you have purchased Hosted Email for another domain other than @xmission.com, enter that email address with that domain.
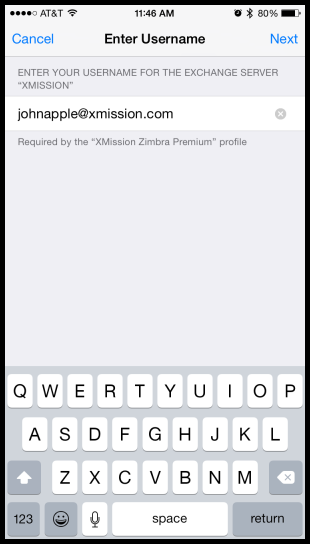
Enter your email address again:
If you have purchased Hosted Email for another domain other than @xmission.com, enter that email address with that domain.
