XMission Email:iPhone iOS3: Difference between revisions
add finish line |
No edit summary |
||
| (6 intermediate revisions by 3 users not shown) | |||
| Line 1: | Line 1: | ||
{{archived}} | |||
==XMission Email on your iPhone iOS3== | ==XMission Email on your iPhone iOS3== | ||
| Line 61: | Line 64: | ||
That's it! Now press [[Image:iphone-home-button.png]] home, tap on the [[Image:Mail_icon.jpg]] mail icon and you should now be able to send and receive email from your iPhone! You can send a test message to support@xmission.com and you should get an automatic reply. | That's it! Now press [[Image:iphone-home-button.png]] home, tap on the [[Image:Mail_icon.jpg]] mail icon and you should now be able to send and receive email from your iPhone! You can send a test message to support@xmission.com and you should get an automatic reply. | ||
[[Category:Client Email Configuration|XMission Email|iOS]] | |||
[[Category:XMission Email|iOS]] | |||
<mediaplayer height="505" width="320">File:Iphone.flv</mediaplayer> | |||
Latest revision as of 15:30, 14 January 2020
XMission Email on your iPhone iOS3
This setup applies to iPhone iOS versions 3.0 through 3.1.3.
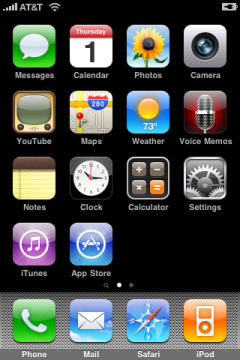
1. Press the ![]() home button, tap on the
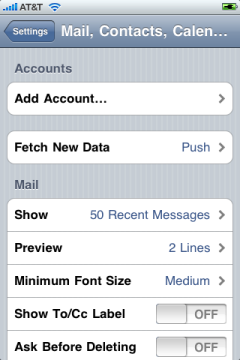
home button, tap on the ![]() Settings icon and then tap on the Mail, Contacts, Calendars option.
Settings icon and then tap on the Mail, Contacts, Calendars option.
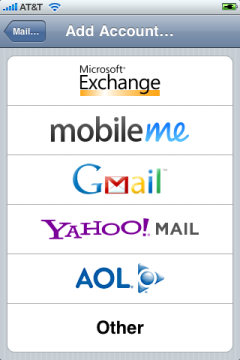
2. Tap Add Account. Under the Add Account menu, tap Other.
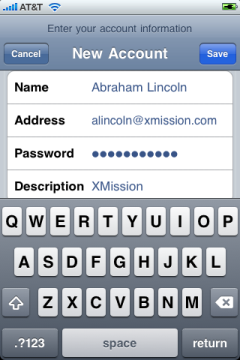
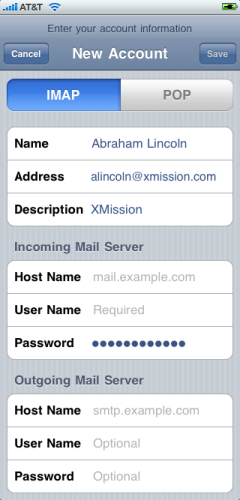
3. Tap in your account information. Your Name, your Address(email address) and your Password. Set Description to XMission. When you're done, tap Save and the phone will go to the next step.
4. The next stage will present you with a New Account information page, with IMAP highlighted.
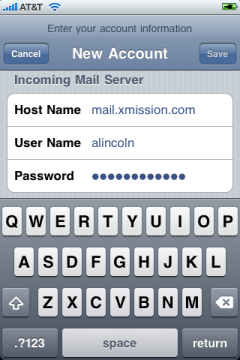
5. Tap on Host Name under Incoming Mail Server and enter mail.xmission.com. Put just your user name portion of your email address (without @xmission.com) in User Name.
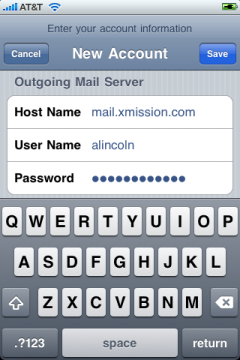
6. Tap on Host Name under Outgoing Mail Server and enter mail.xmission.com. Put just your user name portion of your email address (without @xmission.com) in User Name.
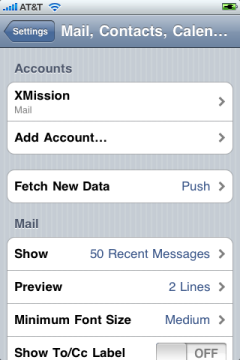
7. Tap on Save and the phone will return to the Mail, Contacts, Calendars settings screen.
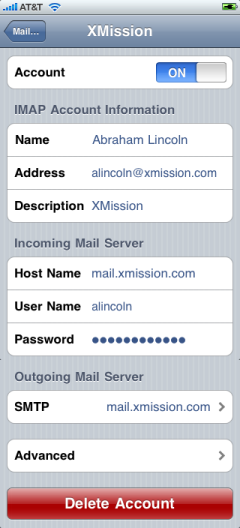
8. Tap on XMission (Mail) under Accounts and you should see your setup summarized.
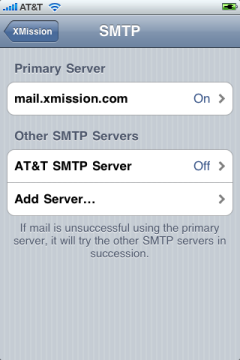
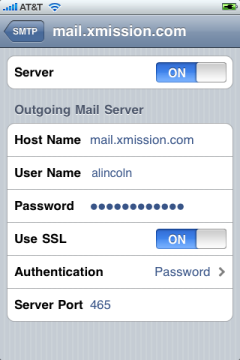
9. Tap on SMTP mail.xmission.com > under Outgoing Mail Server then mail.xmission.com under Primary Server. Ensure the Server switch is On, Use SSL switched On, Authentication is Password, and the Server Port is set to 465.
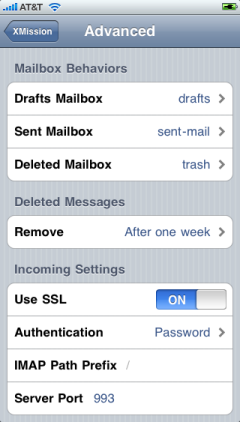
10. Tap the back arrows in the upper left hand corner to return to the screen presented above in Step #8. Tap the Advanced button at the bottom above Delete Account. The Advanced Settings should have Use SSL switched On, Authentication is Password, and the Server Port is set to 993.
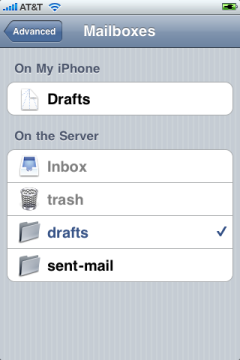
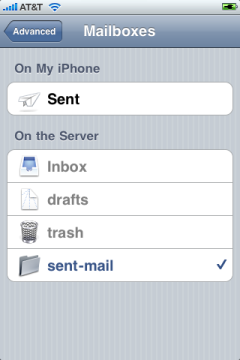
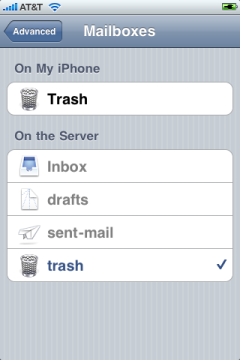
11. Tap the bars for Drafts Mailbox, Sent Mailbox, and Deleted Mailbox and set them respectively to drafts, sent-mail, and trash all On the Server. You will probably have to check your email once with the Mail app for these On the Server folders to appear.
12. If you use any other email software, make certain that the folders set in Step #11 agree, otherwise you will end up with multiple folders with the same purpose. These folder names are sensitive to case.
That's it! Now press ![]() home, tap on the
home, tap on the ![]() mail icon and you should now be able to send and receive email from your iPhone! You can send a test message to support@xmission.com and you should get an automatic reply.
mail icon and you should now be able to send and receive email from your iPhone! You can send a test message to support@xmission.com and you should get an automatic reply.
<mediaplayer height="505" width="320">File:Iphone.flv</mediaplayer>
