FreePPP 2.6 Setup: Difference between revisions
Jump to navigation
Jump to search
m Removed protection from "FreePPP 2.6 Setup" |
No edit summary |
||
| Line 1: | Line 1: | ||
{{archived}} | |||
#Open your Apple menu, go to <span class="button">Control Panels</span>, and select <span class="button">FreePPP</span>. | #Open your Apple menu, go to <span class="button">Control Panels</span>, and select <span class="button">FreePPP</span>. | ||
#Click on the small blue arrow on the bottom left of the window to show the configuration tabs. | #Click on the small blue arrow on the bottom left of the window to show the configuration tabs. | ||
Latest revision as of 10:08, 4 February 2014
![]()
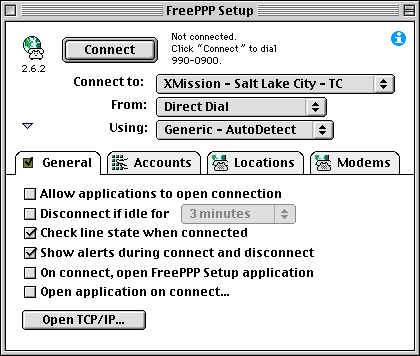
- Open your Apple menu, go to , and select .
- Click on the small blue arrow on the bottom left of the window to show the configuration tabs.
- Uncheck every option under .
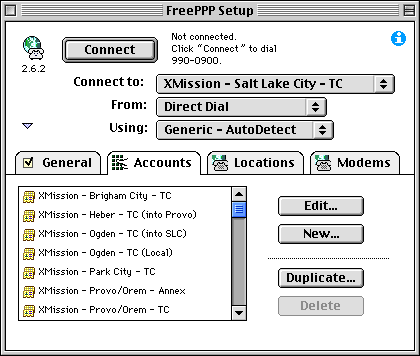
- Click on the tab.
- If you don't see listed, click .
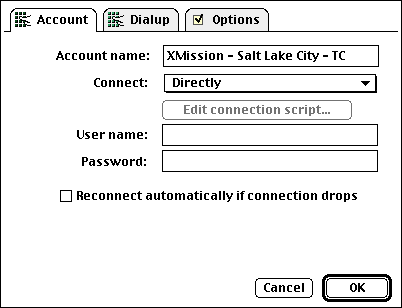
- In the field, enter XMission.
- In the menu next to , select .
- In the field labeled , enter your XMission account name.
- In the field labeled , enter your XMission password. You can leave this blank if you'd like to be prompted for your password when you connect.
- Click on the tab.
- Enter the area code and phone number for the XMission location you will be dialing in the appropriate fields.

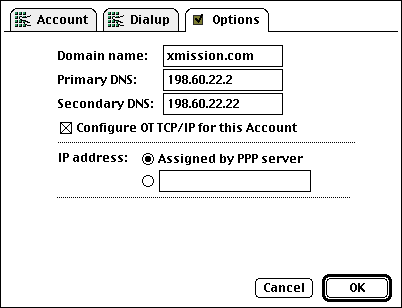
- Click on the tab.
- In the field, enter xmission.com.
- In the field, enter 198.60.22.2.
- In the field, enter 198.60.22.22.
- Click on .
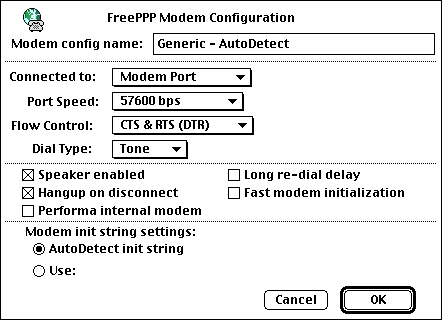
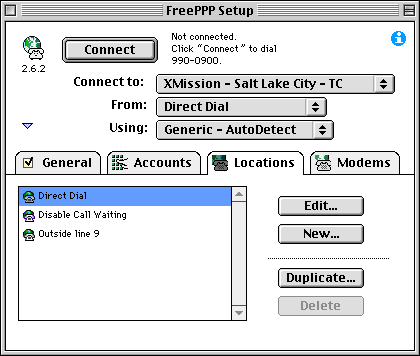
- Click on the tab.
- Select (or ).
- Click on the tab.
- Click .
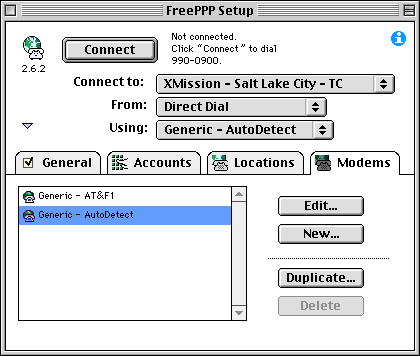
- Click .