Difference between revisions of "XMission Email:MacMail 9.x"
From XMission Wiki
(Created page with "= Configure Mac Mail 7.X for XMission Email = * Click on '''APPLE ICON''' in the top menu bar * Next choose '''SYSTEM PREFERENCES''' * Choose '''INTERNET ACCOUNTS''' * Select...") |
(→Configure Mac Mail 7.X for XMission Email) |
||
| Line 1: | Line 1: | ||
| − | = Configure Mac Mail | + | = Configure Mac Mail 9.X for XMission Email = |
| − | * Click on ''' | + | * Click on '''MAIL''' in the top menu bar |
| − | * Next choose ''' | + | * Next choose '''Add Mail Account''' |
| − | |||
* Select '''Add Other Account''' you will have to scroll down to see it | * Select '''Add Other Account''' you will have to scroll down to see it | ||
Revision as of 14:13, 29 December 2015
Configure Mac Mail 9.X for XMission Email
- Click on MAIL in the top menu bar
- Next choose Add Mail Account
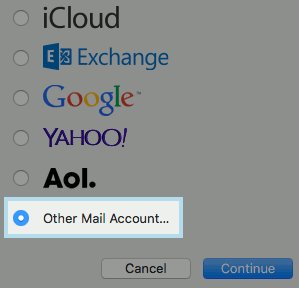
- Select Add Other Account you will have to scroll down to see it
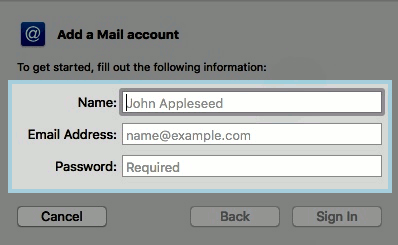
- Next choose Add a mail account
- Next you will want to fill in all the fields and click on NEXT
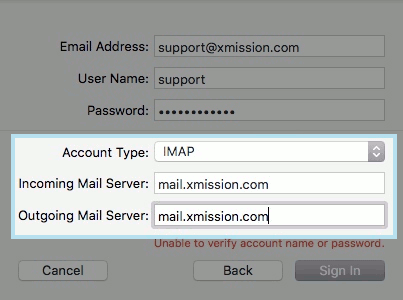
- Next you will enter the Incoming Mail Server Information
- Account Type: - We suggest IMAP
- Mail Server: - mail.xmission.com
- User Name: - your XMission user name - for instance if your email is bob@xmission.com - your username is bob
- Password: - your email password
- Next you will see the Incoming Mail Server info the default settings should be fine
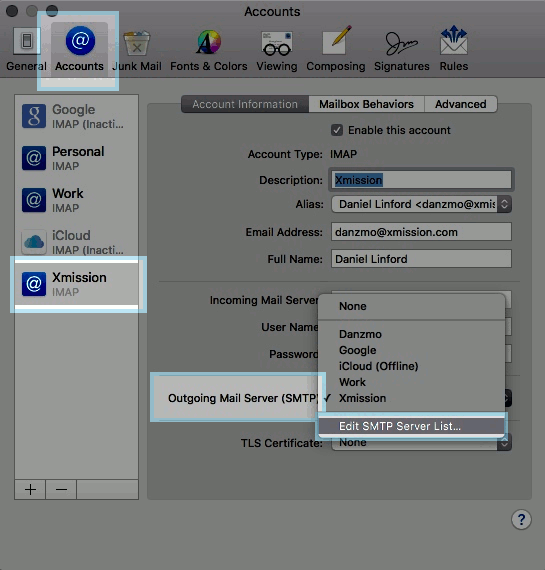
- Next you will fill in the Outgoing Mail Server info
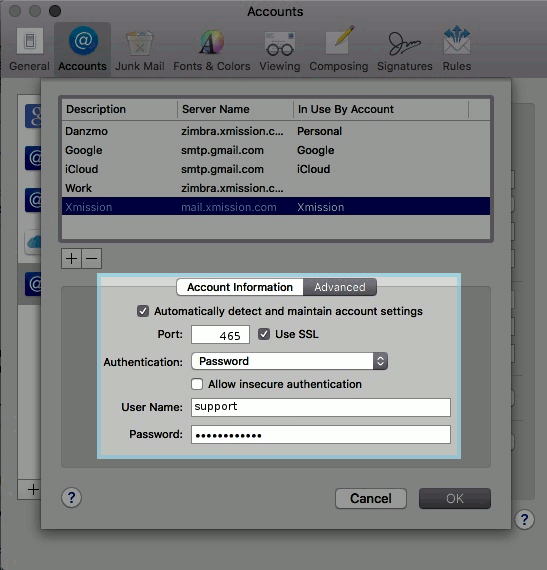
- SMTP Server: - mail.xmission.com
- User Name: - your XMission user name - for instance if your email is box@xmission.com - your username is bob
- Password: - your email password
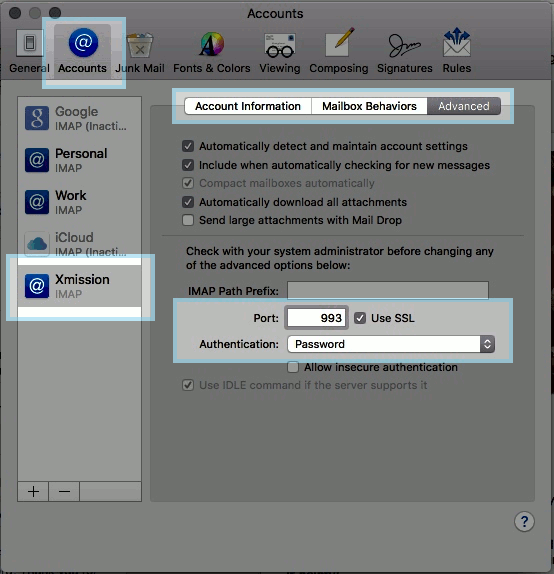
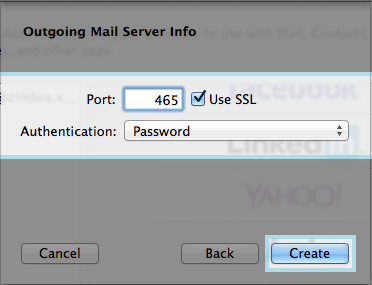
- Next you will enter the port information
- Port: - We recommend 465 and check the box for SSL
- Authentication: - Password
- After you click Create your account will be set up.
