Mac Mail: Difference between revisions
Jump to navigation
Jump to search
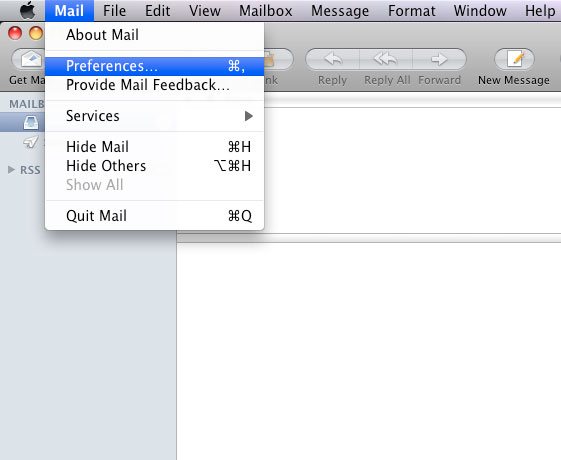
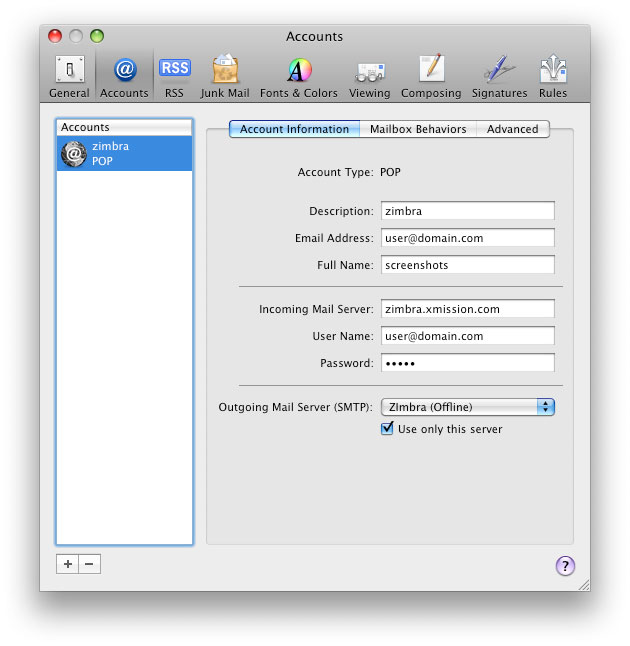
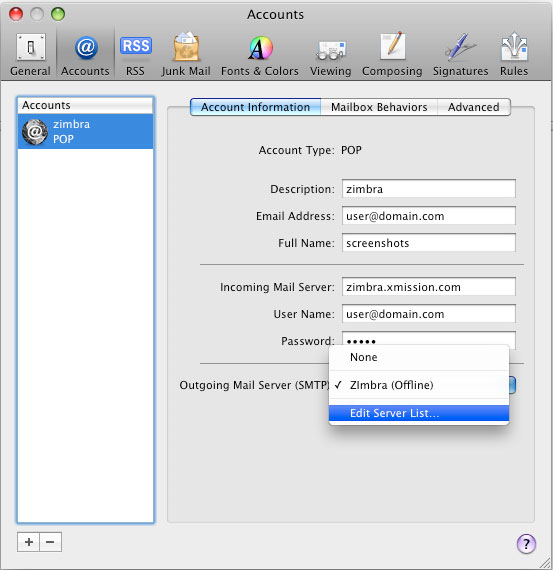
New page: #Open Mac Mail #Click Mail, then Preferences. #:Image:1mail_preferences.jpg #Change the Incoming Mail Server to zimbra.xmission.com, and change your username to your full email address... |
Redirected page to Hosted Email:MacMail 9.x |
||
| (One intermediate revision by the same user not shown) | |||
| Line 1: | Line 1: | ||
#REDIRECT [[Hosted_Email:MacMail_9.x]] | |||
#Open Mac Mail | #Open Mac Mail | ||
#Click Mail, then Preferences. | #Click Mail, then Preferences. | ||
| Line 10: | Line 12: | ||
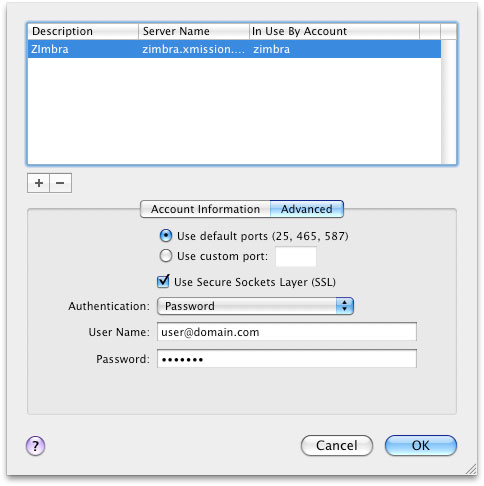
#Set Authentication to Password. Enter your username as your full email address, and password. | #Set Authentication to Password. Enter your username as your full email address, and password. | ||
#:[[Image:5outgoing_servers_advanced.jpg]] | #:[[Image:5outgoing_servers_advanced.jpg]] | ||
[[Category:XMission_Email]] | |||
Latest revision as of 09:19, 7 September 2016
Redirect to:
- Open Mac Mail
- Click Mail, then Preferences.
- Change the Incoming Mail Server to zimbra.xmission.com, and change your username to your full email address.
- Click Outgoing mail server and select "edit server list."
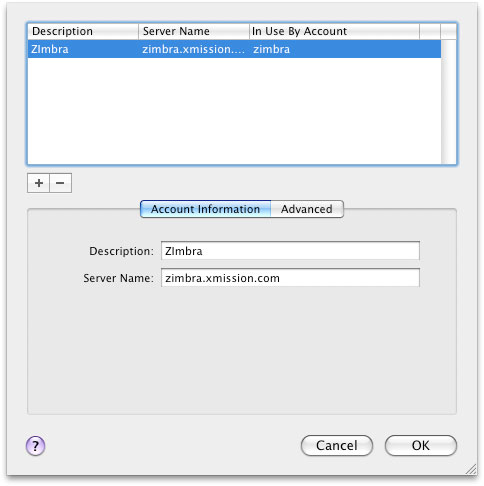
- Change the Server Name to zimbra.xmission.com, and the description to Zimbra.
- Set Authentication to Password. Enter your username as your full email address, and password.
