Difference between revisions of "Hosting Control Panel/Mail Setup-Outlook2012"
From XMission Wiki
(Created page with "== Outlook 2012 == *Open Microsoft Office Outlook. *Go to File > Info > Add Account. *Select the checkbox Manually configure server settings or additional server types. Click ...") |
|||
| Line 1: | Line 1: | ||
| + | {{archived}} | ||
| + | |||
== Outlook 2012 == | == Outlook 2012 == | ||
*Open Microsoft Office Outlook. | *Open Microsoft Office Outlook. | ||
| Line 26: | Line 28: | ||
[[File:Outlook2012-4.png]] | [[File:Outlook2012-4.png]] | ||
<br><br> | <br><br> | ||
| − | + | ||
| + | [[Category: Hosting Archives]] | ||
Latest revision as of 15:45, 25 September 2018
Outlook 2012
- Open Microsoft Office Outlook.
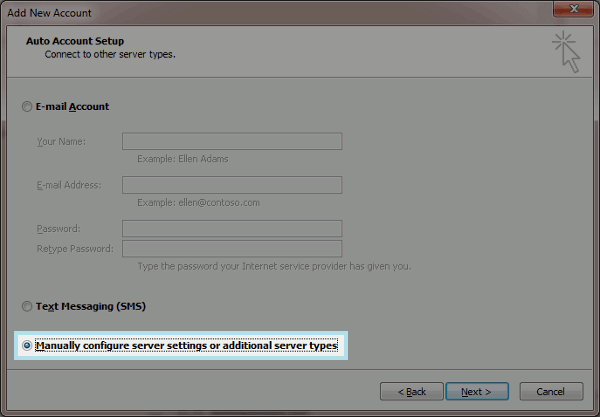
- Go to File > Info > Add Account.
- Select the checkbox Manually configure server settings or additional server types. Click Next.
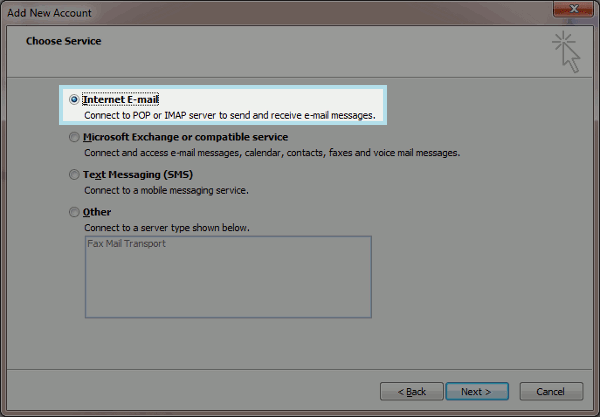
- Select the Internet E-mail option and click Next.
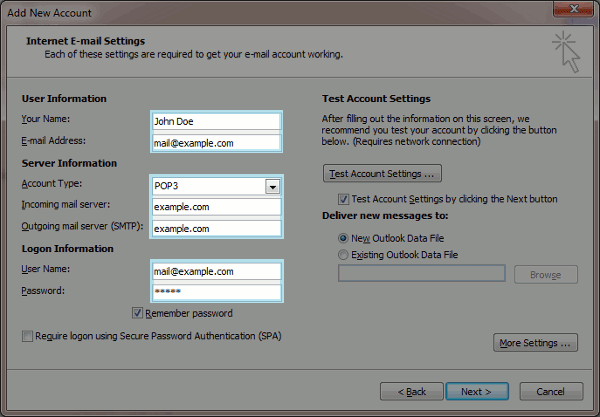
- The next page you will see you will enter in all of your information: A brief description follows the image
- Your name This is what people will see when you send the email
- Your e-mail address This will be your email address, in this example we used mail@example.com
- Account type If you want to keep copies of messages on the server, select the IMAP option. If you do not want to keep any messages on the server, select the POP3 option.
- Incoming mail server Type your domain name. For example, example.com.
- Outgoing mail server (SMTP) Type your domain name. For example, example.com.
- User Name Specify your full e-mail address. In this example we used mail@example.com.
- Password This is the password you set up when setting up the email account.
- Require logon using Secure Password Authentication (SPA). Leave this option cleared.
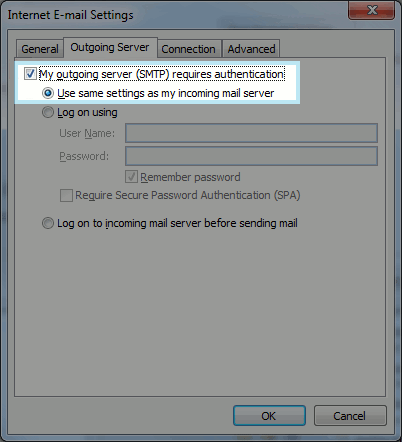
- Click More Settings, open the Outgoing Server tab and check My outgoing server (SMTP) requires authentication.


