Difference between revisions of "XMission Control Panel/Server/Host Files"
From XMission Wiki
| Line 76: | Line 76: | ||
<br><br> | <br><br> | ||
| − | [[Category: | + | [[Category: Control Panel]] |
Revision as of 08:45, 26 February 2019
Setting Up Hosts File
- You can use these steps to view your site on your new Cloud server
- NOTE: once you have completed the migration - make sure to remove this info from your host file
Video
Windows
- Make sure you can view file extensions on your computer. Click on My Computer > Tools > Folder Options
- Under Hidden Files and Folders - make sure it states Show hidden files and folder
- Uncheck Hide extensions for known file types
- Uncheck Hide protected operating system files (Recommended)
- Click Apply
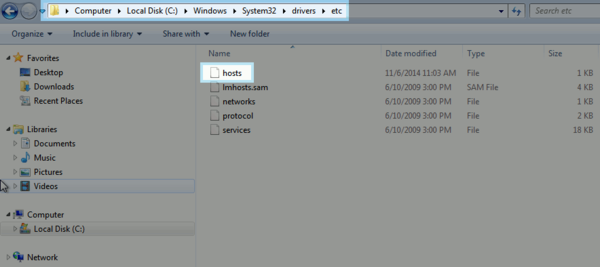
Navigate to C:\Windows\System32\drivers\etc\
- In this folder you should see a file called hosts
- You can right click and choose Open or Open with - choose Notepad (NOTE: Windows 8 and higher users need to open Notepad as administrator.)
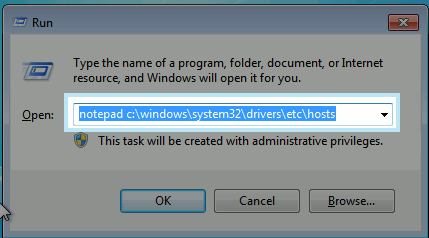
Note: on Windows 7 you can also use the "run" tool and open the hosts file by entering:
notepad c:\windows\system32\drivers\etc\hosts
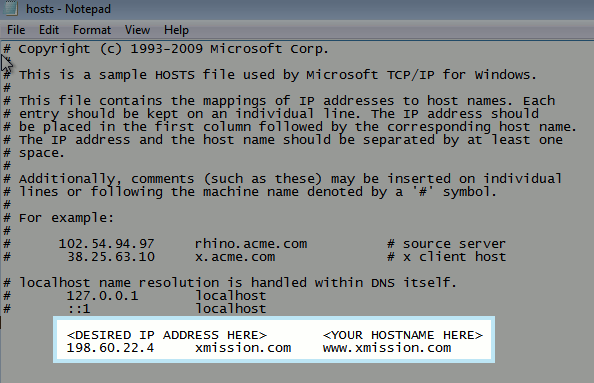
Here is what it will look like.
- Note that the pound character "#" causes the DNS software on your computer to consider anything that follows it in a line as a comment and will therefore ignore that part
- You will want to add the following information we send you to the bottom of your hosts file:
<ip-address> <domain.com> <www.domain.com>
- Where the <ip-address> is the ip address of your server (eg. 166.70.181.4) and <domain.com> is your domain name so it will look something like this:
166.70.22.1 mydomain.com www.mydomain.com
Linux
- Edit your hosts file though a terminal
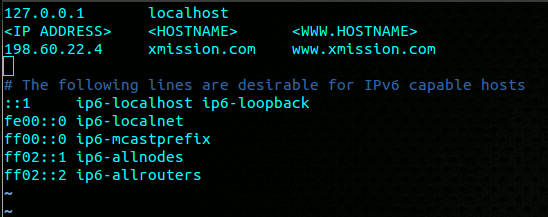
- The line will look similar to this:
- From here you will want to add the IP address of your server and the hostname (example: 166.70.181.4 example.com www.example.com)
- Save and close your file. Now when you go to your domain on your computer it will resolve to the IP address you specified.
Mac OSX
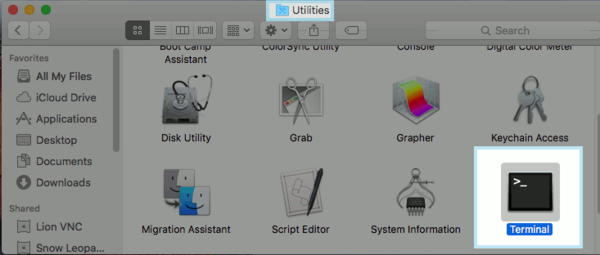
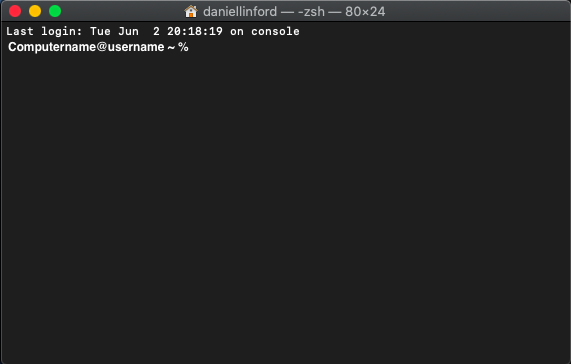
You will need to open a terminal which can be done through your utilities folder.
- Edit your hosts file though a terminal
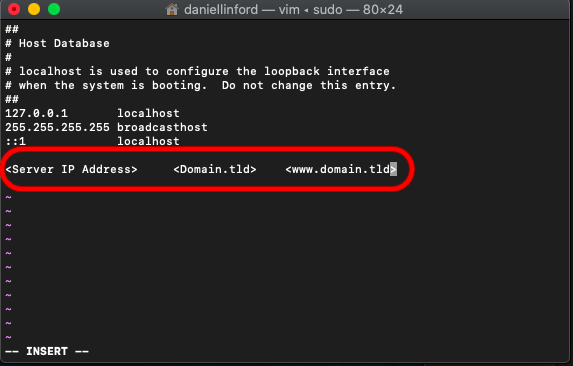
- From here you will want to add the IP address of your server and the hostname (eg. 166.70.181.4 example.com www.example.com)
- Should look like this
- Save and close your file
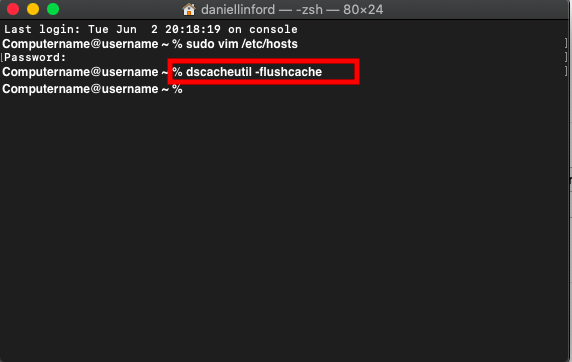
- run this in your terminal dscacheutil –flushcache
- Now when you goto your domain on your computer it will resolve to the IP address you specified.
