DSL 2Wire 2700HG Single IP Setup: Difference between revisions
Jump to navigation
Jump to search
No edit summary |
No edit summary |
||
| (One intermediate revision by the same user not shown) | |||
| Line 1: | Line 1: | ||
{{archived}} | |||
#Enter <tt>192.168.0.1</tt> in the address bar of your web browser to open the home page for your 2-Wire DSL modem. Then, select the <span class="button">Advanced Configuration Settings</span> link in the lower-right corner. | #Enter <tt>192.168.0.1</tt> in the address bar of your web browser to open the home page for your 2-Wire DSL modem. Then, select the <span class="button">Advanced Configuration Settings</span> link in the lower-right corner. | ||
#:[[Image:2wire1.png]] | #:[[Image:2wire1.png]] | ||
| Line 11: | Line 13: | ||
[[Category:DSL | [[Category:DSL Troubleshooting|2Wire 2700HG Single]] | ||
[[Category:DSL]] | [[Category:DSL]] | ||
[[Category:PPPoA]] | [[Category:PPPoA]] | ||
Latest revision as of 12:47, 6 June 2019
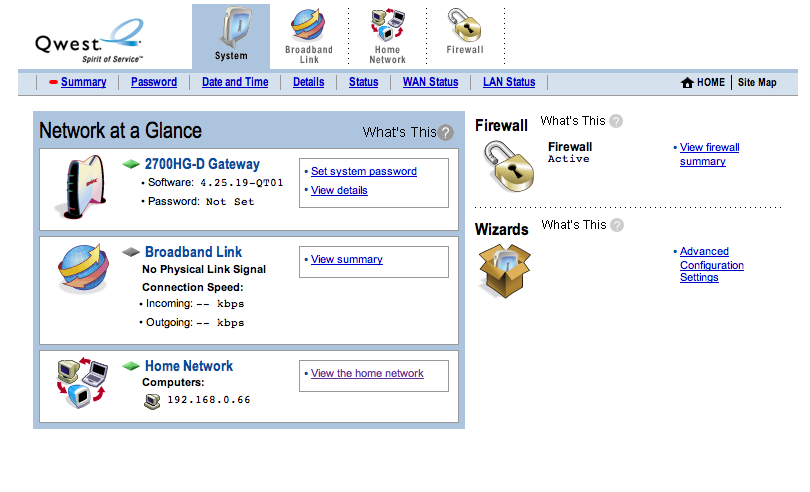
- Enter 192.168.0.1 in the address bar of your web browser to open the home page for your 2-Wire DSL modem. Then, select the link in the lower-right corner.
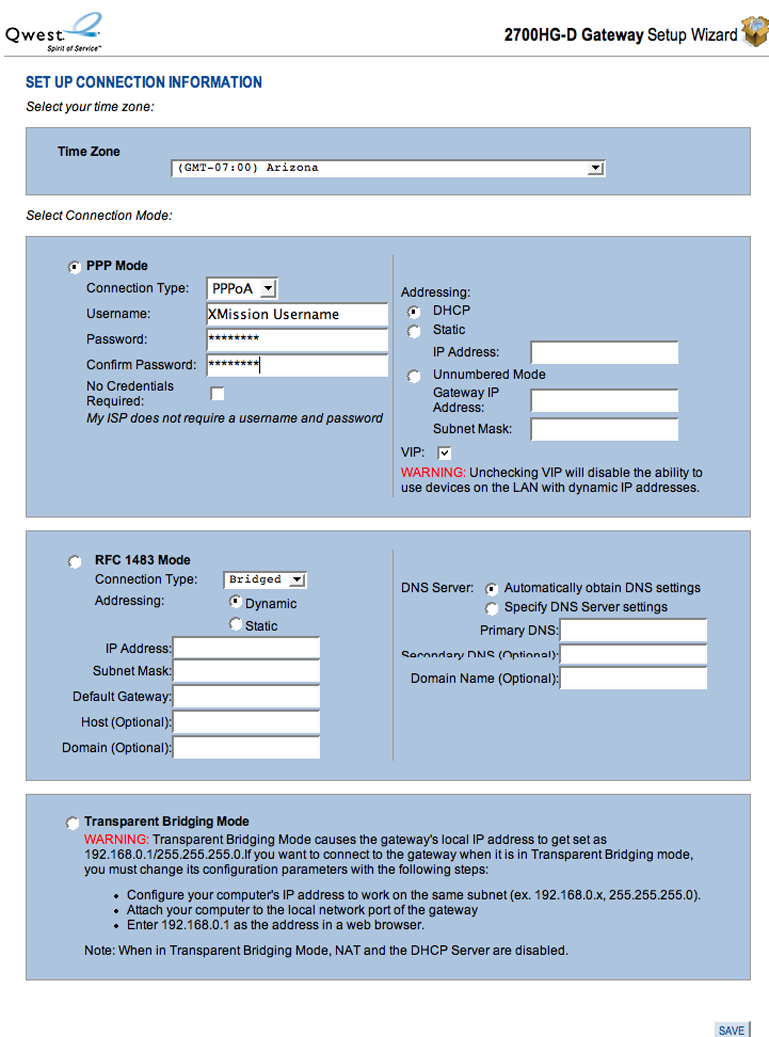
- Select your Time Zone from the drop-down.
- Select the radio button next to PPP Mode.
- In the Connection Type drop-down list, select then enter your XMission username and password in the spaces provided.
- Scroll to the bottom of the page and click .
Your DSL modem should display a green light on Internet. Your configuration is complete.

