TCP/IP for PPP Setup: Difference between revisions
Jump to navigation
Jump to search
No edit summary |
No edit summary |
||
| (One intermediate revision by one other user not shown) | |||
| Line 1: | Line 1: | ||
{{archived}} | |||
#Click on the Apple menu, go to <span class="button">Control Panels</span>, and select <span class="button">TCP/IP</span>. | #Click on the Apple menu, go to <span class="button">Control Panels</span>, and select <span class="button">TCP/IP</span>. | ||
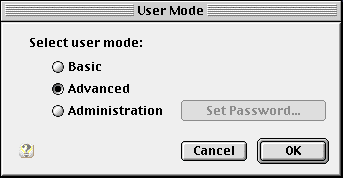
#Click <span class="button">Edit</span> and select <span class="button">User Mode</span>. | #Click <span class="button">Edit</span> and select <span class="button">User Mode</span>. | ||
Latest revision as of 14:58, 14 January 2020
- Click on the Apple menu, go to , and select .
- Click and select .
- Select .
- Click .

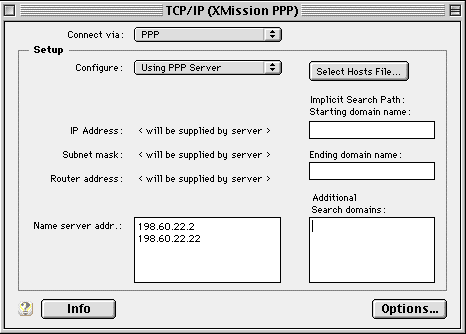
- Select from the drop-down menu beside .
- Select from the drop-down menu beside .
- In the field next to , enter...
- 198.60.22.2
- 198.60.22.22

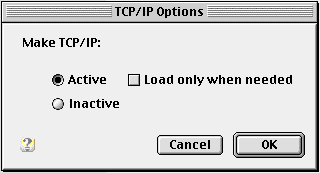
- Click .
- Select .
- Click .
- Close the TCP/IP control panel and save the changes when prompted.
