XMission Email:iOS15: Difference between revisions
Jump to navigation
Jump to search
No edit summary |
|||
| (One intermediate revision by the same user not shown) | |||
| Line 1: | Line 1: | ||
== Adding an account == | == Adding an account == | ||
How to add an account to an iPhone. | How to add an account to an iPhone. (Non-Zimbra) | ||
=== iOS 15 === | === iOS 15 === | ||
| Line 8: | Line 8: | ||
{| style="padding:30px;" | {| style="padding:30px;" | ||
|- | |- | ||
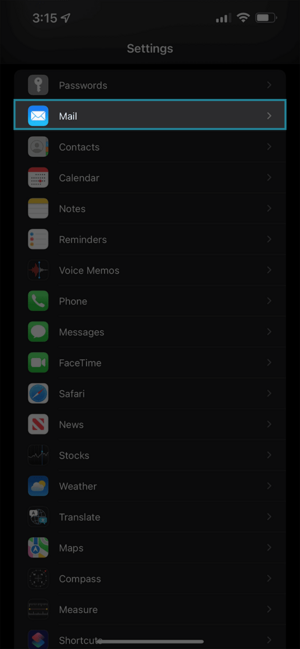
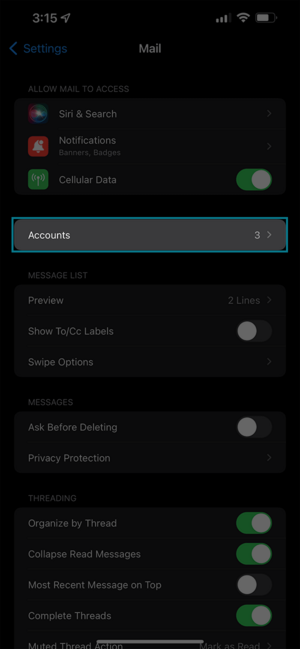
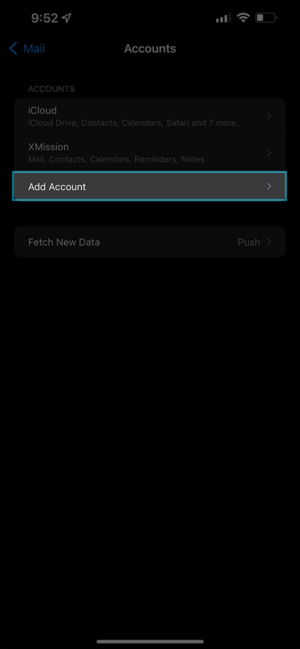
| style="padding:20px; width=33%" | [[File:IOS-Mail-1.png|300px]] | | style="padding:20px; width=33%" | [[File:IOS-Mail-1.png|300px]] <br> * Tap on Mail <br><br> ||style="padding:20px; width=33%"| [[File:IOS-Mail-2.png|300px]] <br> * Tap on Accounts <br><br> ||style="padding:20px; width=33%"| [[File:IOS-Mail-Add-1.png|300px]] <br> * Tap on Add Account <br><br> | ||
* Tap on Mail | |||
| style="padding:20px; width=33%" | [[File:IOS-Mail-2.png|300px]] | |||
* Tap on Accounts | |||
| style="padding:20px; width=33%" | [[File:IOS-Mail-Add-1.png|300px]] | |||
* Tap on Add Account | |||
|- | |- | ||
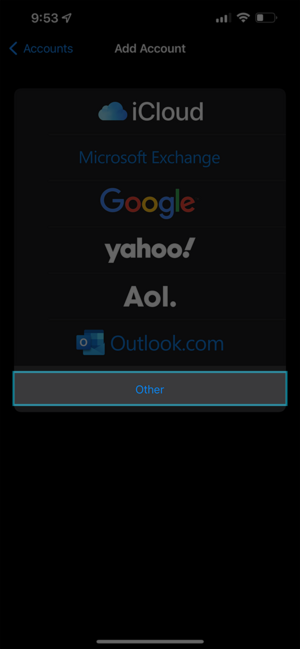
| style="padding:20px; width=33%" | [[File:IOS-Mail-Add-2.png|300px]] | | style="padding:20px; width=33%" | [[File:IOS-Mail-Add-2.png|300px]] <br> * Tap on Other <br><br> ||style="padding:20px; width=33%"| [[File:IOS-Mail-Add-3.png|300px]] <br> * Choose Add Mail Account <br><br> || style="padding:20px; width=33%"| [[File:IOS-Mail-Add-4.png|300px]] <br> * Fill in the New Account Information <br>* When done tap on Next<br> | ||
* Tap on Other | |||
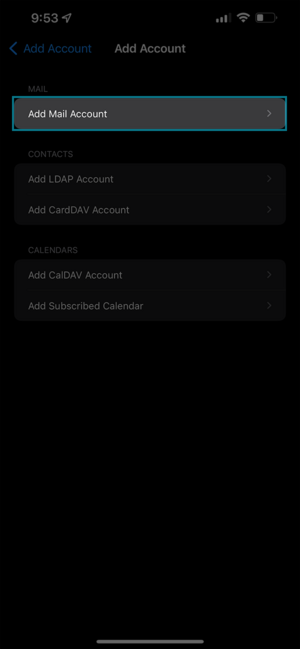
| style="padding:20px; width=33%" | [[File:IOS-Mail-Add-3.png|300px]] | |||
* Choose Add Mail Account | |||
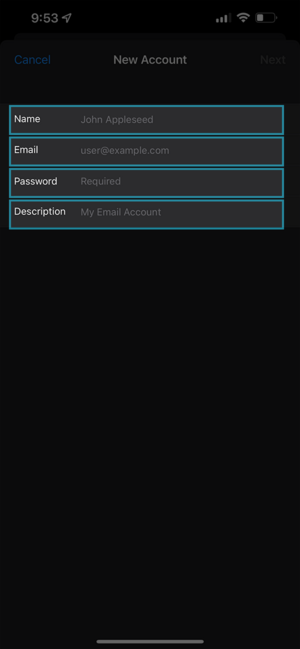
| style="padding:20px; width=33%" | [[File:IOS-Mail-Add-4.png|300px]] | |||
* Fill in the New Account Information | |||
* When done tap on Next | |||
|- | |- | ||
| style="padding:20px; width=33%; |[[File:IOS-Mail-Add-5.png|300px]] | | style="padding:20px; width=33%; |[[File:IOS-Mail-Add-5.png|300px]] <br> * Fill out the Incoming Server Info <br> * Fill Out the Outgoing Server Info <br> * When done tap on Next || style="padding:20px; width=33%"| [[File:IOS-Mail-Add-6.png|300px]] <br> * Verity Mail is on .. then click on Save <br><br><br>|| style="padding:20px; width=33%" | | ||
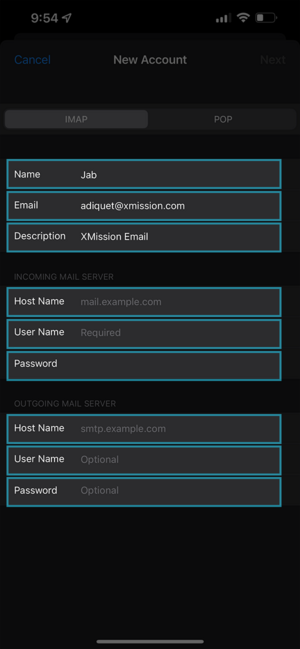
* Fill out the Incoming Server Info | |||
* Fill Out the Outgoing Server Info | |||
* When done tap on Next | |||
| style="padding:20px; width=33%" | [[File:IOS-Mail-Add-6.png|300px]] | |||
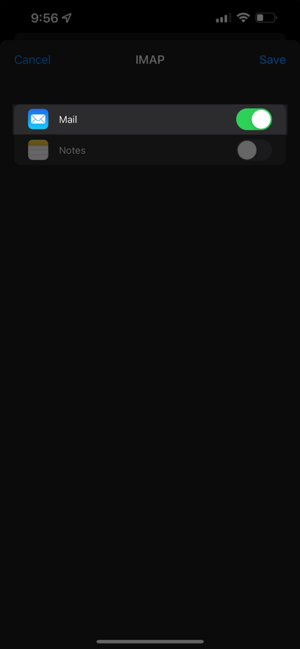
* Verity Mail is on .. then click on Save | |||
| style="padding:20px; width=33%" | | |||
|} | |} | ||
| Line 54: | Line 34: | ||
[[Category: XMission Email]] | [[Category: XMission Email]] | ||
Latest revision as of 10:16, 20 April 2023
Adding an account
How to add an account to an iPhone. (Non-Zimbra)
iOS 15
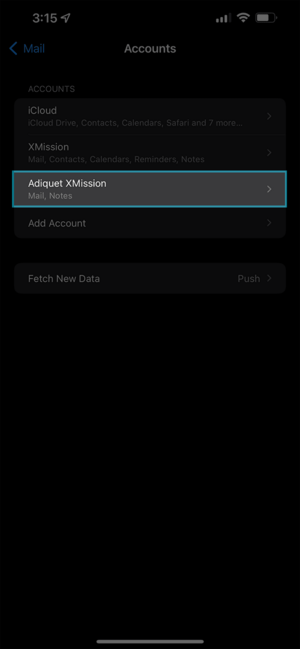
Tap on Settings
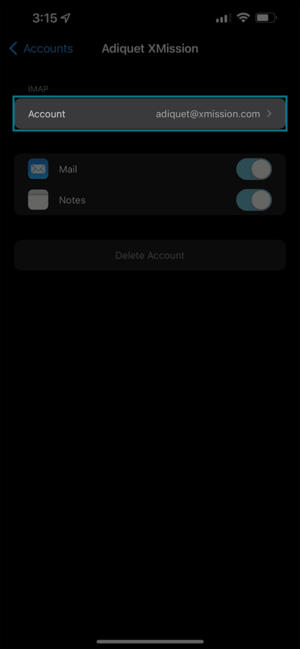
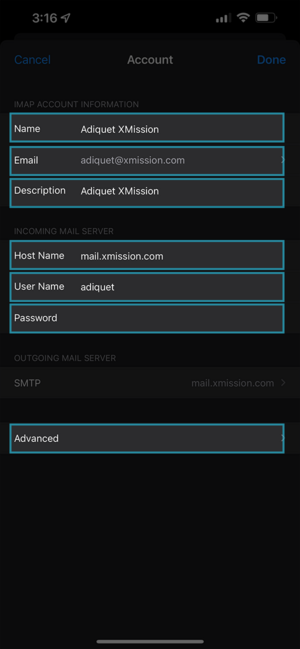
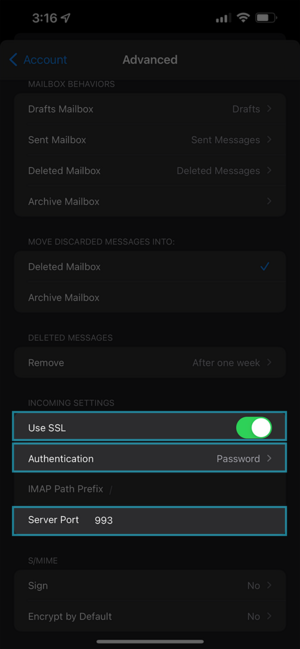
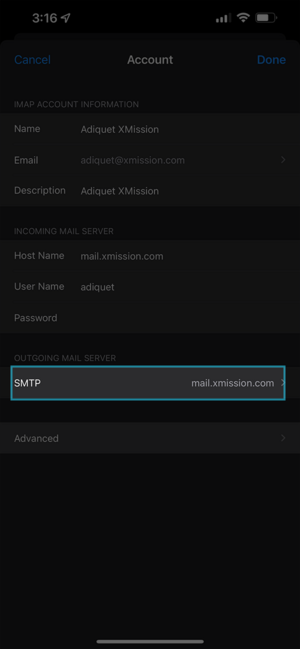
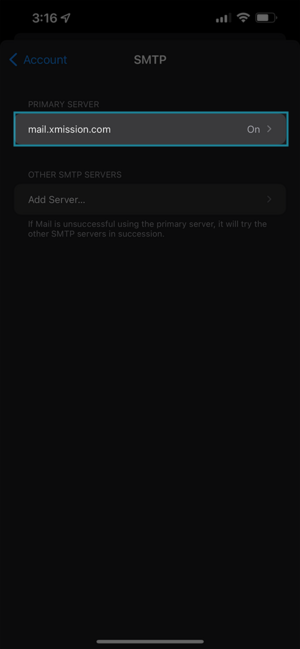
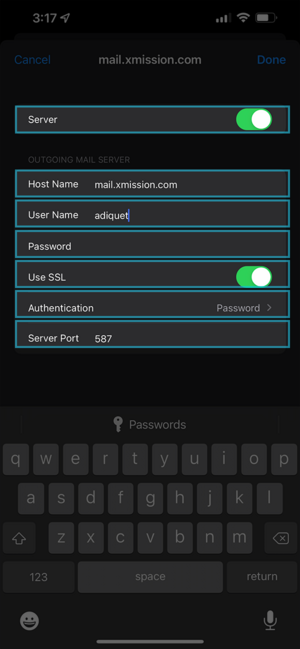
Edit Settings
How to edit or change settings for an iPhone
iOS 15
Tap on Settings
