Vista Mail: Difference between revisions
Jump to navigation
Jump to search
No edit summary |
No edit summary |
||
| (2 intermediate revisions by 2 users not shown) | |||
| Line 1: | Line 1: | ||
{{archived}} | |||
#Go to your Start menu, and Open Windows Mail. | #Go to your Start menu, and Open Windows Mail. | ||
#In Windows Mail, click Tools and Accounts. | #In Windows Mail, click Tools and Accounts. | ||
| Line 4: | Line 7: | ||
#Select your xmission email account and click Properties. | #Select your xmission email account and click Properties. | ||
#:[[Image:2tool_accounts.jpg]] | #:[[Image:2tool_accounts.jpg]] | ||
#Change your incoming and outgoing mailservers to zimbra.xmission.com, set your username to your full email address, and finally check the box that says, "my server requires authentication. | #Change your incoming and outgoing mailservers to zimbra.xmission.com, set your username to your full email address, and finally check the box that says, "my server requires authentication." | ||
#:[[Image:3windows_mail_account_settings.jpg]] | #:[[Image:3windows_mail_account_settings.jpg]] | ||
#Click ok. | #Click ok. | ||
[[Category:Client_Email_Configuration]] | |||
Latest revision as of 15:33, 14 January 2020
- Go to your Start menu, and Open Windows Mail.
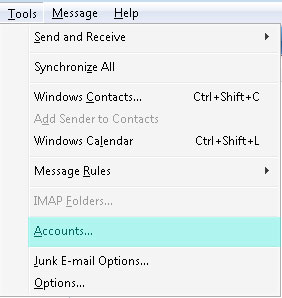
- In Windows Mail, click Tools and Accounts.
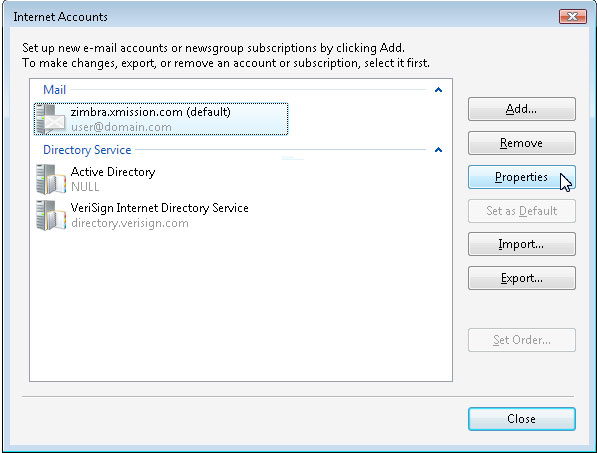
- Select your xmission email account and click Properties.
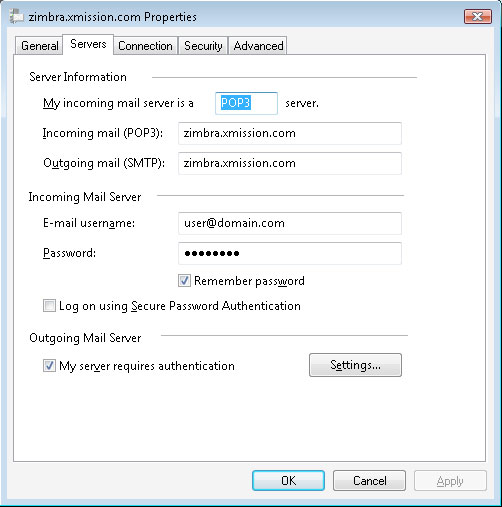
- Change your incoming and outgoing mailservers to zimbra.xmission.com, set your username to your full email address, and finally check the box that says, "my server requires authentication."
- Click ok.


