FreePPP 2.5 Setup: Difference between revisions
Jump to navigation
Jump to search
No edit summary |
No edit summary |
||
| (One intermediate revision by one other user not shown) | |||
| Line 1: | Line 1: | ||
{{archived}} | |||
Mac FreePPP 2.5 Setup | Mac FreePPP 2.5 Setup | ||
| Line 27: | Line 29: | ||
[[Category:Dialup Archives | [[Category:Dialup Archives]] | ||
[[Category:Archives]] | |||
Latest revision as of 10:18, 4 February 2014
![]()
Mac FreePPP 2.5 Setup
- Open your Apple menu, go to , and select .
- Click on the small blue arrow on the bottom left of the window to show the configuration tabs.
- Uncheck every option under .
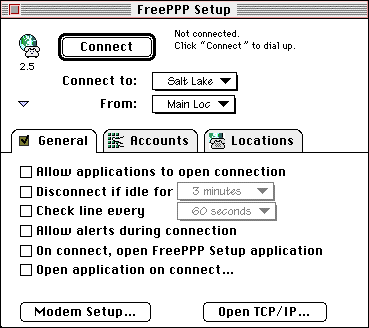
- Click .
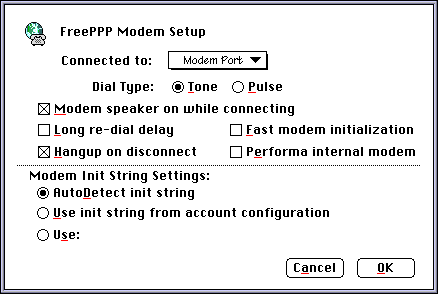
- Make sure the only boxes checked are and .
- Click .
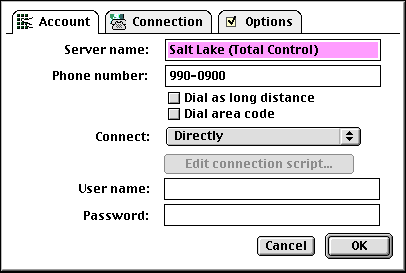
- Click on the tab.
- If you don't see your area listed, click .
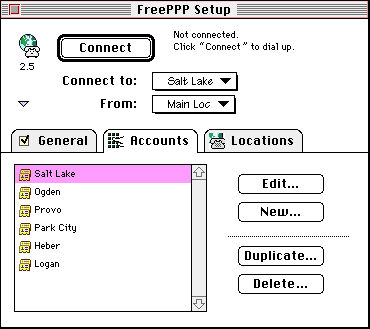
- In the Server name: field, enter XMission.
- Enter the phone number for the XMission location you will be dialing in the field.
- In the menu next to , select .
- In the field labeled , enter your XMission account name.
- In the field labeled , enter your XMission password. You can leave this blank if you'd like to be prompted for your password when you connect.
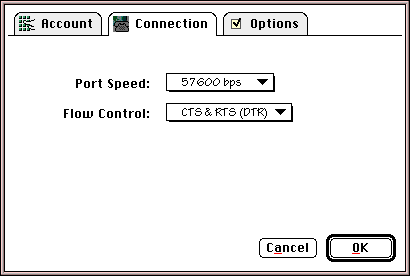
- Click on the tab.
- Click on .