Xmission Email:Outlook Express: Difference between revisions
No edit summary |
No edit summary |
||
| (6 intermediate revisions by 3 users not shown) | |||
| Line 1: | Line 1: | ||
{{archived}} | |||
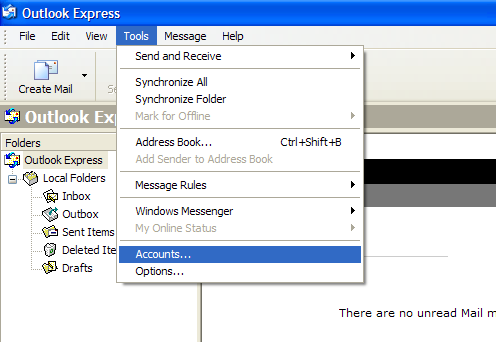
1. Open Outlook Express, then go to the ''Tools'' menu and select ''Accounts'' | 1. Open Outlook Express, then go to the ''Tools'' menu and select ''Accounts'' | ||
:[[Image:Outlook_1.png]] | :[[Image:Outlook_1.png]] | ||
| Line 29: | Line 31: | ||
<br/> | <br/> | ||
<br/> | <br/> | ||
7. Click ''Finish'' and you will be brought back to the Internet Accounts window. We need to change a default setting for the account we just created so you can send mail. Click on the ''Properties button''. | 7. Click ''Finish'' and you will be brought back to the Internet Accounts window. We need to change a default setting for the account we just created so you can send mail. Click on the ''Properties button''. | ||
: | :[[Image:Outlook_XM_8.png]] | ||
<br/> | <br/> | ||
<br/> | <br/> | ||
<br/> | <br/> | ||
8. Click on the ''Servers'' tab and check the box at the bottom of the window labeled ''My server requires authentication'' | 8. Click on the ''Servers'' tab and check the box at the bottom of the window labeled ''My server requires authentication''. | ||
:[[Image:Outlook_XM_9.png]] | :[[Image:Outlook_XM_9.png]] | ||
<br/> | |||
<br/> | |||
<br/> | |||
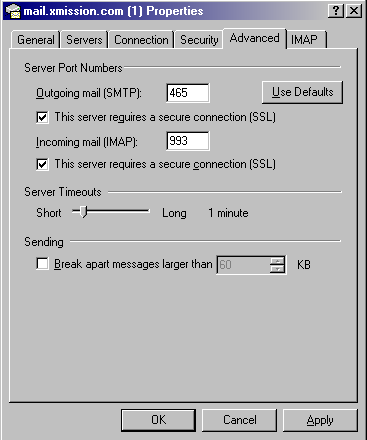
9. Click on the ''Advanced'' tab and check both boxes labelled "This server requires a secure connection (SSL)". Then change the Outgoing mail (SMTP) port to 465. Click the ''Ok'' button. You should now be able to send and receive messages. | |||
:[[Image:Outlook_Express_Ports.png]] | |||
[[Category:Client Email Configuration|XMission Email|Outlook Express 6]] | |||
[[Category:XMission Email | [[Category:XMission Email|Outlook Express 6]] | ||
Latest revision as of 15:29, 14 January 2020
1. Open Outlook Express, then go to the Tools menu and select Accounts
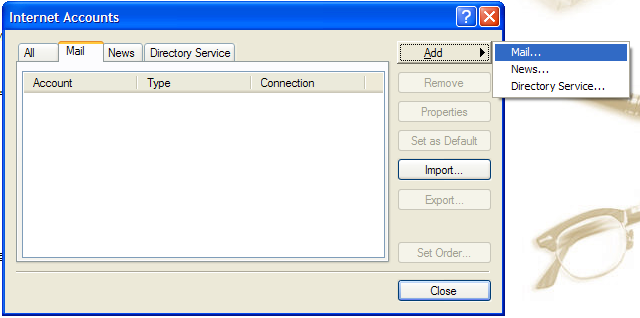
2. Click Add and select Mail
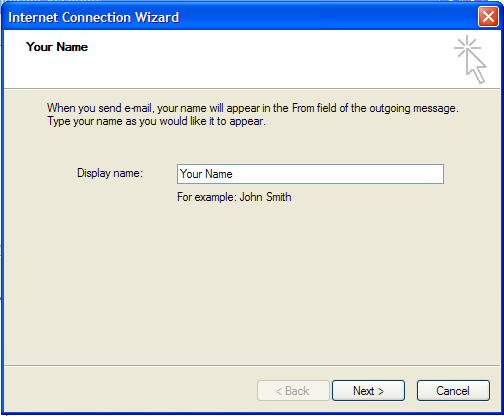
3. In the field labeled Display Name, type in the name you wish to appear on your outgoing email messages, then click Next.
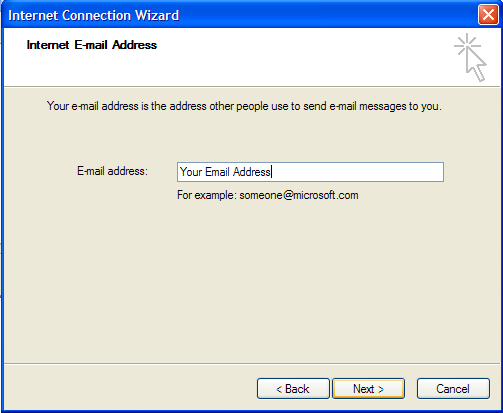
4. In the field labeled Email Address type your XMission email address.
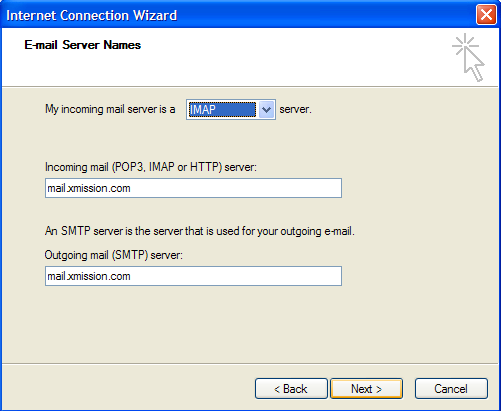
5. Fill out the information on this window as shown below and click Next.
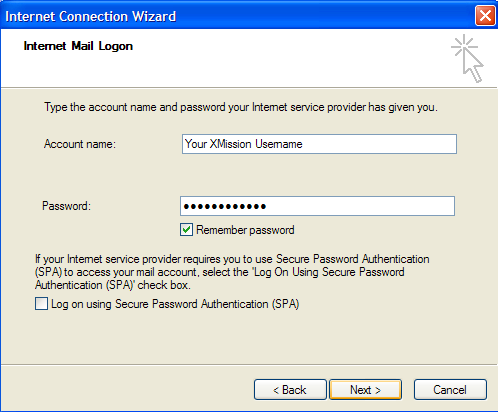
6. Type in your account name and your password then click Next.
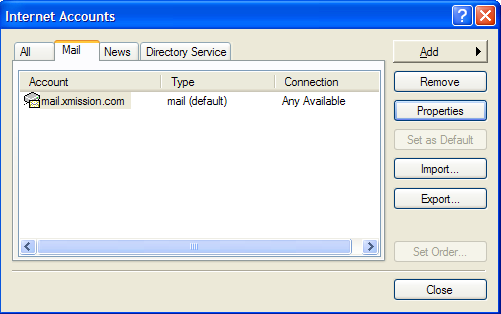
7. Click Finish and you will be brought back to the Internet Accounts window. We need to change a default setting for the account we just created so you can send mail. Click on the Properties button.
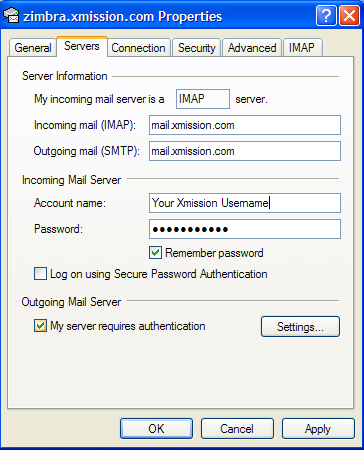
8. Click on the Servers tab and check the box at the bottom of the window labeled My server requires authentication.
9. Click on the Advanced tab and check both boxes labelled "This server requires a secure connection (SSL)". Then change the Outgoing mail (SMTP) port to 465. Click the Ok button. You should now be able to send and receive messages.
