Installing RAS in NT: Difference between revisions
Jump to navigation
Jump to search
m Removed protection from "Installing RAS in NT" |
No edit summary |
||
| Line 1: | Line 1: | ||
{{archived}} | |||
#Click <span class="button">Start</span>, go to <span class="button">Settings</span>, and select <span class="button">Control Panel</span>. | #Click <span class="button">Start</span>, go to <span class="button">Settings</span>, and select <span class="button">Control Panel</span>. | ||
#Double-click on <span class="button">Network</span>. | #Double-click on <span class="button">Network</span>. | ||
Latest revision as of 15:35, 4 February 2014
![]()
- Click , go to , and select .
- Double-click on .
- Select the tab.
- In the box, check for .
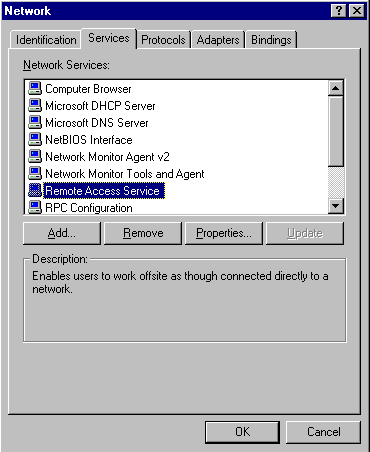
- Click .
- Scroll down to and highlight it.
- Click .
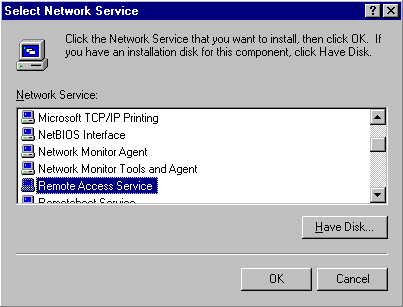
- Insert the Windows NT disk and click .
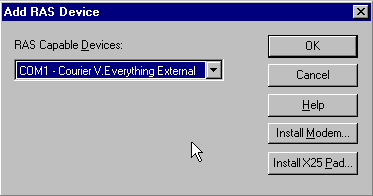
- Select your modem from the menu.
- Click .
- Click .
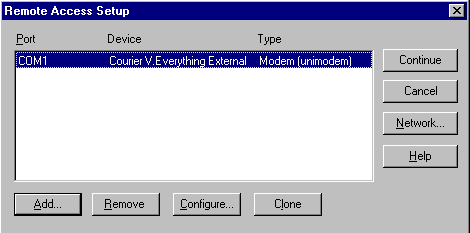
- Select .
- Click .
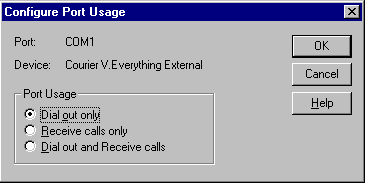
- Click .
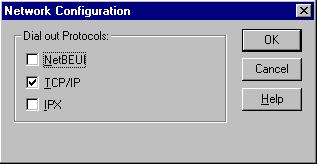
- Make sure is the only protocol selected.
- Click .
- Click .
- Click .
- Click to reboot your computer.


