DSL Actiontec 1520/1524 Setup: Difference between revisions
Jump to navigation
Jump to search
m Added 'archived' template. |
No edit summary |
||
| (10 intermediate revisions by 3 users not shown) | |||
| Line 1: | Line 1: | ||
{{ | {{archived}} | ||
#Launch the Autorun program from the install CD (if it does not AutoRun). | #Launch the Autorun program from the install CD (if it does not AutoRun). | ||
| Line 8: | Line 5: | ||
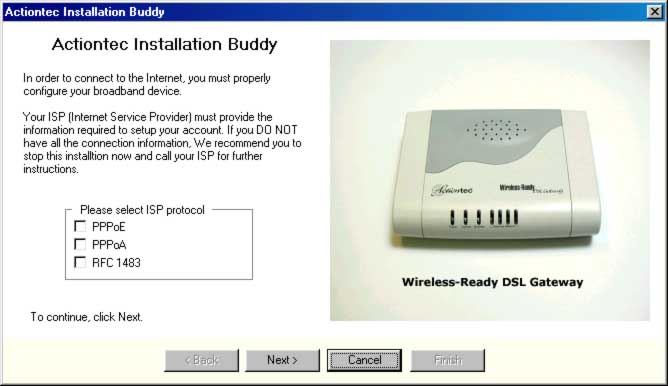
#Select <span class="button">PPPoA</span> under <span class="button">Please select ISP protocol</span>. | #Select <span class="button">PPPoA</span> under <span class="button">Please select ISP protocol</span>. | ||
#Click <span class="button">Next</span>. | #Click <span class="button">Next</span>. | ||
#: | #:[[Image:bdy-prot.jpg]] | ||
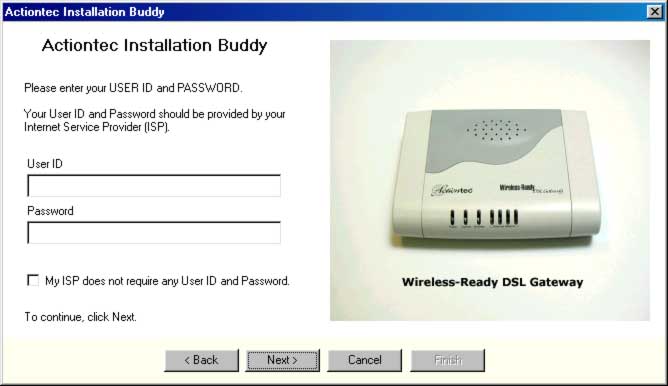
#Type your XMission username under <span class="button">User ID</span>. | #Type your XMission username under <span class="button">User ID</span>. | ||
#Type your XMission password under <span class="button">Password</span>. | #Type your XMission password under <span class="button">Password</span>. | ||
#Click <span class="button">Next</span>. | #Click <span class="button">Next</span>. | ||
#: | #:[[Image:bdy-act.jpg]] | ||
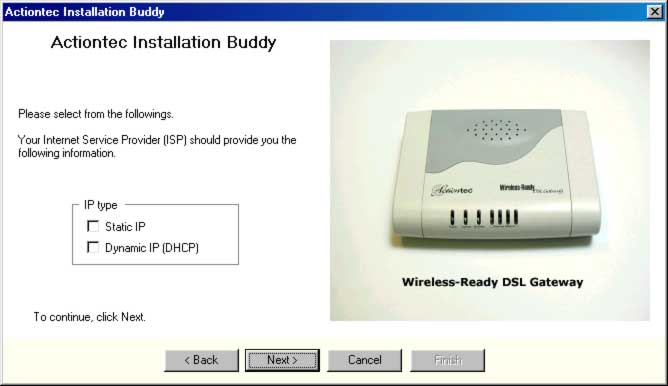
#Select <span class="button">Dynamic IP (DHCP)</span>. | #Select <span class="button">Dynamic IP (DHCP)</span>. | ||
#Click <span class="button">Next</span>. | #Click <span class="button">Next</span>. | ||
#: | #:[[Image:bdy-ip.jpg]] | ||
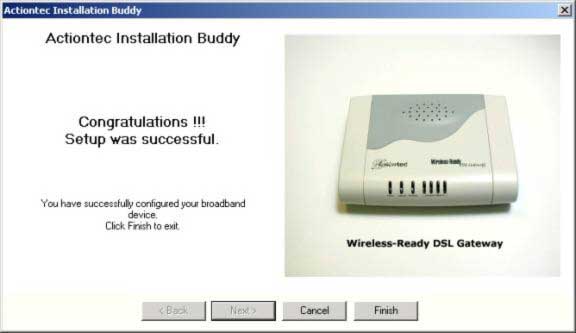
#Click <span class="button">Finish</span>. | #Click <span class="button">Finish</span>. | ||
#: | #:[[Image:bdy-done.jpg]] | ||
<div class="messagebox metadata">'''Note''': At this point the configuration for your Actiontec is complete. Shortly after the Internet light on your Actiontec becomes solid you should be able to access the Internet.</div> | <div class="messagebox metadata">'''Note''': At this point the configuration for your Actiontec is complete. Shortly after the Internet light on your Actiontec becomes solid you should be able to access the Internet.</div> | ||
Remember, if you ever change your XMission password, you'll need to update your password in the Actiontec] as well. | Remember, if you ever change your XMission password, you'll need to update your password in the Actiontec] as well. | ||
If you purchased a multiple IP block, you may configure it now | If you purchased a multiple IP block, you may configure it now | ||
[[Category:DSL Troubleshooting|Actiontec 1520/1524 Setup]] | |||
[[Category:DSL]] | [[Category:DSL]] | ||
[[Category:PPPoA]] | |||
Latest revision as of 12:46, 6 June 2019
- Launch the Autorun program from the install CD (if it does not AutoRun).
- Follow the instructions on the screen untill it asks you to select an ISP protocol.
- Select under .
- Click .
- Type your XMission username under .
- Type your XMission password under .
- Click .
- Select .
- Click .
- Click .
Remember, if you ever change your XMission password, you'll need to update your password in the Actiontec] as well. If you purchased a multiple IP block, you may configure it now


