Hosted Email:Windows Mail: Difference between revisions
Jump to navigation
Jump to search
No edit summary |
No edit summary |
||
| Line 3: | Line 3: | ||
2. Select your preference from the 'My incoming mail server is a ______ server' Drop down menu. Fill out the preferences to match what is shown below. The 'This server requires a secure connection (SSL)' boxes can be checked if desired. Then click the 'Next" button.<br/> | 2. Select your preference from the 'My incoming mail server is a ______ server' Drop down menu. Fill out the preferences to match what is shown below. The 'This server requires a secure connection (SSL)' boxes can be checked if desired. Then click the 'Next" button.<br/> | ||
'''Note:'''To take advantage of all Zimbra features and for maximum compatibility we strongly suggest selecting IMAP as the server type. | '''Note:''' To take advantage of all Zimbra features and for maximum compatibility we strongly suggest selecting IMAP as the server type. | ||
:[[Image:wl2_add_servers.png]] | :[[Image:wl2_add_servers.png]] | ||
3. Click Finish. You should now be able to send and recieve mail. | 3. Click Finish. You should now be able to send and recieve mail. | ||
:[[Image:wl3_finish.png]] | :[[Image:wl3_finish.png]] | ||
Revision as of 17:02, 19 January 2010
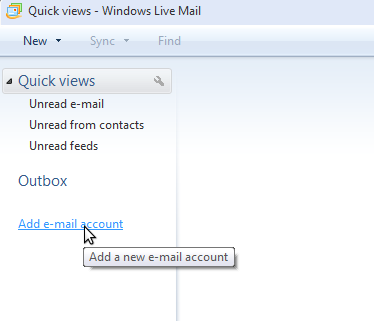
1. Open Windows Live Mail and click on 'Add e-mail account' located in the left column.
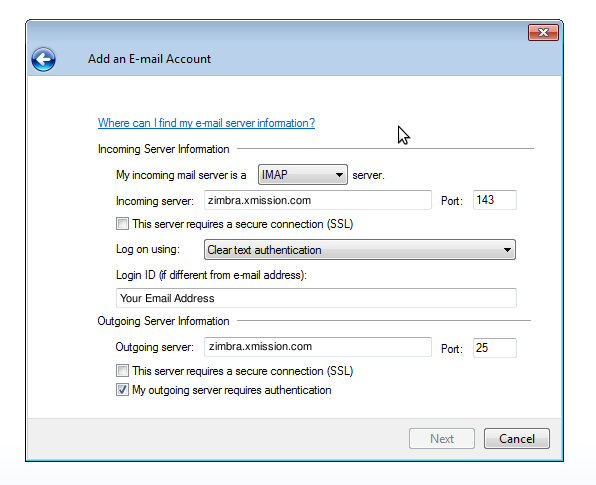
2. Select your preference from the 'My incoming mail server is a ______ server' Drop down menu. Fill out the preferences to match what is shown below. The 'This server requires a secure connection (SSL)' boxes can be checked if desired. Then click the 'Next" button.
Note: To take advantage of all Zimbra features and for maximum compatibility we strongly suggest selecting IMAP as the server type.
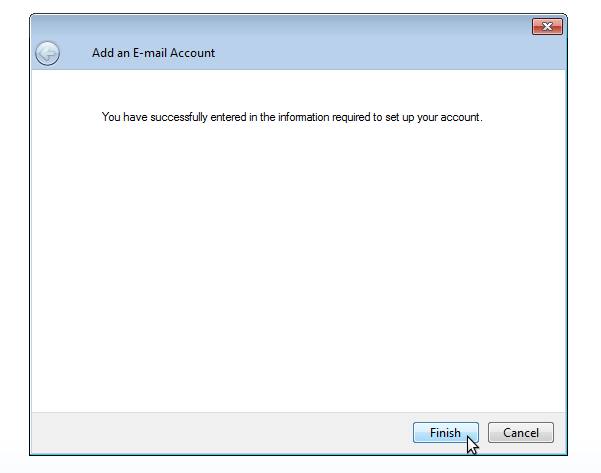
3. Click Finish. You should now be able to send and recieve mail.


