Hosted Email:Windows Mail: Difference between revisions
Jump to navigation
Jump to search
No edit summary |
No edit summary |
||
| Line 3: | Line 3: | ||
2. Select your preference from the 'My incoming mail server is a ______ server' Drop down menu. Fill out the preferences to match what is shown below. The 'This server requires a secure connection (SSL)' boxes can be checked if desired. Then click the 'Next" button.<br/> | 2. Select your preference from the 'My incoming mail server is a ______ server' Drop down menu. Fill out the preferences to match what is shown below. The 'This server requires a secure connection (SSL)' boxes can be checked if desired. Then click the 'Next" button.<br/> | ||
'''Note:''' | '''Note:''' For maximum compatibility and addition features we strongly suggest selecting IMAP as the server type. | ||
:[[Image:wl2_add_servers.png]] | :[[Image:wl2_add_servers.png]] | ||
3. Click Finish. You should now be able to send and recieve mail. | 3. Click Finish. You should now be able to send and recieve mail. | ||
:[[Image:wl3_finish.png]] | :[[Image:wl3_finish.png]] | ||
Revision as of 17:03, 19 January 2010
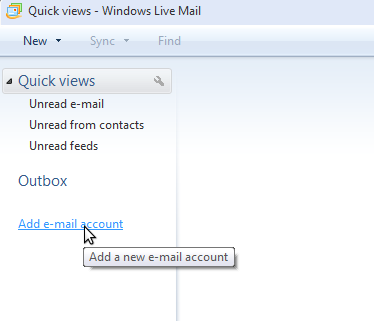
1. Open Windows Live Mail and click on 'Add e-mail account' located in the left column.
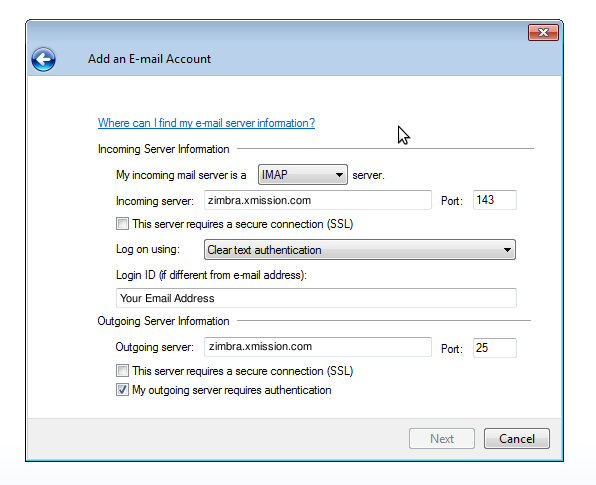
2. Select your preference from the 'My incoming mail server is a ______ server' Drop down menu. Fill out the preferences to match what is shown below. The 'This server requires a secure connection (SSL)' boxes can be checked if desired. Then click the 'Next" button.
Note: For maximum compatibility and addition features we strongly suggest selecting IMAP as the server type.
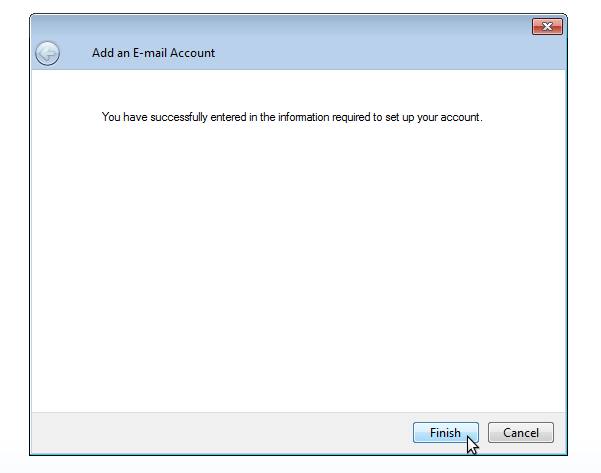
3. Click Finish. You should now be able to send and recieve mail.


