XMission Email:Outlook 2010: Difference between revisions
New page: '''Important:''' Outlook 2010 is currently in beta and not officially supported. This page is merely to assist those experimenting with the Office 2010 Beta and may be inaccurate as change... |
No edit summary |
||
| Line 21: | Line 21: | ||
<br/> | <br/> | ||
<br/> | <br/> | ||
5. Fill out the information on this window as seen below and then click on the ''More Settings...'' button.<br/> | 5. Select your preference from the ''Account Type'' drop down menu and Fill out the information on this window as seen below and then click on the ''More Settings...'' button.<br/> | ||
:[[Image:XM_2007-5.png]] | :[[Image:XM_2007-5.png]] | ||
<br/> | <br/> | ||
Revision as of 16:33, 29 January 2010
Important: Outlook 2010 is currently in beta and not officially supported. This page is merely to assist those experimenting with the Office 2010 Beta and may be inaccurate as changes are made to Outlook 2010 before the final release.
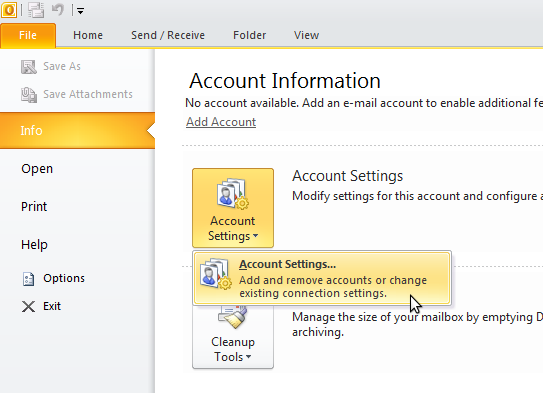
1. Click on the File menu, then go to the Info submenu and click on the Account Settings button.
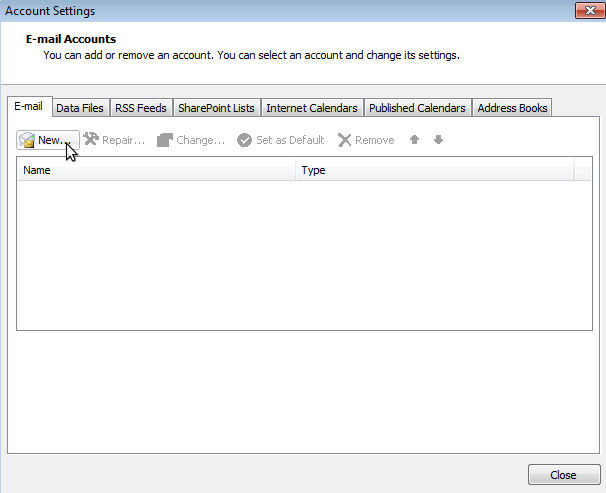
2. Click the New... button underneath the E-mail Tab.
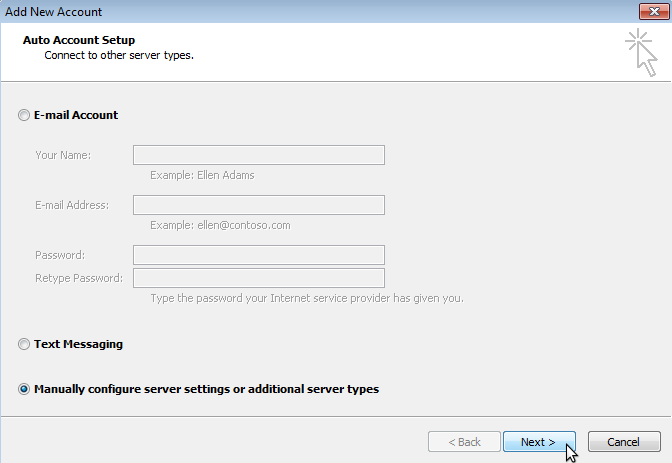
3. Before filling in any information check the box labeled Manually configure server settings or additional server types and click Next.
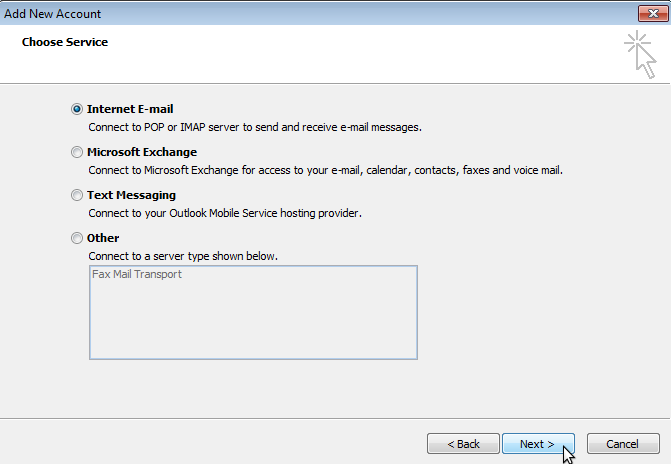
4. Select Internet E-mail from the options presented and click Next.
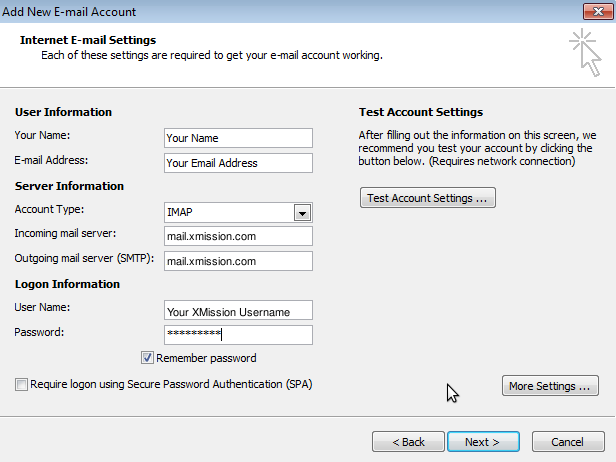
5. Select your preference from the Account Type drop down menu and Fill out the information on this window as seen below and then click on the More Settings... button.
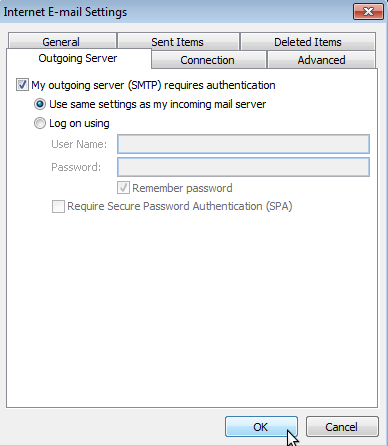
6. Goto the Outgoing Server tab and check the box that says My outgoing server (SMTP) requires authentication and make sure Use same settings as my incoming mail server is selected underneath that.
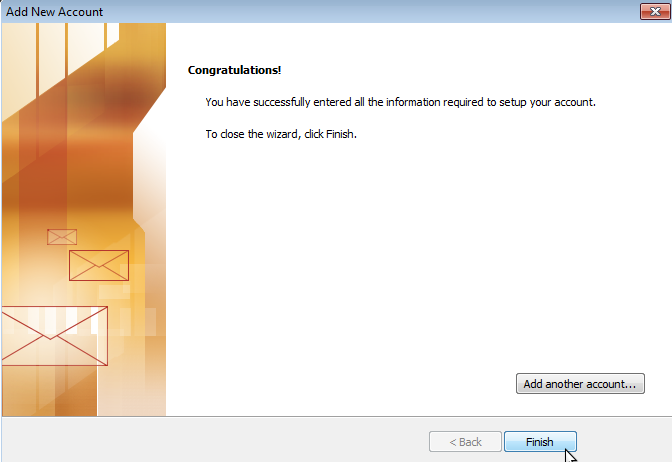
7. Click the Finish button. You should now be able to send and receive mail.
