FreePPP 1.05 Setup: Difference between revisions
Jump to navigation
Jump to search
m Removed protection from "FreePPP 1.05 Setup" |
No edit summary |
||
| Line 1: | Line 1: | ||
{{archived}} | |||
#Open your Apple menu, go to <span class="button">Control Panels</span>, and select <span class="button">FreePPP</span>. | #Open your Apple menu, go to <span class="button">Control Panels</span>, and select <span class="button">FreePPP</span>. | ||
#Set the <span class="button">Port Name:</span> to which port your modem is on. | #Set the <span class="button">Port Name:</span> to which port your modem is on. | ||
Latest revision as of 09:08, 4 February 2014
- Open your Apple menu, go to , and select .
- Set the to which port your modem is on.
- should be set to None.
- should be set to Off.
- Check , and .
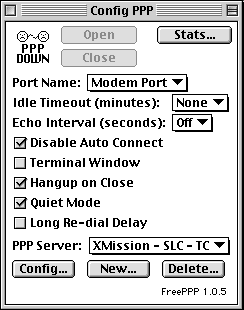
- Click on .
- Enter XMission into the field.
- should be set to CTS & RTS (DTR) unless you have a Global Village Modem, then it should be set to CTS Only.
- Enter your local XMission dial-up number in the field.
- Set to 90 seconds.
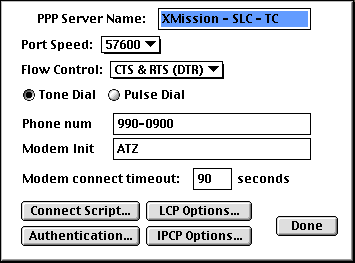
- Click on .
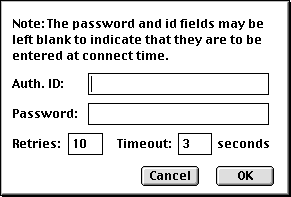
- Enter your XMission username in the field
- Enter your XMission password in the field.
- should at least be set to 1 and the should be set to 3 seconds.
- Click on .
- Click on .
- Click on .
- Check all boxes next to and .
- Check and under the column next to .
- Click on .
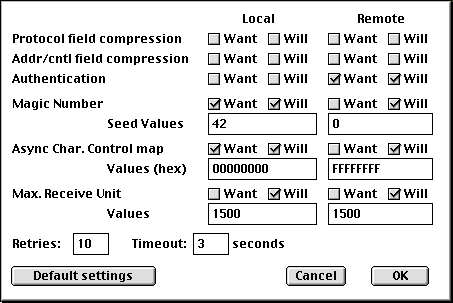
- Click on .
- Click on .
- Uncheck all boxes next to .
- Click on .
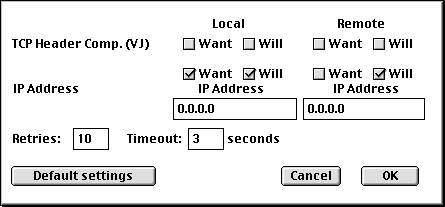
- Click on .