XMission Email:Thunderbird 41: Difference between revisions
Jump to navigation
Jump to search
No edit summary |
No edit summary |
||
| Line 1: | Line 1: | ||
{{archived}} | |||
1. Open '''Thunderbird''' and click on '''"Email"''' under '''"Create a new account"'''. | 1. Open '''Thunderbird''' and click on '''"Email"''' under '''"Create a new account"'''. | ||
| Line 18: | Line 20: | ||
[[Category:Client Email Configuration|XMission Email|Thunderbird]] | [[Category:Client Email Configuration|XMission Email|Thunderbird]] | ||
[[Category:XMission Email|Thunderbird]] | [[Category:XMission Email|Thunderbird]] | ||
[[Category:Archives]] | |||
Revision as of 15:45, 1 August 2022
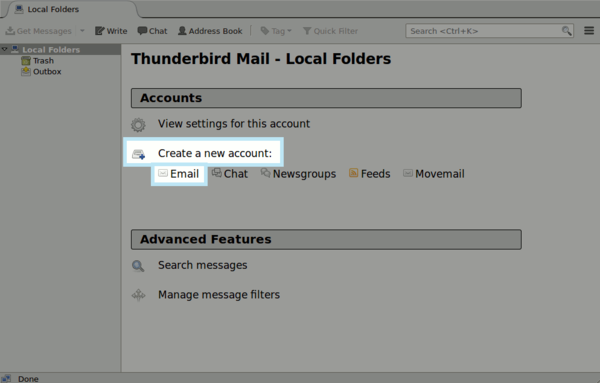
1. Open Thunderbird and click on "Email" under "Create a new account".
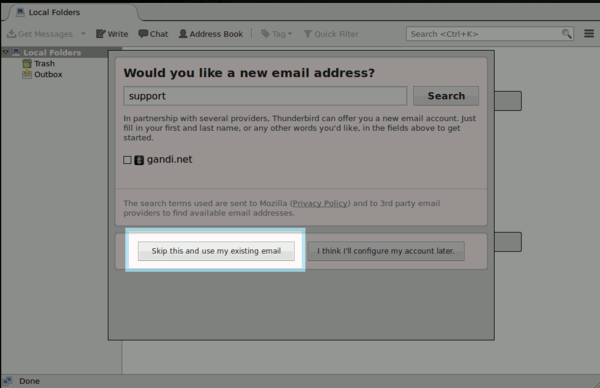
2. If you are prompted by a box below, click the option "Skip this and use my existing email".
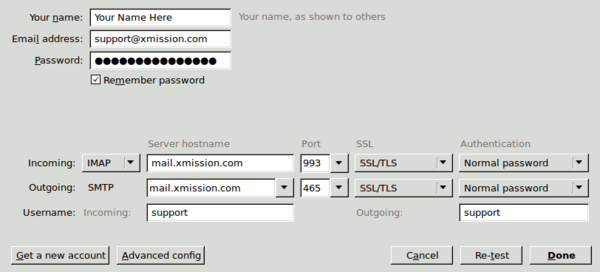
3. At first you will be prompted for your Name, email, and password. Fill in this information and choose "Manual Config"
- The Incoming server is mail.xmission.com with port 993 with SSL and Normal Password set for authentication.
- The Outgoing server is mail.xmission.com with port 465 with SSL and Normal Password set for authentication.
- Your username for both incoming and outgoing is your first part of your email. Example: Support@xmission.com would use the username "Support"


