Thunderbird Configuration: Difference between revisions
Jump to navigation
Jump to search
No edit summary |
No edit summary |
||
| Line 1: | Line 1: | ||
#Click <span class="button">Start</span>, go to Programs and open Thunderbird. | #Click <span class="button">Start</span>, go to Programs and open Thunderbird. | ||
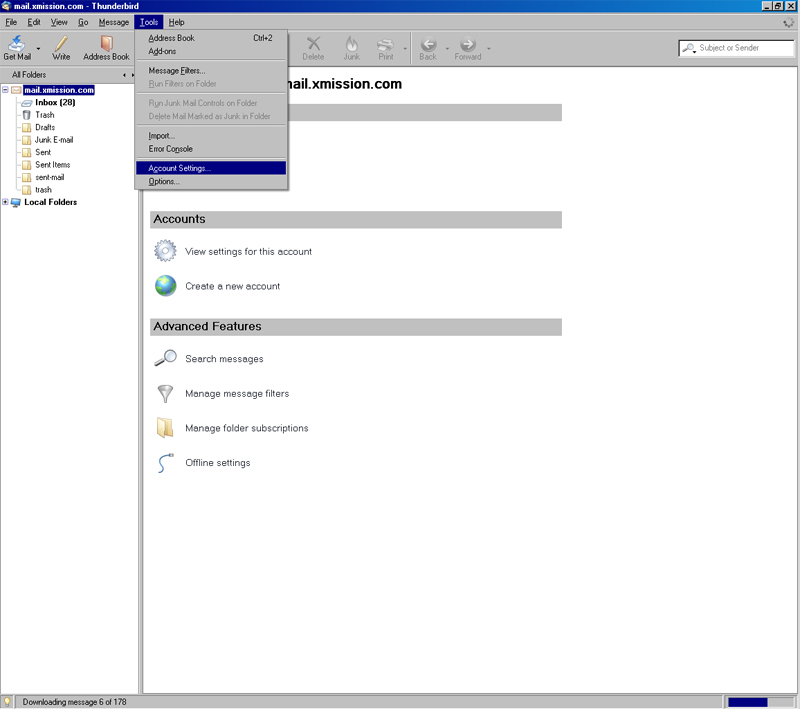
#In Thunderbird, click <span class="button">Tools</span> then Account Settings. | #In Thunderbird, click <span class="button">Tools</span> then Account Settings. | ||
[[Image:ThunderbirdMigration1.jpg]] | |||
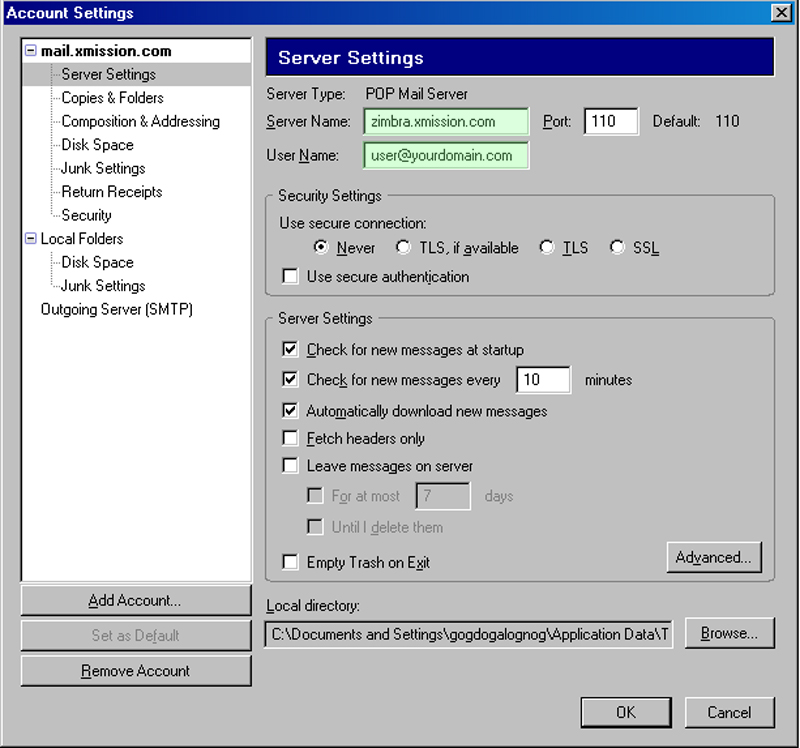
#Click <span class="button">Server Settings</span>. Change '''mail.xmission.com''' to '''zimbra.xmission.com''' and ensure your full email address is in the User Name field. | #Click <span class="button">Server Settings</span>. Change '''mail.xmission.com''' to '''zimbra.xmission.com''' and ensure your full email address is in the User Name field. | ||
[[Image:ThunderbirdMigration2.jpg]] | |||
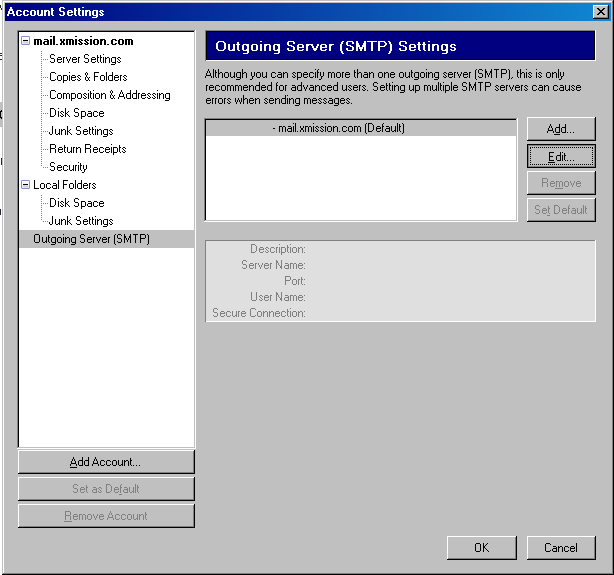
#Click <span class="button">Outgoing Server (SMTP)</span>, select '''mail.xmission.com''' and click <span class="button">Edit</span>. | #Click <span class="button">Outgoing Server (SMTP)</span>, select '''mail.xmission.com''' and click <span class="button">Edit</span>. | ||
[[Image:ThunderbirdMigration3.jpg]] | |||
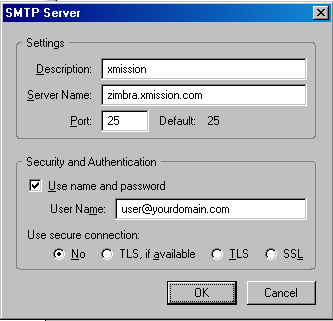
#Change '''mail.xmission.com''' to '''zimbra.xmission.com'''. Check <span class="button">Use name and password</span> and enter your full email address below. | #Change '''mail.xmission.com''' to '''zimbra.xmission.com'''. Check <span class="button">Use name and password</span> and enter your full email address below. | ||
[[Image:ThunderbirdMigration4.jpg]] | |||
Revision as of 12:47, 5 May 2009
- Click , go to Programs and open Thunderbird.
- In Thunderbird, click then Account Settings.
- Click . Change mail.xmission.com to zimbra.xmission.com and ensure your full email address is in the User Name field.
- Click , select mail.xmission.com and click .
- Change mail.xmission.com to zimbra.xmission.com. Check and enter your full email address below.


