Pegasus Mail Setup: Difference between revisions
Jump to navigation
Jump to search
mNo edit summary |
No edit summary |
||
| Line 1: | Line 1: | ||
#Clicking the <span class="button">Start</span> button, go to <span class="button">Programs</span>, then <span class="button">Pegasus Mail for Win32</span>, and select <span class="button">Pegasus Mail for Win32</span>. | #Clicking the <span class="button">Start</span> button, go to <span class="button">Programs</span>, then <span class="button">Pegasus Mail for Win32</span>, and select <span class="button">Pegasus Mail for Win32</span>. | ||
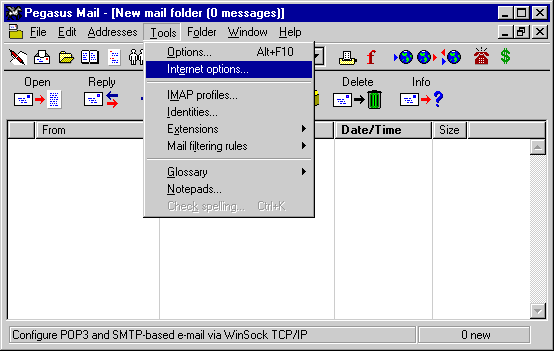
#In Pegasus, click on <span class="button">Tools</span> and select <span class="button">Internet options...</span>. | #In Pegasus, click on <span class="button">Tools</span> and select <span class="button">Internet options...</span>. | ||
#: | #[[Image:Winpeg01.png]] | ||
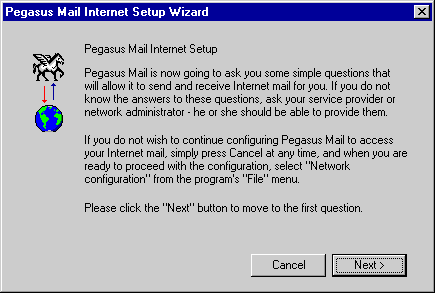
#Click on the <span class="button">Start Setup Wizard</span> button and then click <span class="button">Next</span>. | #Click on the <span class="button">Start Setup Wizard</span> button and then click <span class="button">Next</span>. | ||
#: | #[[Image:Winpeg02.png]] | ||
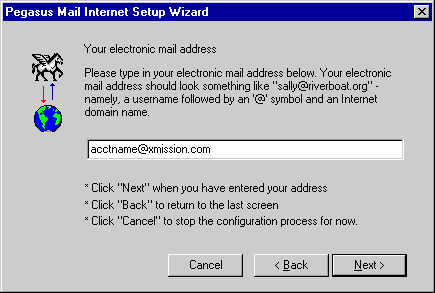
#Enter your XMission email address in the <span class="button">Your electronic mail address</span> field and then click <span class="button">Next</span>. | #Enter your XMission email address in the <span class="button">Your electronic mail address</span> field and then click <span class="button">Next</span>. | ||
#: | #[[Image:Winpeg03.png]] | ||
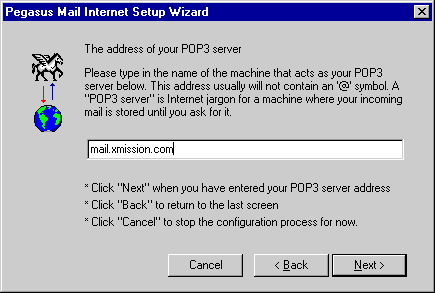
#Enter <tt>mail.xmission.com</tt> in the <span class="button">The address of your POP3 server</span> field and then click <span class="button">Next</span>. | #Enter <tt>mail.xmission.com</tt> in the <span class="button">The address of your POP3 server</span> field and then click <span class="button">Next</span>. | ||
#: | #[[Image:Winpeg03.png]] | ||
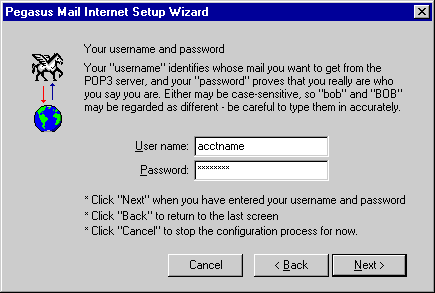
#Enter your XMission username and password in the fields labeled <span class="button">Your username and password</span> and click <span class="button">Next</span>. | #Enter your XMission username and password in the fields labeled <span class="button">Your username and password</span> and click <span class="button">Next</span>. | ||
#: | #[[Image:Winpeg04.png]] | ||
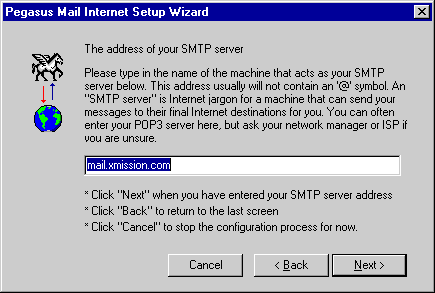
#Enter <tt>mail.xmission.com</tt> in the field labeled <span class="button">The address of your SMTP server</span> and then click <span class="button">Next</span>. | #Enter <tt>mail.xmission.com</tt> in the field labeled <span class="button">The address of your SMTP server</span> and then click <span class="button">Next</span>. | ||
#: | #[[Image:Winpeg05.png]] | ||
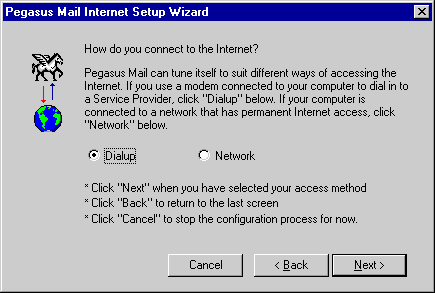
#Select the box labeled <span class="button">Dial-up</span> and click <span class="button">Next</span>. | #Select the box labeled <span class="button">Dial-up</span> and click <span class="button">Next</span>. | ||
#: | #[[Image:Winpeg06.png]] | ||
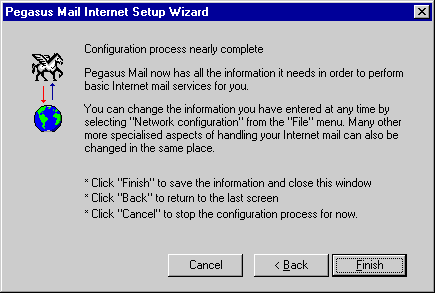
#Click on <span class="button">Finish</span>. | #Click on <span class="button">Finish</span>. | ||
#: | #[[Image:Winpeg07.png]] | ||
#Click on <span class="button">OK</span>. | #Click on <span class="button">OK</span>. | ||
#: | #[[Image:Winpeg08.png]] | ||
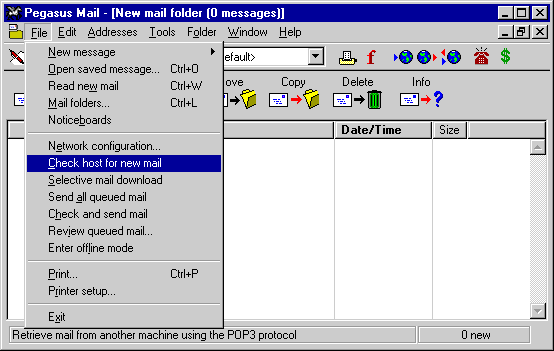
#Click on <span class="button">File</span> and select <span class="button">Check host for new mail</span>. | #Click on <span class="button">File</span> and select <span class="button">Check host for new mail</span>. | ||
#: | #[[Image:Winpeg13.png]] | ||
Congratulations! You should now see your Inbox. You're ready to start sending and receiving email. | Congratulations! You should now see your Inbox. You're ready to start sending and receiving email. | ||
[[Category:XMission Email Archives|Pegasus Mail Setup]] | [[Category:XMission Email Archives|Pegasus Mail Setup]] | ||
Revision as of 11:05, 19 May 2009
- Clicking the button, go to , then , and select .
- In Pegasus, click on and select .
- Click on the button and then click .
- Enter your XMission email address in the field and then click .
- Enter mail.xmission.com in the field and then click .

- Enter your XMission username and password in the fields labeled and click .
- Enter mail.xmission.com in the field labeled and then click .
- Select the box labeled and click .
- Click on .
- Click on .
- Click on and select .
Congratulations! You should now see your Inbox. You're ready to start sending and receiving email.