Difference between revisions of "Windows 8"
From XMission Wiki
| Line 40: | Line 40: | ||
:Your Internet connection is now ready to use! | :Your Internet connection is now ready to use! | ||
| + | |||
| + | |||
| + | [[Category:Troubleshooting|UTOPIA]] | ||
| + | [[Category:UTOPIA Configuration|Windows 8]] | ||
| + | [[Category:UTOPIA]] | ||
| + | [[Category:PPPoE]] | ||
Revision as of 10:49, 15 January 2014
Windows 8 PPPoE procedure:
- Before you begin, ensure that an Ethernet cable is connected from the appropriately provisioned port on your UTOPIA equipment to your computer.
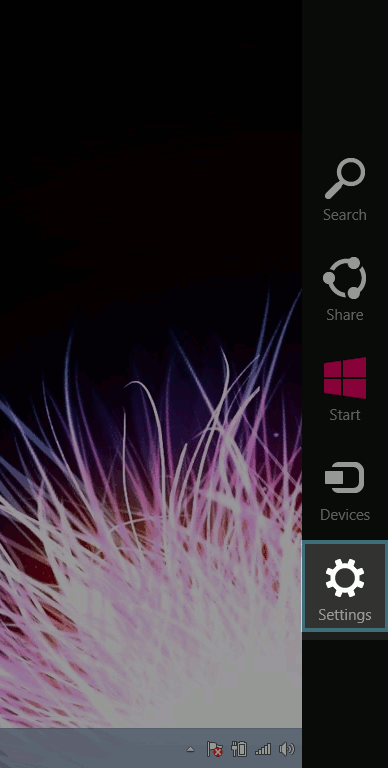
Move the cursor to the far upper-right or lower-right side of the screen to open the menu pictured below. Click on "Settings."
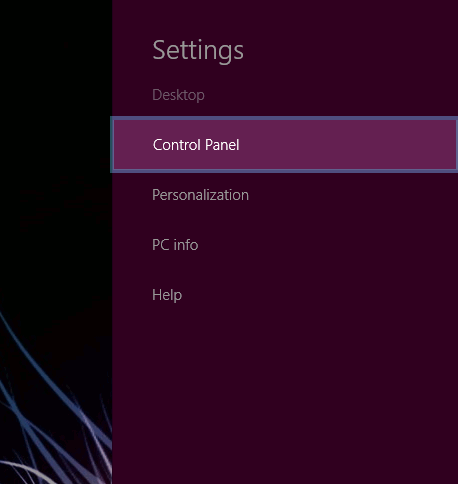
- Click on "Control Panel."
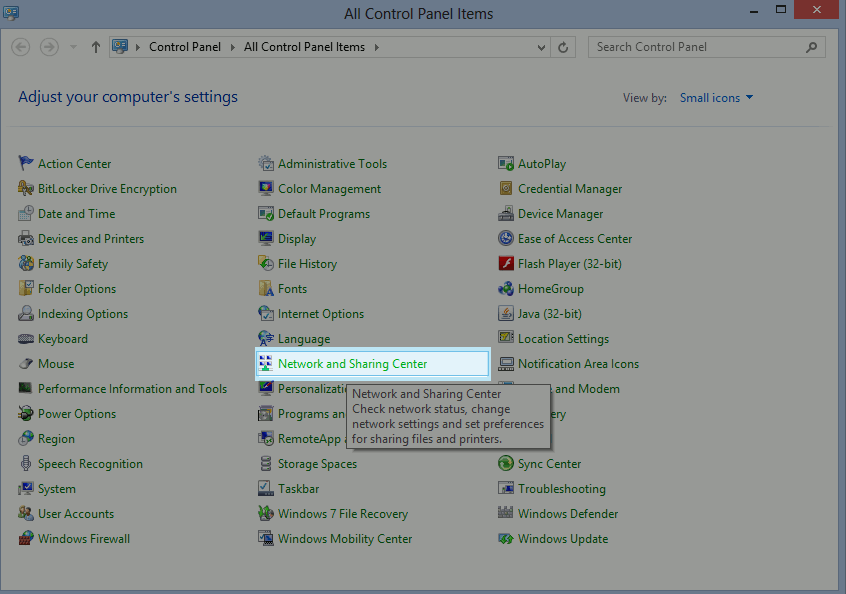
Select the "Network and Sharing Center" from the list.
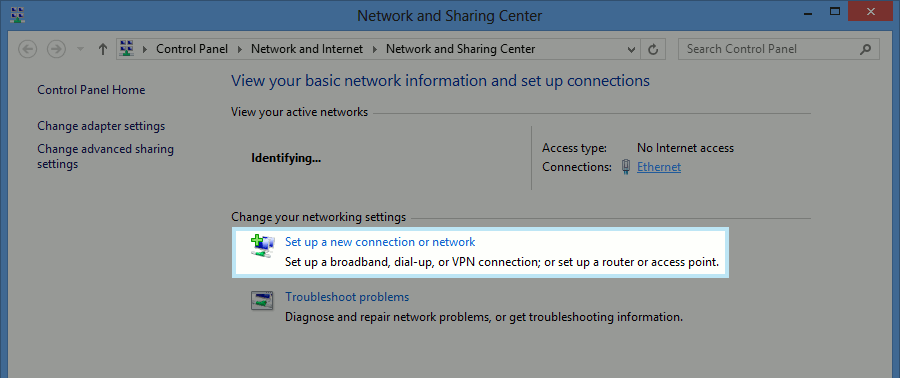
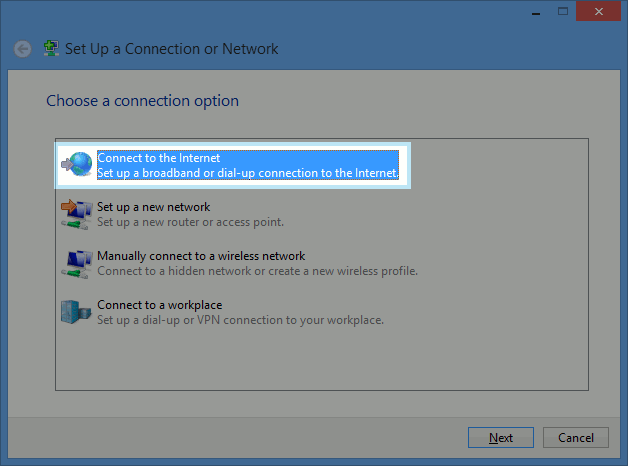
- Click on "Set up a new connection or network."
Select "Connect to the Internet."
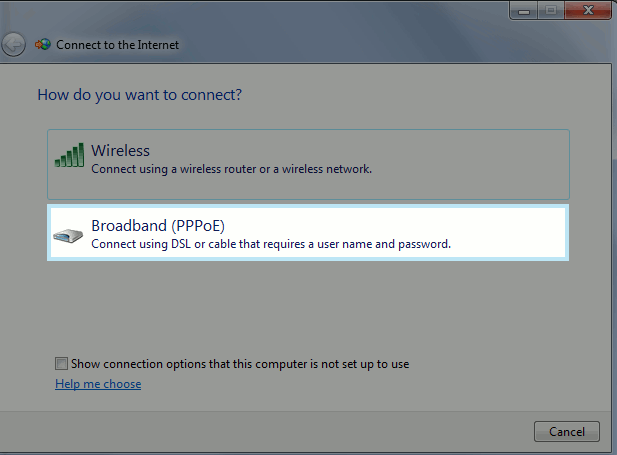
- When asked how you would like to connect, select the "Broadband (PPPoE)" option.
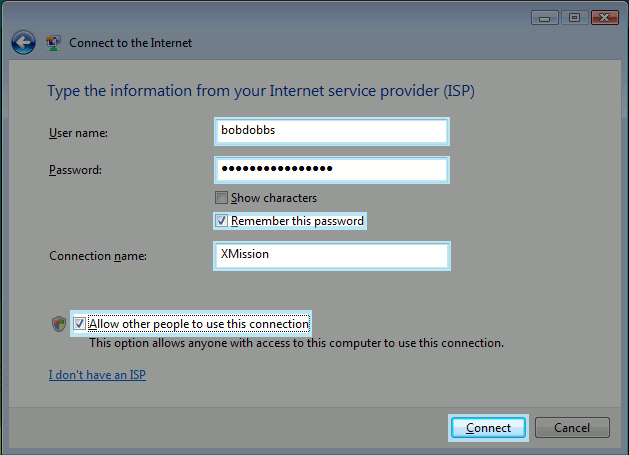
Enter your XMission username and corresponding password. In the example below, we have used "bobdobbs" as a username. You would replace this with your own, unique XMission username. Remember that passwords are case-sensitive! You may name the connection whatever you like, but we recommend you simply use "XMission." You will also likely want to check the two boxes indicated below -- "Remember this password" and "Allow other people to use this connection." Once finished, click "Connect."
- Your Internet connection is now ready to use!
