Difference between revisions of "Remote Desktop Chrome"
(→Enable remote access to your computer) |
(→Windows) |
||
| Line 66: | Line 66: | ||
#The computer you enabled should show up under “My Computers.” | #The computer you enabled should show up under “My Computers.” | ||
| − | '''Note:'' Windows User Account Control might appear and ask you for permission to install. If you don’t have administration privileges on the computer, please contact your system administrator to finish installation. | + | '''Note:''' Windows User Account Control might appear and ask you for permission to install. If you don’t have administration privileges on the computer, please contact your system administrator to finish installation. |
====Mac==== | ====Mac==== | ||
Revision as of 12:07, 21 April 2015
Contents
What is Chrome Remote Desktop?
Chrome Remote Desktop is a cross-platform solution that can allow you to share your desktop with our support team, to quickly resolve your support needs.
Do I need a Google Account?
To enable the computer you want to access remotely, you'll need to use a Google Account. If you don't have one, you can sign up for one.
Will it work on my computer?
Yes, Chrome Remote Desktop is cross-platform, meaning it will work on Windows, Mac and Linux.
How safe is Chrome Remote Desktop?
For your safety and security, all remote desktop sessions are fully encrypted using Chrome's SSL features, which includes full support for AES. None of your session data is ever recorded, and no session data is transmitted in a way that would let Google or anyone else (besides the participants) access it.
How do I get started?
Installing the Chrome App
Install the Chrome Remote Desktop app on the computer you want us to access remotely.
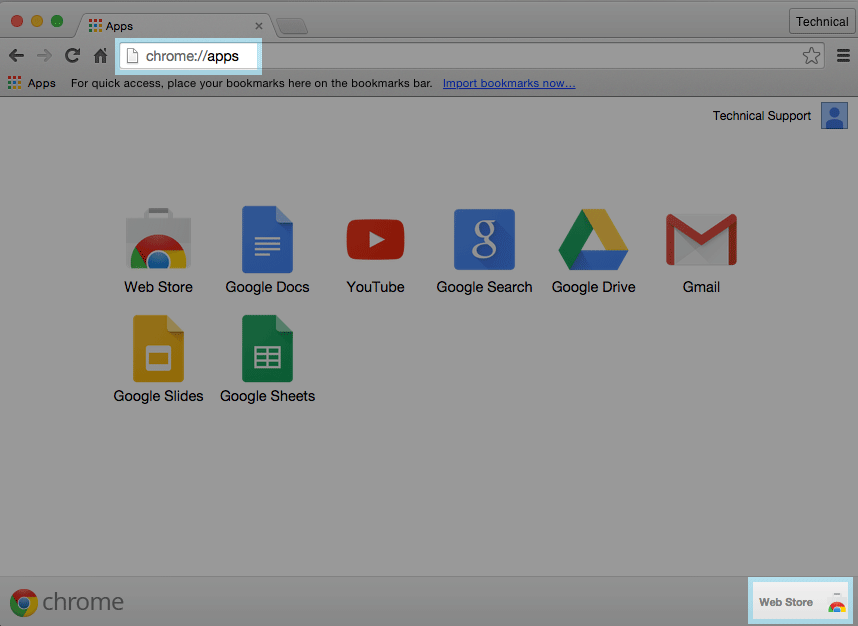
- In your Chrome Browser URL bar type chrome://apps then click on Web Store in the bottom right.
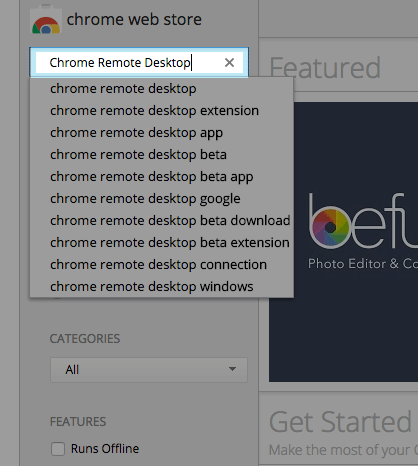
- Next: In the search box type Chrome Remote Desktop
- Next: In the upper-right corner of the window, click the blue + Free button to download Chrome Remote Desktop.
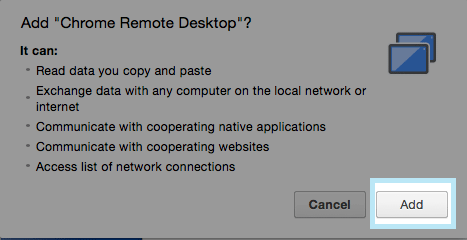
- Next: Click Add in the confirmation dialog.
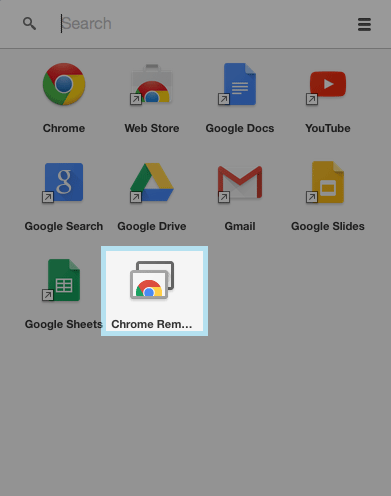
- Once the app has been added, the Chrome Remote Desktop icon will appear in the App Launcher.
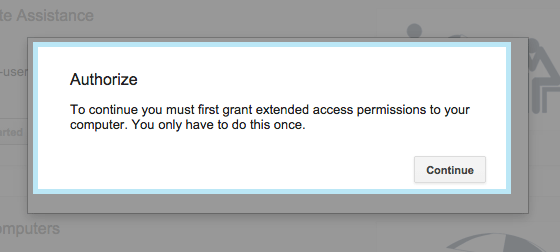
- When you open Chrome Remote Desktop app for the first time, you’ll be asked to authorize it.
Enable remote access to your computer
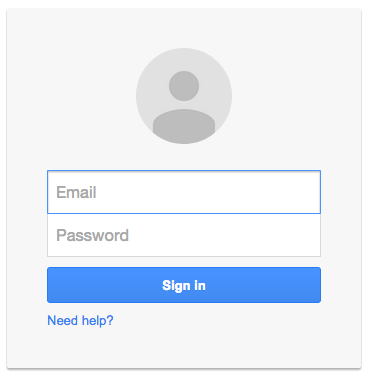
- To enable the computer you want to access remotely, you'll need to use a Google Account.
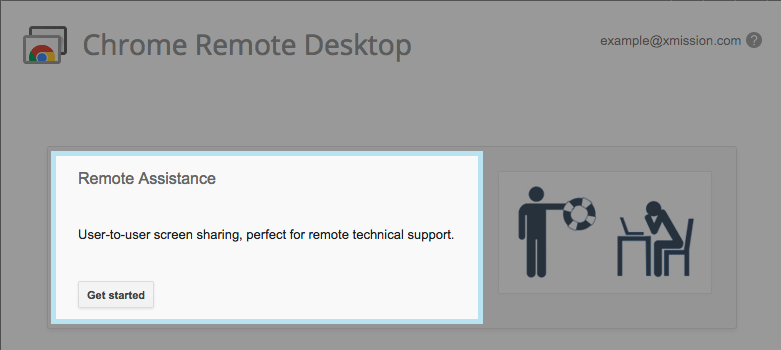
- If the Get Started button appears in the "Remote Assistance" box, click it to see Remote Assistance options.
- After you have signed into your google account, Click on the Share button
- After you click on Share a small file will be downloaded this is for the Chrome Remote Host Service
Windows
- Applies only to Chrome on Windows XP and Windows Server 2003 or higher
- Enter a PIN and re-type the PIN. Click OK.
- Click Yes to install the Chrome Remote Host Service. The host service will download and install automatically.
- A confirmation box will appear. Confirm the Google Account and enter the PIN again to continue.
- The computer you enabled should show up under “My Computers.”
Note: Windows User Account Control might appear and ask you for permission to install. If you don’t have administration privileges on the computer, please contact your system administrator to finish installation.
Mac
- Chrome will start the download of an installation .dmg. Click Save.
- Click chromeremotedesktop.dmg in the Download bar to mount the installer.
- Switch to your Finder, and locate the “Chrome Remote Desktop” window with the “Chrome Remote Desktop.mpkg” installer package.
- Double-click the Chrome Remote Desktop.mpkg file to run the installer.
- Follow the on-screen prompts to finish installation.
- When the installation is complete, return to Chrome and click OK in the on-screen dialog to enable your computer for remote access.
- Enter a PIN and re-type the PIN, then click OK.
- A System Preference dialog appears, unlock the panel and confirm your account and PIN again.
- The “Remote connections for this computer have been enabled” message will appear. Click OK to dismiss it.
- The computer you enabled should show up under “My Computers”.
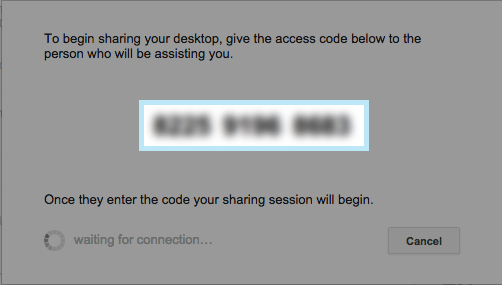
- A unique access code will be generated for each sharing session. We will ask you to read this code out loud so we can access your computer.
- Once we enter the access code, the sharing session will begin and we will be able to see your computer screen.
How to end my session?
You can click Stop sharing or press Ctrl+Alt+Esc (Mac: Opt-Ctrl-Esc) at any time to end the session.

Sensitive information
When you use the app to share your computer with someone, that person will see your email address and have full control of your computer, including access to your applications, files, emails, documents and history. Please be sure that any sensitive information is not displayed on your desktop, this includes bank information, credit card information, personal pictures. Remember you can stop the session at any point in time if you feel insecure.
