Account Home: Difference between revisions
No edit summary |
No edit summary |
||
| Line 1: | Line 1: | ||
__NOTOC__ | __NOTOC__ | ||
=Account Home= | =Account Home= | ||
The Account Home tab provides an overview of your XMission account. Here you can change your password, view and pay your bill, review services, and manage authorized contacts and users. | The Account Home tab provides an overview of your XMission account. Here you can change your password, view and pay your bill, review services, and manage authorized contacts and users. | ||
Revision as of 13:58, 8 September 2017
Account Home
The Account Home tab provides an overview of your XMission account. Here you can change your password, view and pay your bill, review services, and manage authorized contacts and users.
Changing your Password
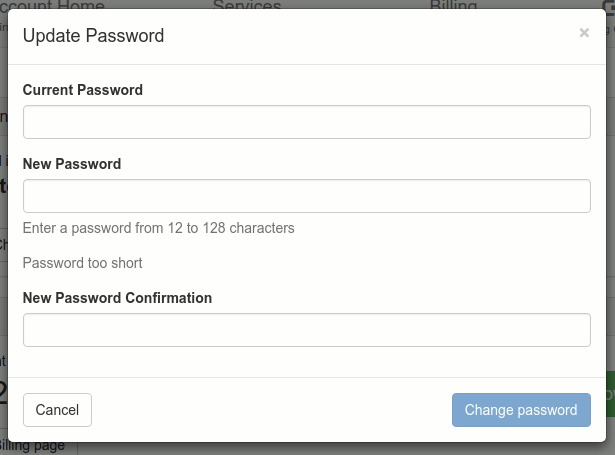
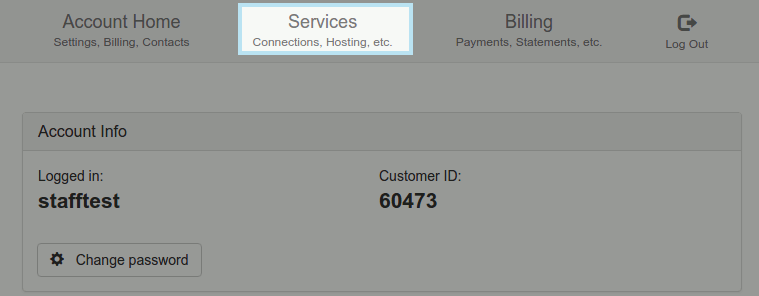
To change your password, click on the "Change Password" button in the Account Info section.
This window requires your current password and asks for the new password you wish to use. The new password must be entered in the New Password and Confirmation fields. | Secure passwords must be at least 12 characters long.
Paying your Bill
You can pay your bill on the Account Home screen and click the "Pay Now" button under the Billing section.
Alternatively, you can click on the Billing link at the top of the page:
Then click on the green "Pay now" button.
This will bring you to the make a payment screen.
Viewing your Services
You can see a list of your active services two ways. First, you can click on any one of the services buttons under the Services section.
Clicking "Summary" will take you to a list of all of the services on your account, while clicking on a more specific option, such as email, will show you only services you have related to that category. Alternatively, you can click the Services tab at the top of the screen and be taken to the services page where you can see your services listed.
Authorized Contacts
The Authorized Contacts on your account are individuals who are authorized to make changes to the account and receive direct technical support from our support technicians. Individuals not listed on the account cannot do things such as change passwords, change billing information, or anything else that requires XMission to apply changes to the account.
You can find the Authorized Contacts section at the bottom of the Account Home screen.
There are four tags that a contact can have on an account:
- Primary contacts can access all features on the account and can change any information on the account.
- Technical contacts can make changes to the individual services, such as DNS updates or password changes, and authorize XMission technical support to do the same, but cannot update any billing information.
- Billing contacts can receive invoices and can modify billing settings and information, but are not authorized to make changes to existing services, such as password changes.
- AVS contacts serve as a reference for the credit cards on file. When a transaction is made with a credit card, the address associated with the credit card will be checked against the contact marked as AVS.
Adding a New Contact
New contacts can be added to your account by clicking on the "+ Add Contact" button below the listed contacts.
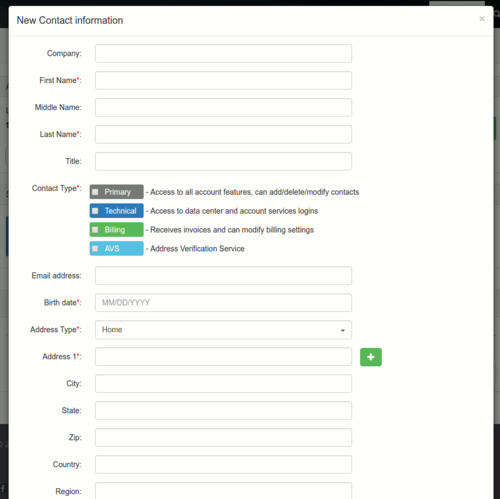
This will take you to the New Contact Information screen, where you can fill out details for the contact. You can also set the type of contact here.
When you've filled in the required fields, you can find the "Save" button at the bottom of the form by scrolling down.
Editing/Removing Existing Contacts
You can edit existing contacts by clicking on the little gear icon to the far right of the contact you want to change.
This will bring up the form for the contact in question, showing you the details of the contact. If you scroll down to the bottom of the form, you can find the "Edit Settings" and "Delete" buttons, which will allow you to edit the contact or delete it.
When deleting a contact, you will be prompted with a confirmation button before the contact is deleted.
Users
The users section details the various users associated with your account. You can think of a user as a unique account login that can used to access the control panel. It can be accessed by clicking on the "Users" tab next to "Authorized Contacts". The users you see listed are generated by the system according to the various services you have. The username can be seen under the "Username" column, and the service it is associated with can be seen under the "Service" column.
Editing Existing Users
By default, only existing users with usernames can login to the panel. Currently if there are more than one user on the account, no one is granted admin permission until you call in and we can verify which account should have admin permission. You can grant other users the ability to manage your account should you want to give admin access to other people, or just use an alternative username.
Similar to editing Authorized Contacts, click on the little gear icon to bring up the editing screen.
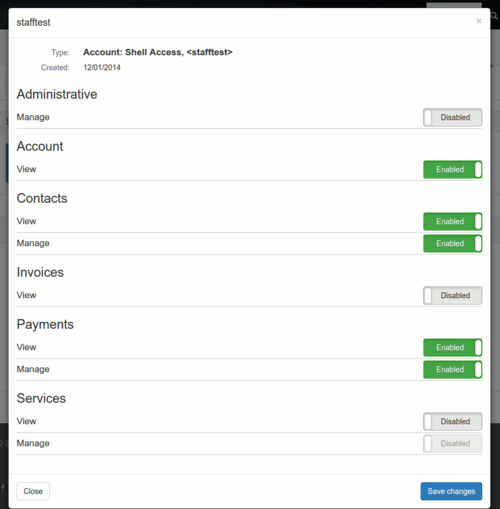
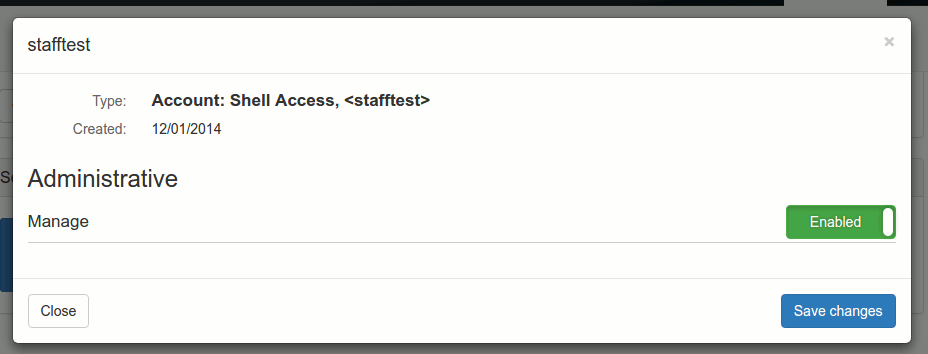
Here you will see a list of options pertaining to different parts of your account, allowing you to determine specifically what parts of the account the different users can access and edit.
Once you're satisfied with the various permissions for a user, you can scroll to the bottom and click on the 'Save Changes' button.
Note that if you enable Administrative management, the other options will disappear, as the administrative management option gives full control over the account.
Account Home
Services
- Services

