VPN: Difference between revisions
Created page with "=XMission VPN connection details= {| class="wikitable" |- !XMission VPN Connection Settings |- | '''Server:''' vpn.xmission.com<br> '''Username:''' Configured at time of purc..." |
|||
| Line 13: | Line 13: | ||
|- | |- | ||
|} | |} | ||
==Connecting to the VPN via Windows 10== | |||
==Setting up the Networking Configuration== | |||
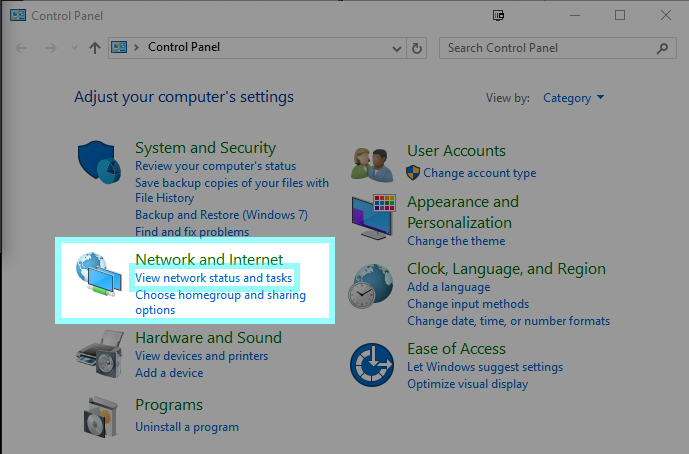
Open your '''Control Panel''' and select '''View network status and tasks''' | |||
:[[File:Win10vpn1.png]] | |||
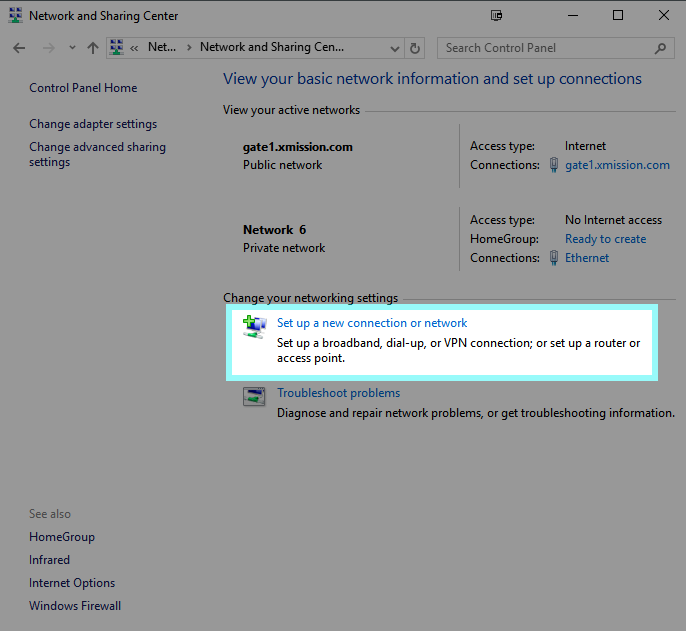
Click on '''Set up a new connection or network'''. | |||
:[[File:Win10vpn2.png]] | |||
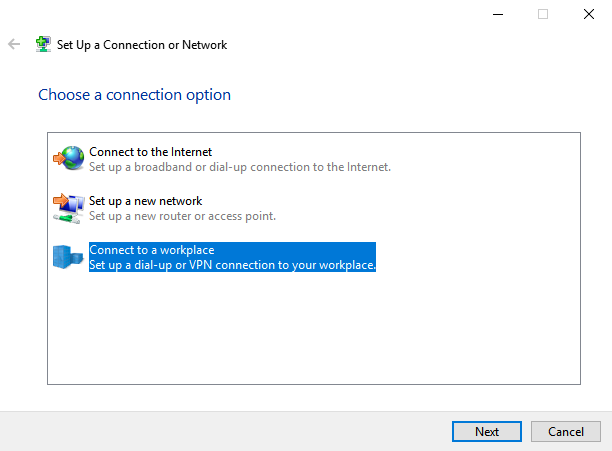
Select '''Set up a workplace - Set up a dial-up or VPN connection to your workplace'''. Press '''Next'''. | |||
:[[File:Win10vpn3.png]] | |||
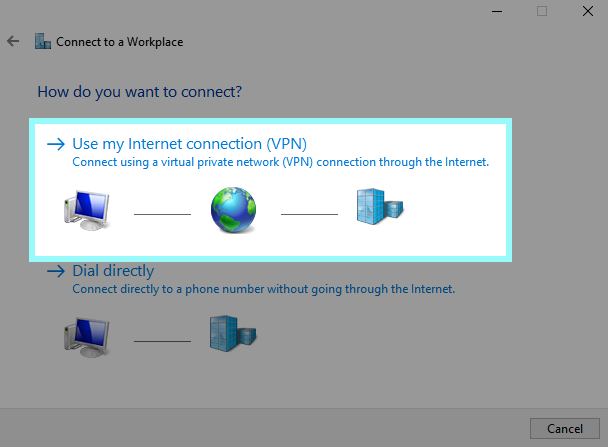
Choose '''Use my Internet connection (VPN)'''. | |||
:[[File:Win10vpn4.png]] | |||
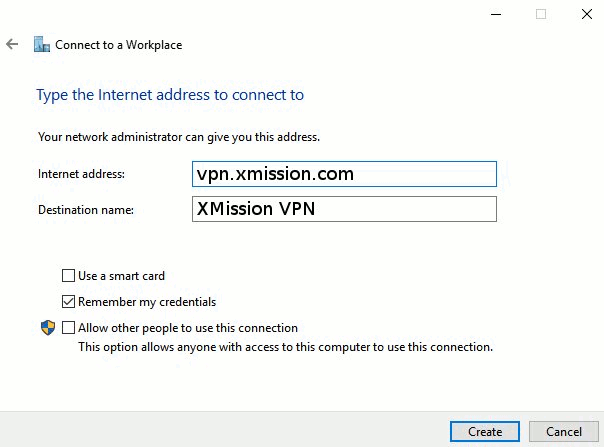
Enter '''vpn.xmission.com''' for '''Internet address:''' and '''XMission VPN''' for '''Destination name:'''. Click '''Create''' to finish this step. | |||
:[[File:Win10vpn5.png]] | |||
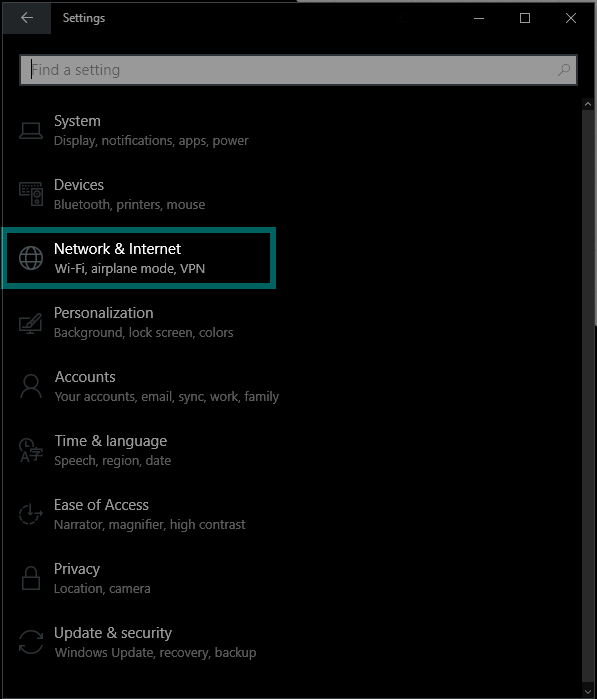
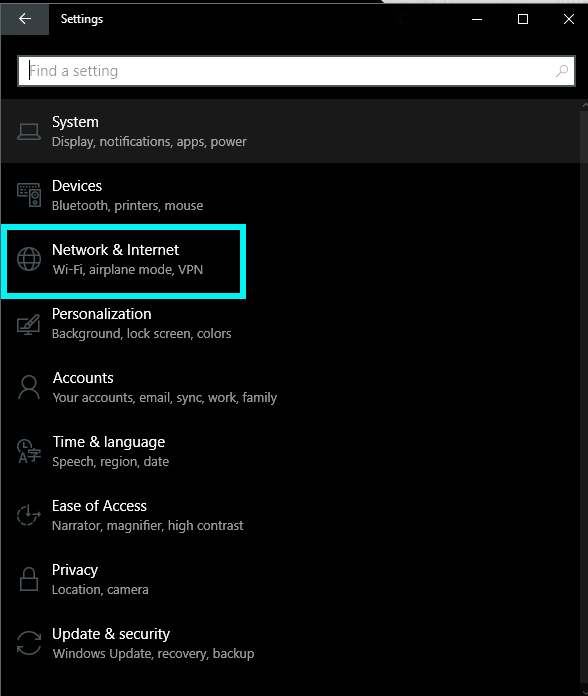
Open the Windows 10 '''Settings''' and go to '''Network and Internet''' | |||
:[[File:Win10vpn6.png]] | |||
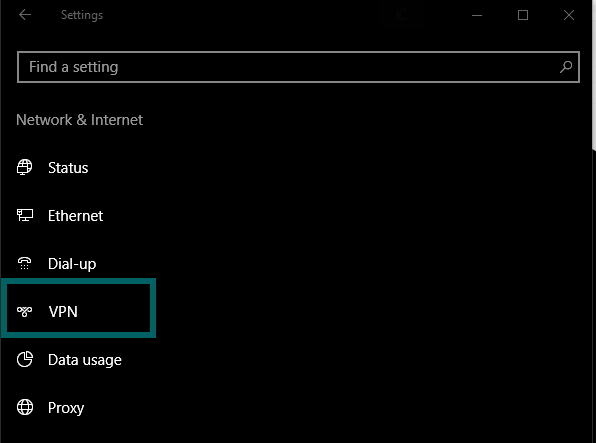
Select '''VPN''' | |||
:[[File:Win10vpn7.png]] | |||
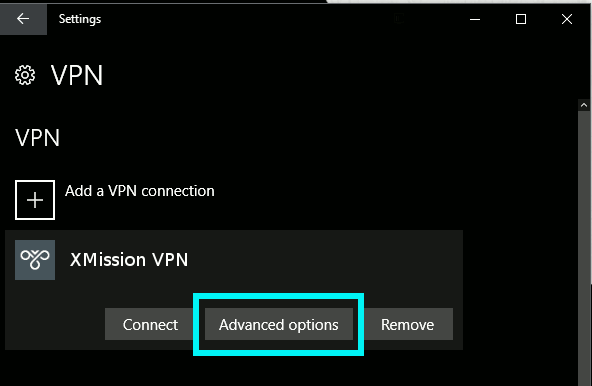
Here you should see your recently created VPN. Click on it and choose '''Advanced Options''' | |||
:[[File:Win10vpn8.png]] | |||
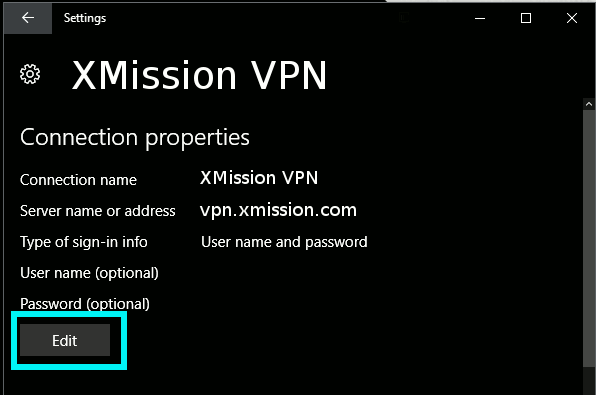
'''Edit''' the VPN settings | |||
:[[File:Win10vpn9.png]] | |||
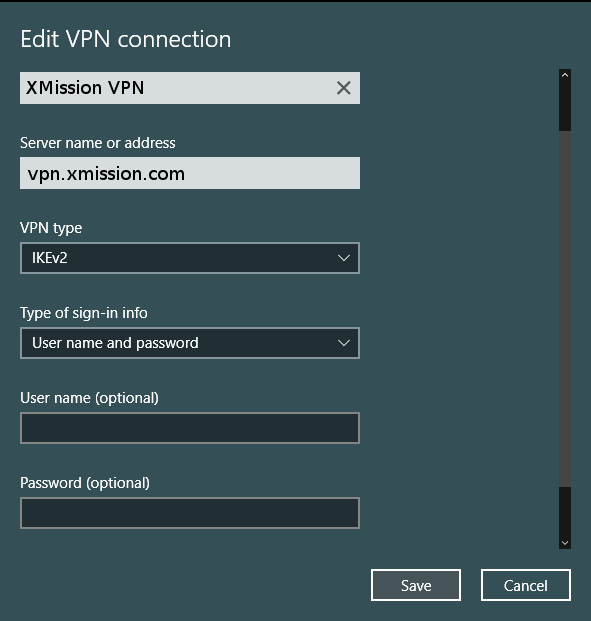
Change the VPN type to '''IKEv2''', followed by selecting '''User name and password''' in the '''Type of sign-in info''' drop down. Enter the username and password given to you when the service was ordered. When finished click '''Save'''. | |||
:[[File:Win10vpn10.png]] | |||
Navigate back to '''Network and Internet''' in the Windows 10 settings. | |||
:[[File:Win10vpn11.png]] | |||
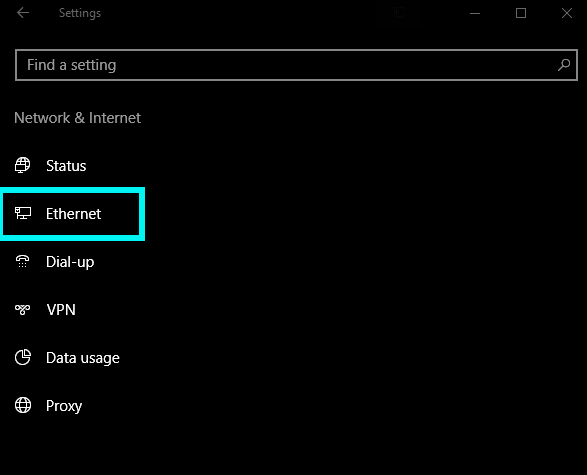
This time choose '''Ethernet''' | |||
:[[File:Win10vpn12.png]] | |||
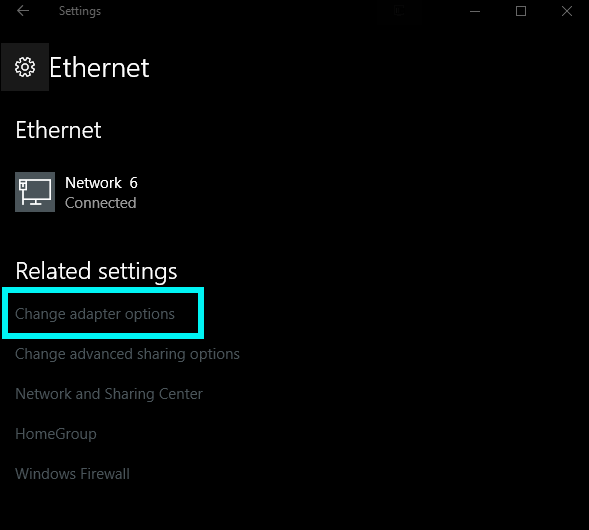
Here you will click on '''Change Adapter Options''' under the '''Related Settings''' | |||
:[[File:Win10vpn13.png]] | |||
You will see all Network options you have here, including wifi, etc. '''Right click''' on the VPN you created and select '''Properties''' | |||
:[[File:Win10vpn14.png]] | |||
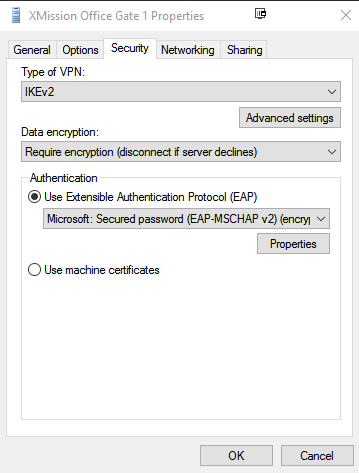
Under the Security tab, ensure your settings are correct as they are below | |||
:[[File:Win10vpn15.png]] | |||
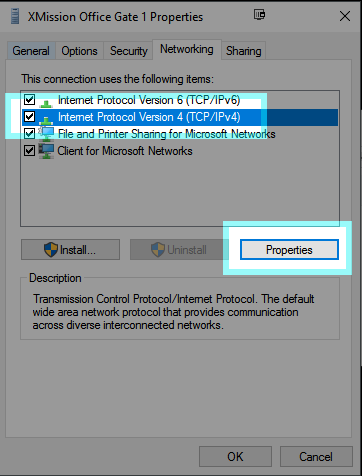
Next go to the '''Networking''' tab and select '''Properties''' under the '''Internet Protocol Version 4 (TCP/IPv4)''' option. | |||
:[[File:Win10vpn16.png]] | |||
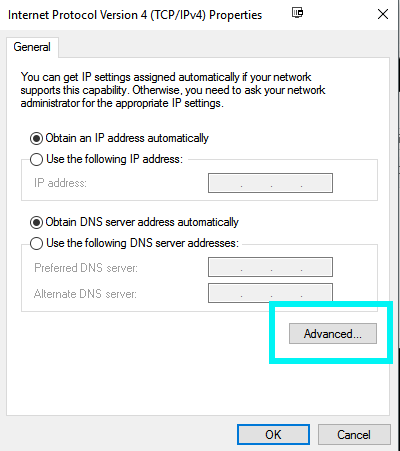
Click '''Advanced''' | |||
:[[File:Win10vpn17.png]] | |||
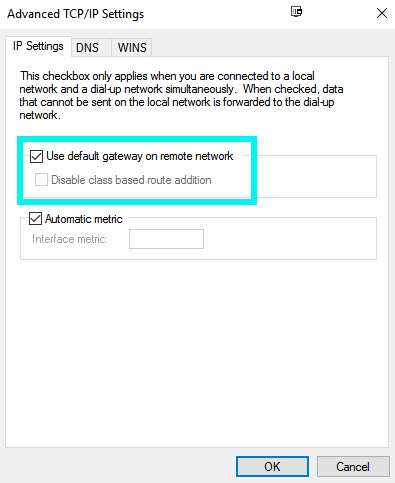
Under the '''IP Settings''' tab, chose '''Use Default Gateway on Remote Network''' | |||
:[[File:Win10vpn18.png]] | |||
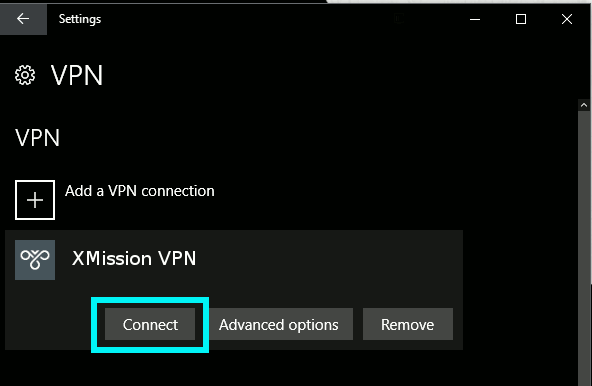
You are now ready to connect to the VPN. | |||
:[[File:Win10vpn19.png]] | |||
[[Category: Troubleshooting]] | |||
Revision as of 14:41, 11 January 2018
XMission VPN connection details
| XMission VPN Connection Settings |
|---|
|
Server: vpn.xmission.com |
Connecting to the VPN via Windows 10
Setting up the Networking Configuration
Open your Control Panel and select View network status and tasks
Click on Set up a new connection or network.
Select Set up a workplace - Set up a dial-up or VPN connection to your workplace. Press Next.
Choose Use my Internet connection (VPN).
Enter vpn.xmission.com for Internet address: and XMission VPN for Destination name:. Click Create to finish this step.
Open the Windows 10 Settings and go to Network and Internet
Select VPN
Here you should see your recently created VPN. Click on it and choose Advanced Options
Edit the VPN settings
Change the VPN type to IKEv2, followed by selecting User name and password in the Type of sign-in info drop down. Enter the username and password given to you when the service was ordered. When finished click Save.
Navigate back to Network and Internet in the Windows 10 settings.
This time choose Ethernet
Here you will click on Change Adapter Options under the Related Settings
You will see all Network options you have here, including wifi, etc. Right click on the VPN you created and select Properties
Under the Security tab, ensure your settings are correct as they are below
Next go to the Networking tab and select Properties under the Internet Protocol Version 4 (TCP/IPv4) option.
Click Advanced
Under the IP Settings tab, chose Use Default Gateway on Remote Network
You are now ready to connect to the VPN.
