Netscape 4 Mail for Mac Setup: Difference between revisions
Jump to navigation
Jump to search
m Removed protection from "Netscape 4 Mail for Mac Setup" |
No edit summary |
||
| Line 1: | Line 1: | ||
{{archived}} | |||
#Open Netscape by double-clicking on the <span class="button">Netscape Communicator</span> icon in the <span class="button">Netscape Communicator</span> program folder. | #Open Netscape by double-clicking on the <span class="button">Netscape Communicator</span> icon in the <span class="button">Netscape Communicator</span> program folder. | ||
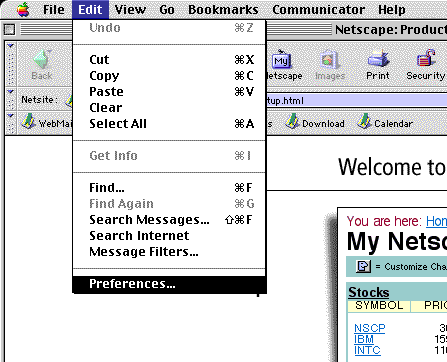
#In Netscape Communicator, click on <span class="button">Edit</span> and select <span class="button">Preferences...</span> | #In Netscape Communicator, click on <span class="button">Edit</span> and select <span class="button">Preferences...</span> | ||
Latest revision as of 15:55, 14 January 2020
![]()
- Open Netscape by double-clicking on the icon in the program folder.
- In Netscape Communicator, click on and select
- Click the blue arrow next to the .
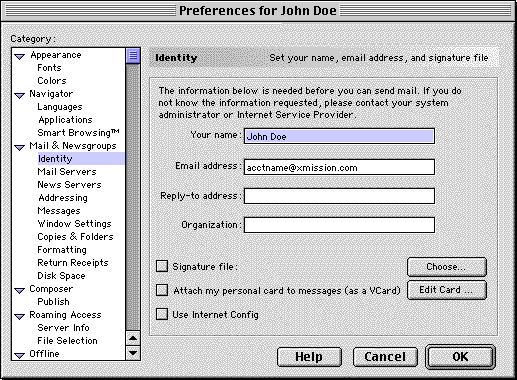
- Click on .
- On the right, fill out the field. This is the name that will appear on your outgoing messages.
- Fill out your XMission email address in the field.
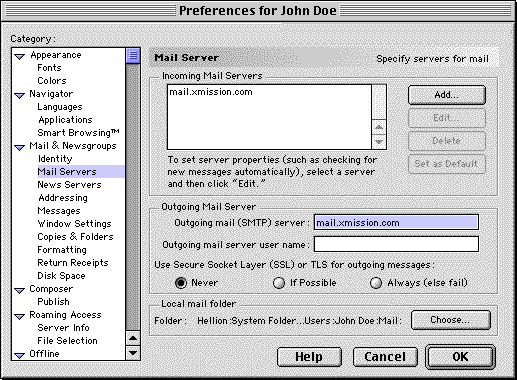
- On the left, click on .
- On the right side, highlight the server under and click on .
- Now type mail.xmission.com in the field.
- In the field, type your XMission username
- Check the box.
- Click on .

- Under the Heading you will see two fields. In , type mail.xmission.com.
- Click on
- Click on the pull down menu and select .
- Click the button and enter your XMission password when prompted.
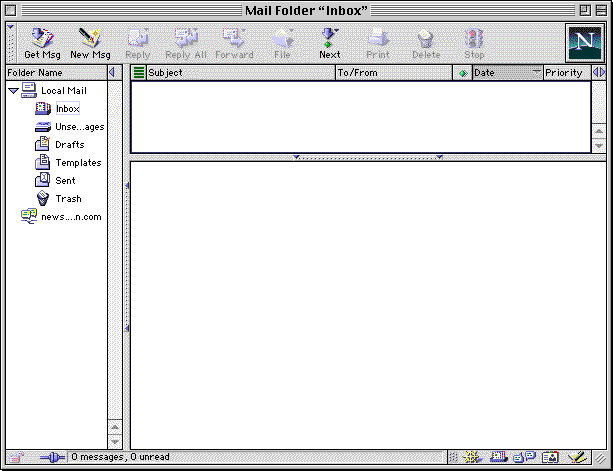


Congratulations! You should now see your Inbox. You're ready to start sending and receiving email.