Belkin
Belkin PPPoE Proceedure
- Before you begin, ensure that an Ethernet cable is connected from the Internet port on your router to the appropriately provisioned port on your UTOPIA equipment. Also, as wireless settings do not come pre-configured, you may need to connect your computer directly to one of the numbered LAN ports on your router with an Ethernet cable.
Once you've completed the preliminary steps above, open any web browser (for example, Internet Explore, Mozilla Firefox, Google Chrome, etc...) and remove any website in the address bar of your browser and type in "192.168.2.1" (without the quotation marks). Please note: the address bar is the bar you would use to directly access websites. This will not work if you enter these numbers in a search bar.
- Hit enter on your keyboard or click the appropriate button to progress to the site. Your browser may update to show "http://192.168.2.1" or "https://192.168.2.1." This is normal.
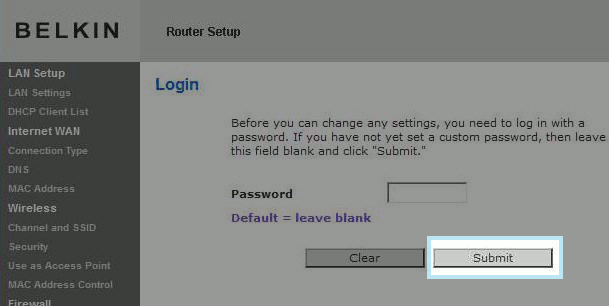
If the connection between your computer and your router is successful, you will be prompted to enter a username and password. By default, Belkin devices have no administrative password so you can simply click "Submit."
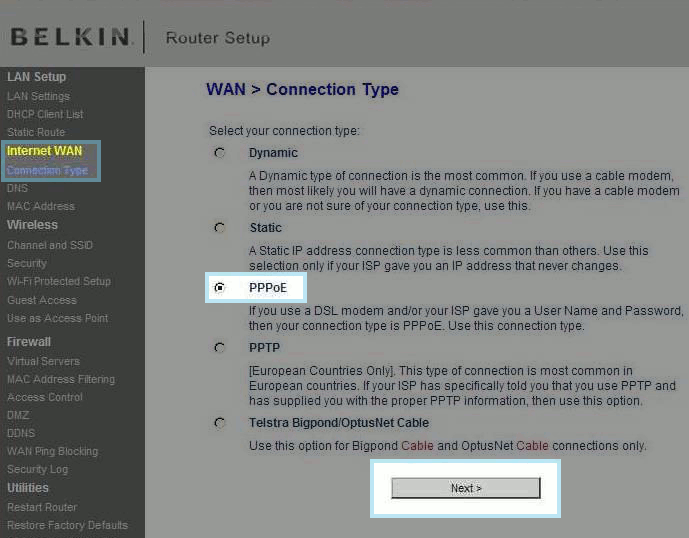
- Once logged in, click on "Internet WAN / Connection Type" along the left-hand column, place a dot beside the "PPPoE" option, and click "Next."

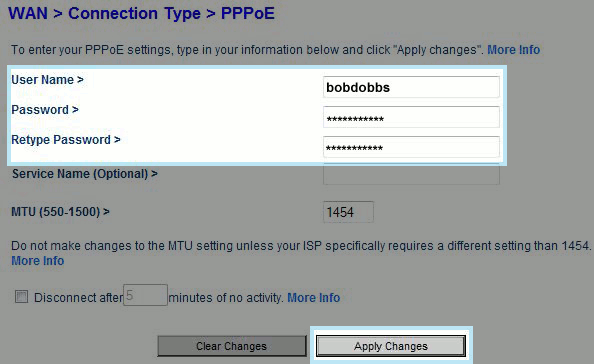
On the next screen, enter your XMission username. In the example below, we have used "bobdoobs." You would replace this with your own, unique XMission username. Where it asks for password, enter the corresponding password for your XMission username in both the "Password" and "Re-type Password" fields. The "Service Name" field can be left blank. Click "Apply Changes" near the bottom of the window.
After your router returns you to the setup screen, your Internet connection is ready for use!

