Zimbra Two-Factor Authentication
Contents
- 1 Two Factor Authentication or 2FA
- 2 How it works
- 3 2FA Video Tutorial
- 4 How to enable for the Modern interface
- 4.1 How to Install and Configure an OTP smartphone app
- 4.2 Finishing the configuration in the Web Client
- 4.3 Testing Zimbra Two-factor authentication
- 4.4 Trusted Devices
- 4.5 How to trust a computer/device
- 4.6 How to revoke trusted computer/device
- 4.7 Application Passcode
- 4.8 Revoking Application Codes
- 5 How to enable for the Classic interface
- 5.1 How to Install and Configure an OTP smartphone app
- 5.2 Finishing the configuration in the Web Client
- 5.3 Testing Zimbra Two-factor authentication
- 5.4 Trusted Devices
- 5.5 How to trust a computer/device
- 5.6 How to revoke trusted computer/device
- 5.7 Application Passcode
- 5.8 Revoking Application Codes
- 6 Known Issues
Two Factor Authentication or 2FA
All XMission Zimbra email accounts support a beneficial security practice known as two-factor authentication (aka, 2FA). This includes both base and premium accounts. Two-factor authentication provides mailbox protection by combining something you know (your password) and something have (your smartphone or USB-key, etc.) Once configured you will utilize the 2FA authentication with all devices and programs you use for accessing email. All major platforms support and encourage the use of 2FA.
XMission email customers can opt-out of password yearly password changes by implementing two-factor authentication (2FA).
Once set, your password will never expire unless you disable the advanced authentication.
NOTE: Should you disable 2FA, your password will automatically be set to expire within 30 days and you will have to update your password.
How it works
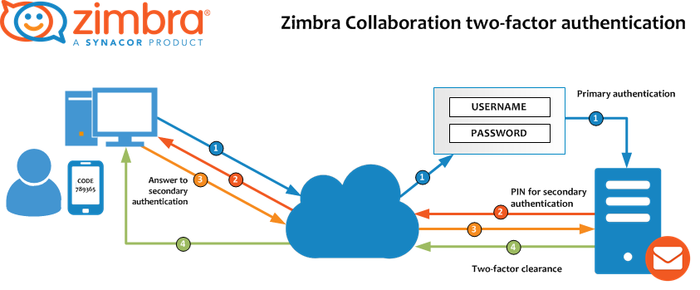
By using both a password and a PIN code from a trusted device, like a smartphone, 2FA adds layers of login security to the account. This helps with preventing brute-forcing passwords, or if your password gets leaked/exposed/found from another site, if you use the same password on multiple systems.
In simple terms, two-factor authentication prevents unauthorized users from accessing the system because they are very unlikely to have both variables to access the account. The password and PIN are needed to login. The PIN is sent to the mailbox owner's smartphone, through something like the Google Authenticator app. If either variable is missing, access is denied.
2FA Video Tutorial
Watch this official Zimbra.com video on configuring 2FA inside webmail: https://youtu.be/_eEwnnaEvMU
How to enable for the Modern interface
Two-factor authentication is included by default for all XMission Zimbra accounts. This means all base and premium accounts can use it. Two-factor has to be enabled from the online Zimbra webmail interface for all accounts.
- To enable 2FA go to: Settings > Accounts > Select "Primary" Account > Set up two-factor authentication
- The first step shows a brief description about two-step authentication. Simply click the "Setup two-step authentication ..." link to begin the configuration process.
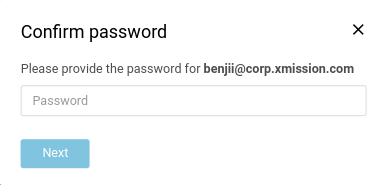
- The next step will ask for your current password. Enter and click on Next.
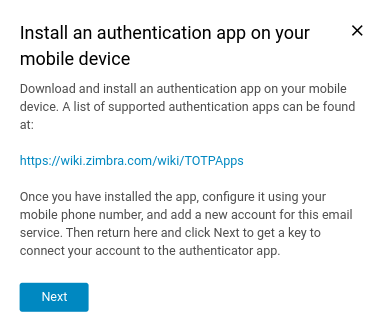
- Next it will establish the second component the user must have, (the "what you have" such as a smartphone application or usb key). The Two Factor authentication wizard will show a Wiki link with the OTP Apps Zimbra recommends. In this example we will be authenticating with your smartphone. (Reference this blog post on 2FA with a USB key.)
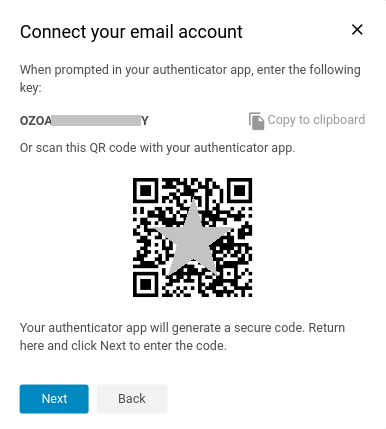
- Once you have installed the smartphone app, the Zimbra 2FA wizard will show a unique key that the you must enter in the Smartphone OTP App unless you use the QR code instead to connect the app.
How to Install and Configure an OTP smartphone app
In this example, we use Google authenticator, but please visit the Zimbra Wiki where you can find other options.
Google Authenticator
In the App Store or Play Store, search by Google authenticator, then click Install.
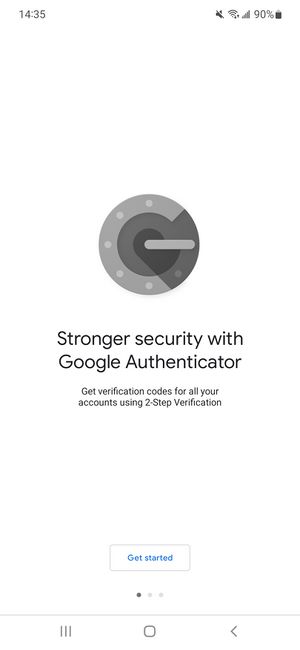
- Once the app is installed, open it, and click Get Started.
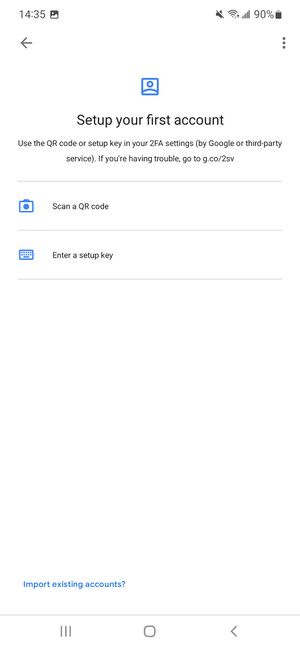
- The app will ask if you want to scan a QR code or enter the setup key.
- All done! Now the app is configured and will show a 6-digit code that changes after 15 seconds.
Finishing the configuration in the Web Client
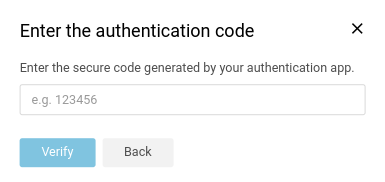
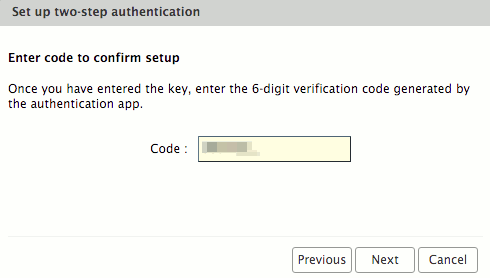
- Once the user has the App configured and showing the 6 digit code, the user can enter the Code in the wizard window and click Next.
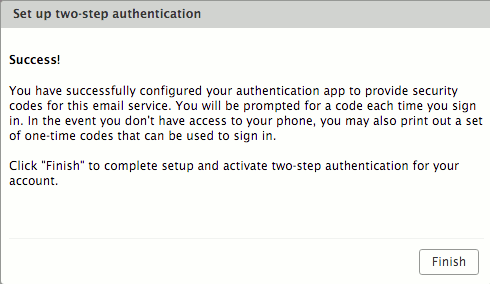
- The two-step authentication feature is now enabled, and the user will be prompted for a code in each new Browser, smartphone, computer, or app where he or she tries to access the account.
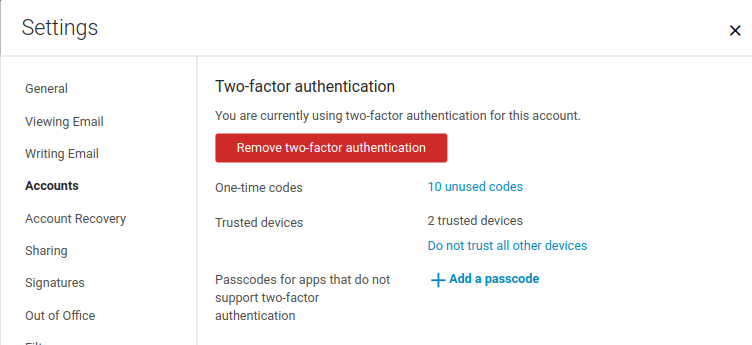
- In the users’ Settings > Accounts > Select "Primary" Account (if the Admin has enabled these options under the COS), the user will see more options like the one-time codes, Trusted devices, and Applications.
Testing Zimbra Two-factor authentication
We recommend testing from a new web browser session on another computer.
Time to test from another web browser, computer, smartphone, or the Zimbra Desktop application, you should successfully pass the two-factor authentication process.
For example on the Web Client: One-time Codes
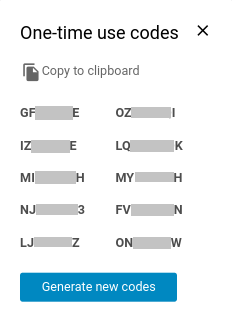
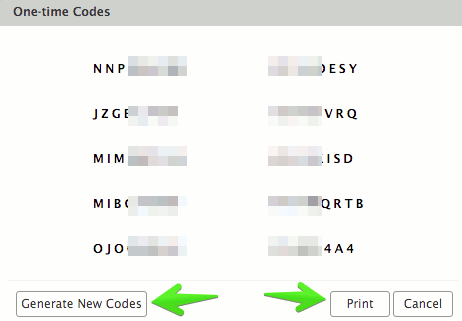
NOTE: With the two-factor authentication enabled, there may be a situation where you don't have the secondary device (phone/usb key). This is where Zimbra allows the use of one-time codes. This feature allows you to generate multiple codes to use in case of emergency. The total number of one-time codes can be configured by XMission. If you need these refreshed let us know.
From the Settings section of the Primary account for Two-Factor authentication you will find the "One-time Codes" option, click View to see your available codes. You must keep the codes secure (written somewhere, in another device, etc.). Just be certain it is an absolutely secure area where others won't find it.
Trusted Devices
Zimbra Web Client and Zimbra Touch Client can be configured as trusted devices during the second challenge stage of two-factor authentication. Once the computer/device is established as trusted you will only need to provide standard credentials, bypassing the two-factor code.
How to trust a computer/device
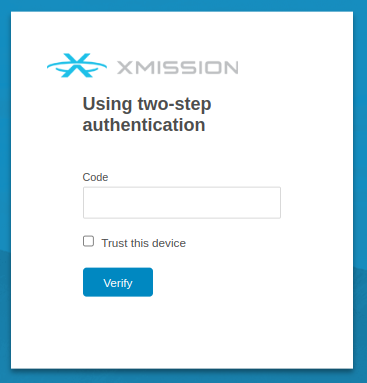
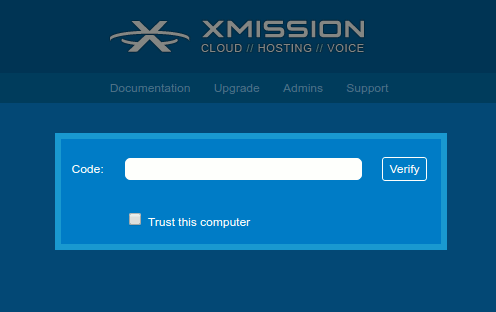
Once the user enters two-factor code in the login screen the user will have to select the check box Trust this computer and click Verify to trust the current computer/device. User can trust more than one computer/device.
How to revoke trusted computer/device
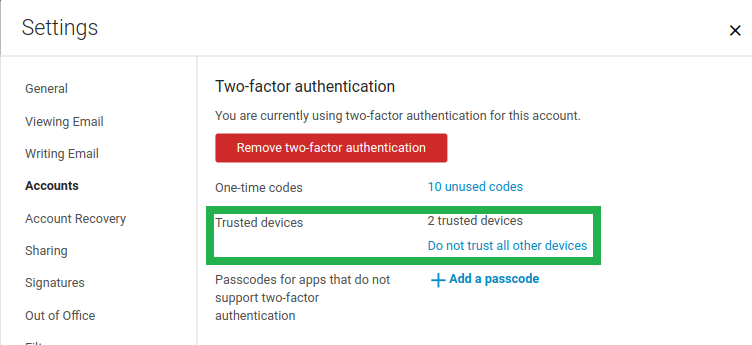
You can easily revoke a trusted computer/device in Settings > Accounts > Select "Primary" Account > Trusted Devices found in your Zimbra webmail. Revoke trust for any selected device by clicking "revoke this device" link or get rid of them all by clicking on "revoke all other devices" link.
Application Passcode
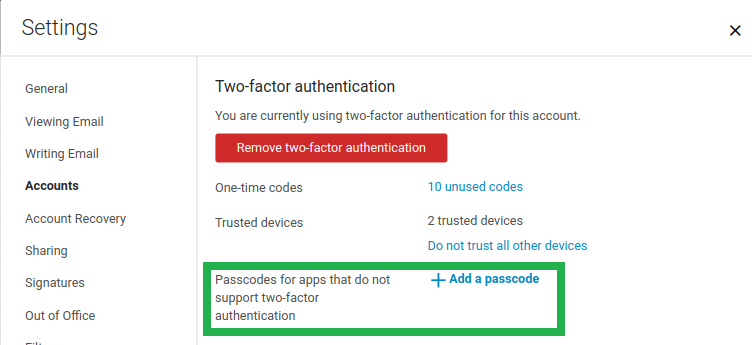
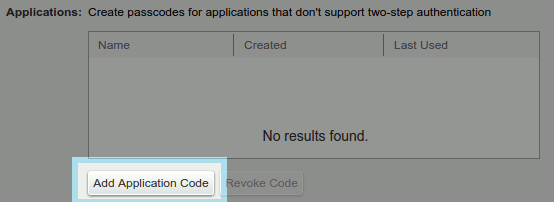
Clients such as IMAP or ActiveSync do not support the UI flow needed for TOTP authentication. This means that you will need to use the Application Code section to create codes for IMAP and ActiveSync use. For these users need to generate application passcode.
Application passcodes:
Randomly generated. Can be created by giving a label and revoked by their label. Changing account password will revoke all application passcodes.
How to create an application passcode
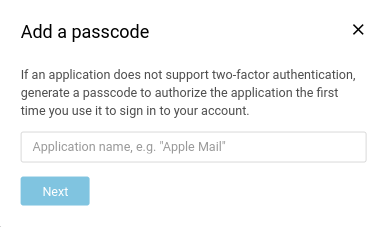
- Users can create an application passcode by navigating to Settings > Accounts > Select "Primary" Account and selecting "Add a passcode" button.
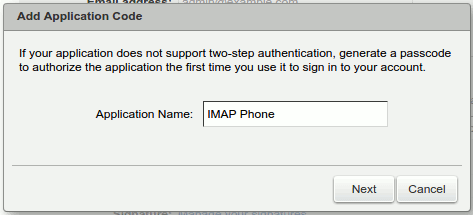
- Next enter the application name you desire in the "Add a passcode" dialog and click Next.
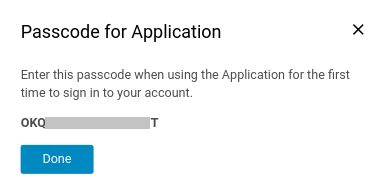
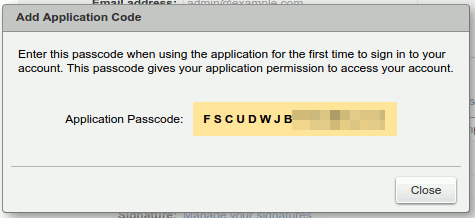
- Application passcode will get generated, then it can be used to sign in to your account from that device.
Revoking Application Codes
Once the user generates application passcode user can revoke it by navigating to Settings > Accounts > Select "Primary" Account in Zimbra Web Client. Users can revoke this application passcode after selecting the required name in the list.
How to enable for the Classic interface
Two-factor authentication is included by default for all XMission Zimbra accounts. This means all base and premium accounts can use it. Two-factor has to be enabled from the online Zimbra webmail interface for all accounts.
- To enable 2FA go to: Preferences > Accounts > Account Security, Setup two-step authentication
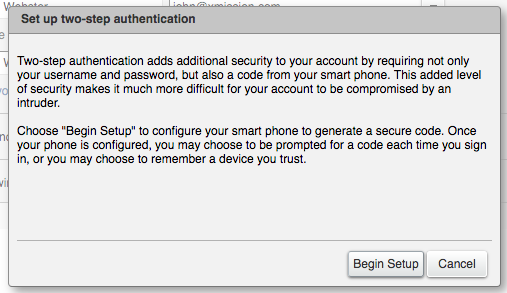
- Simply click the "Setup two-step authentication ..." link to begin the configuration process.
- The first step shows a brief description about two-step authentication. Next click on Begin Setup.
- The next step will ask for your current password. Enter and click on Next.
- Next it will establish the second component the user must have, (the "what you have" such as a smartphone application or usb key). The Two Factor authentication wizard will show a Wiki link with the OTP Apps Zimbra recommends. In this example we will be authenticating with your smartphone. (Reference this blog post on 2FA with a USB key.)
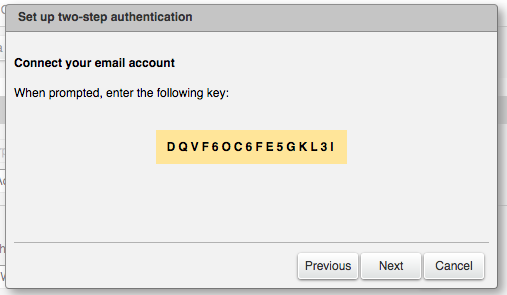
- Once you have installed the smartphone app, the Zimbra 2FA wizard will show a unique key that the you must enter in the Smartphone OTP App.
How to Install and Configure an OTP smartphone app
In this example, we use Google authenticator, but please visit the Zimbra Wiki where you can find other options.
Google Authenticator
In the App Store or Play Store, search by Google authenticator, then click Install.
- Once the app is installed, open it, and click Get Started.
- The app will ask if you want to scan a QR code or enter the setup key.
- All done! Now the app is configured and will show a 6-digit code that changes after 15 seconds.
Finishing the configuration in the Web Client
- Once the user has the App configured and showing the 6 digit code, the user can enter the Code in the wizard window and click Next.
- The two-step authentication feature is now enabled, and the user will be prompted for a code in each new Browser, smartphone, computer, or app where he or she tries to access the account.
- In the users’ Preferences > Accounts > Account Security (if the Admin has enabled these options under the COS), the user will see more options like the one-time codes, Trusted devices, and Applications.
Testing Zimbra Two-factor authentication
We recommend testing from a new web browser session on another computer.
Time to test from another web browser, computer, smartphone, or the Zimbra Desktop application, you should successfully pass the two-factor authentication process.
For example on the Web Client: One-time Codes
NOTE: With the two-factor authentication enabled, there may be a situation where you don't have the secondary device (phone/usb key). This is where Zimbra allows the use of one-time codes. This feature allows you to generate multiple codes to use in case of emergency. The total number of one-time codes can be configured by XMission. If you need these refreshed let us know.
From the Preferences settings for 2FA you will find "One-time Codes" option, click View to see your available codes. You must keep the codes secure (written somewhere, in another device, etc.). Just be certain it is an absolutely secure area where others won't find it.
Trusted Devices
Zimbra Web Client and Zimbra Touch Client can be configured as trusted devices during the second challenge stage of two-factor authentication. Once the computer/device is established as trusted you will only need to provide standard credentials, bypassing the two-factor code.
How to trust a computer/device
Once the user enters two-factor code in the login screen the user will have to select the check box Trust this computer and click Verify to trust the current computer/device. User can trust more than one computer/device.
How to revoke trusted computer/device
You can easily revoke a trusted computer/device in Preferences > Accounts > Trusted Devices found in your Zimbra webmail. Revoke trust for any selected device by clicking "revoke this device" link or get rid of them all by clicking on "revoke all other devices" link.
Application Passcode
Clients such as IMAP or ActiveSync do not support the UI flow needed for TOTP authentication. This means that you will need to use the Application Code section to create codes for IMAP and ActiveSync use. For these users need to generate application passcode.
Application passcodes:
Randomly generated. Can be created by giving a label and revoked by their label. Changing account password will revoke all application passcodes.
How to create an application passcode
- Users can create an application passcode by navigating to Preferences > Accounts > Applications and selecting Add Application Code button.
- Next enter the application name you desire in the "Add Application Code" dialog and click Next.
- Application passcode will get generated, then it can be used to sign in to your account from that device.
Revoking Application Codes
Once the user generates application passcode user can revoke it by navigating to Preferences > Accounts > Applications in Zimbra Web Client. Users can revoke this application passcode after selecting the required name in the list.
Known Issues
Zimbra bugs
Bug 103824 {AUTH} Provide 2FA configuration capability in ZCO
Bug 104144 2fa:ReferenceError: AjxDebug is not defined when zimbraFeatureTwoFactorAuthRequired in multinode rolling upgrade environment
Bug 104648 allow clearing 2FA data from admin console
Bug 105678 Application specific password entry should be purged when 2FA disabled from Admin Console
Notes
Disabling two-factor authentication using Admin console does not clear user's two-factor data. Admin can disable user's two-factor authentication in case user is facing issues with authentication using TOTP/scratch codes. Re-enabling user's two-factor authentication using Admin console after user's problem has got resolved will allow user to use two-factor authentication. In future, Bug 104648 will allow Admin to clear user's two-factor data.
Third party issues
Issue - Mail client issues with application passcode
Scenario: User's zimbra account is configured on EWS Apple Mail and Thunderbird (IMAP/POP3). User enables 2FA using Web client, adds application passcodes for Apple Mail and Thunderbird applications.
Expected behavior: Both clients (Apple Mail) and Thunderbird should prompt for new password, user if enters application passcode, authentication should succeed.
Current behavior:
EWS Apple Mail app complains about connection failure and provides option to enter new password, wherein entering correct application passcode does not work. Only option is to Edit Account and provide new password, which works correctly.
Thunderbird (IMAP/POP3) prompts for new password after some time (after few minutes or sometimes after restarting client)
Failed Login Attempts
Please note, use of Two-Factor Authentication (2FA) does not prevent account suspension due to exceeding failed login attempts limits.
