Remote Desktop
Remote desktop is a technology that allows you to access and control another computer from a different location, as if you were sitting right in front of it. Imagine being able to use your home computer while you're at work or helping a friend fix their computer without physically being there. Through an internet connection, you can see the other computer's screen, move the mouse, type on the keyboard, and even transfer files, making it a convenient tool for remote work, tech support, or accessing files from afar.
While there are many remote desktop applications, including some you may have heard of like TeamViewer and AnyDesk, XMission uses Rustdesk.
Below you will find instructions on how to install Rustdesk, either on your own as you may want to use it on your own to help troubleshooting your friends or family computer issue.
Install on Mac
Below are the instructions on how to install RustDesk on the latest version of MacOS (Sequoia 15.3)
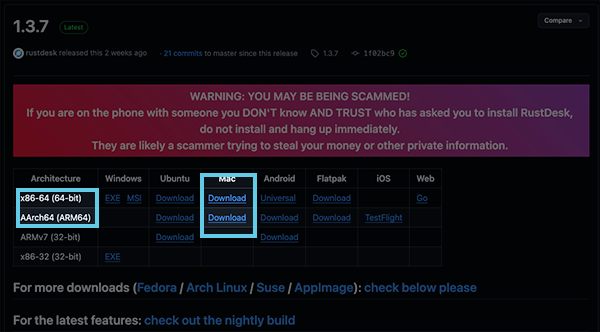
- Visit rustdesk.com you will see the Download button - click on that.
- Next you will choose which file to download based on the type of mac that you have either x86-64 (Intel Macs) or AArch64 (M1 or higher)
- Click on Download for the version you need.
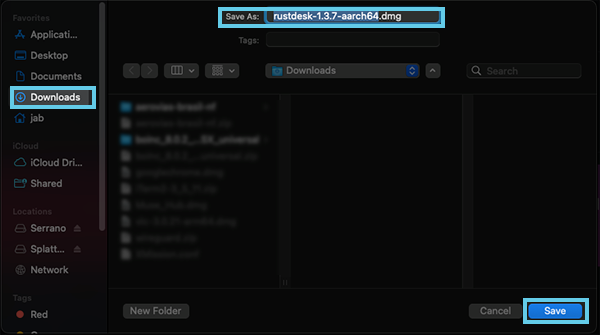
- When the dialog box opens, choose your Downloads folder on the left then click on Save
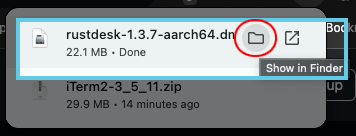
- Now we need to find the file you downloaded. Depending on your browser, click the download history icon and select the folder next to your download to Show in Finder
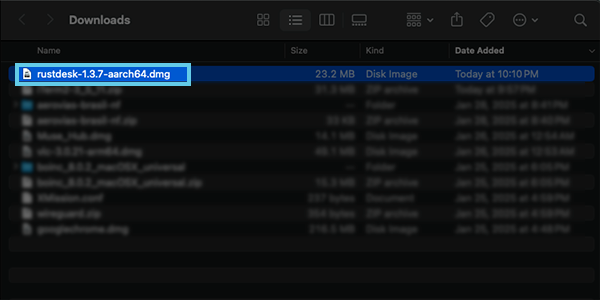
- This should open up your finder directly to the downloads folder. When you see the file ie rustdesk-1.3.7-aarch64.dmg you can double click on this file to launch it.
- Next simply click and drag the RustDesk icon to the Applications folder and let go.
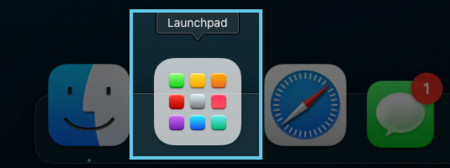
- NOTE: You may not see anything happen, and that is just fine. Next we will open your Launchpad.
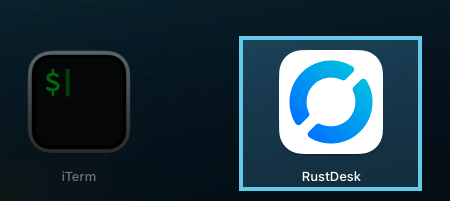
- Then find RustDesk and click on it.
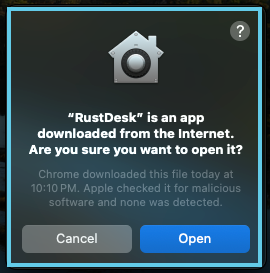
- You will see a dialog box open with the following:
- Simply click on Open
Congratulations we have installed RustDesk. However before we can allow anyone to connect your desktop we have to setup some permissions. Follow the instructions below to get the permissions setup properly.
Granting Permissions
On the initial install of RustDesk you will need to provide your computer with permissions to allow the remote desktop to happen.
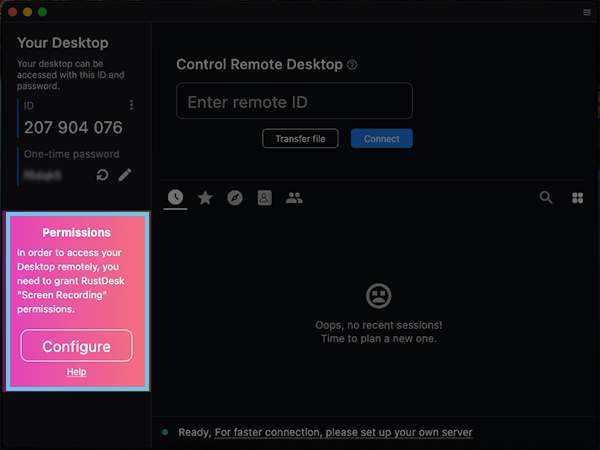
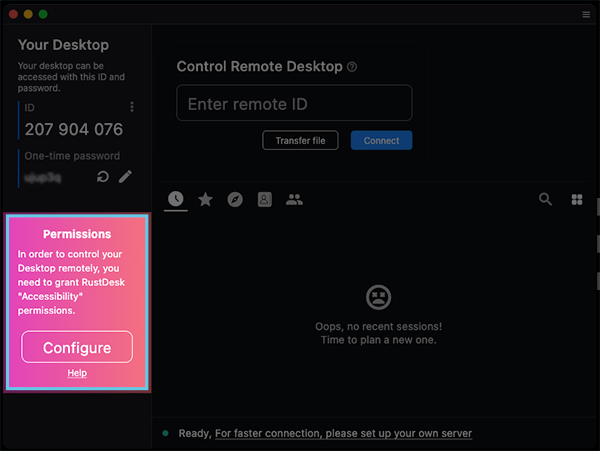
After you install RustDesk you may see the following:
- Click on Configure
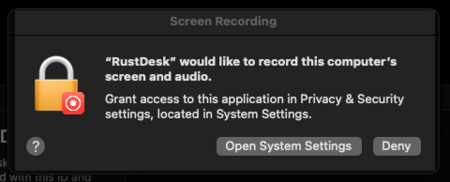
- A dialog box appears - click on Open System Settings
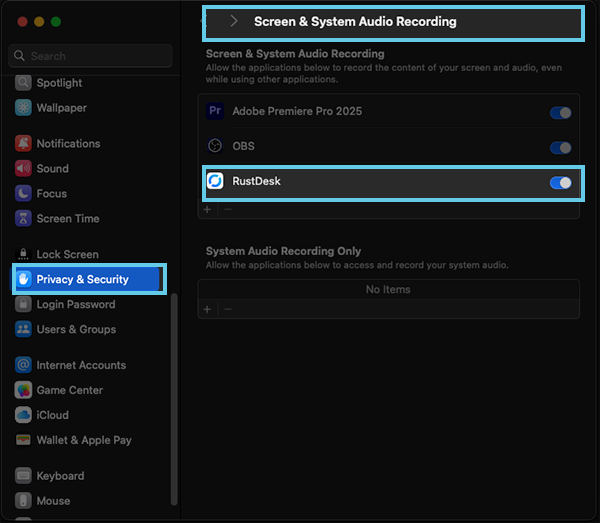
- This will open your System Preferences. Under Privacy & Security > Screen & System Audio Recording make sure that RustDesk is turned on.
|
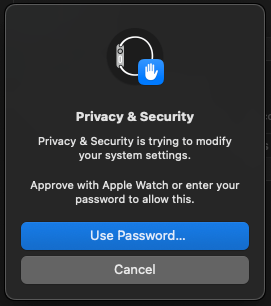
* After you turn this on you may get a dialog box that opens up and asks you to Approve this change. Click on Use Password and enter your computer password. |
|
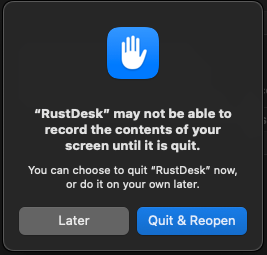
* Next another dialog box will appear stating that you will need to Quit & Reopen go ahead and press this button to quit out of RustDesk - then you will need to reopen it. |
We are almost done. Just a couple more steps.
- Next you may see another Permissions in red after relaunching RustDesk:
- Click on Configure this should open your System Preference once again
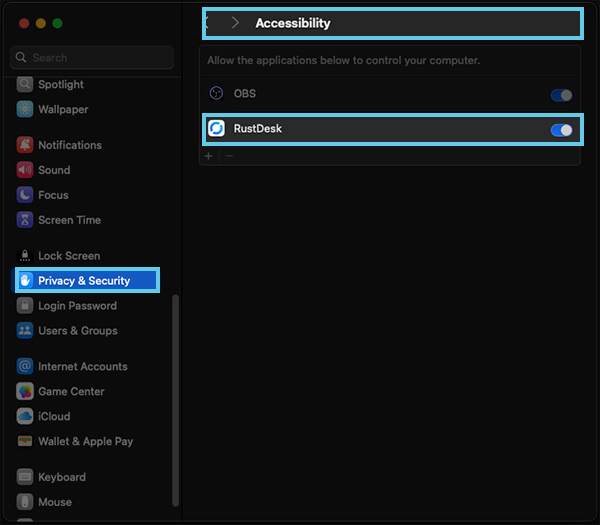
- Be sure to turn on RustDesk under Accessibility. This will again prompt you for your password. Just like before Enter your computer password.
Finally you are now ready to start sharing your screen.

