Webmail Spam Filtering
Filtering with XMission's Webmail
Your Webmail filtering system is very robust and capable of many possibilities. This guide will cover the basics to help you get started in creating your own filtering system to combat spam.
Changing your Spam Filtering
- 1) Login to your Webmail account at webmail.xmission.com with your XMission username and password.
- 2) Hover your cursor over the "Mail" tab and click "Filters"
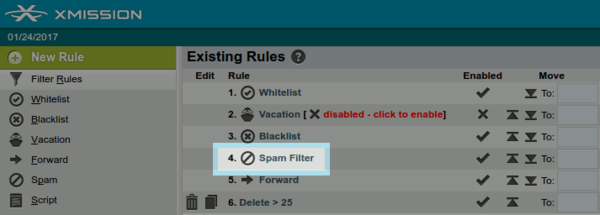
- 3) Navigate to the rule named "Spam Filter"
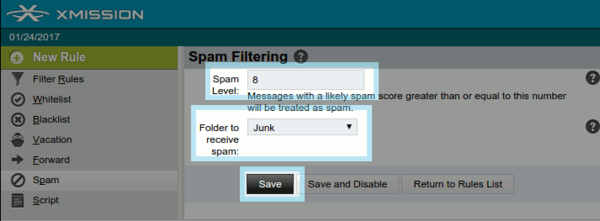
- 4) Increase or lower the spam filtering level. The higher the number, the more loose while the lower the number is more strict.
- 5) Tell the filter which folder to send the unwanted emails to, like "Junk"
- 6) Click save
Whitelisting and Blacklisting
There are a few different ways to go about whitelisting and blacklisting in your XMission webmail. Let's start with the most simple way.
- 1) Login to your Webmail account at webmail.xmission.com with your XMission username and password.
- 2) In your Inbox, check the box from the address you are wanting to whitelist/blacklist
- 3) Click "Other" in the top right corner and choose "Whitelist" or "Blacklist"
If you want to manage your Whitelist or Blacklist in bulk, you can follow these simple steps.
- 1) Login to your Webmail account at webmail.xmission.com with your XMission username and password.
- 2) Hover your cursor over the "Mail" tab and click "Filters"
- 3) Navigate to the rule named "Whitelist/Blacklist"


