VPS Manager
Redirect to:
Contents
Overview
VPS manager for XMission Managed Cloud customers gives you the ability to view and edit a number of features, including your domains and servers.
Login
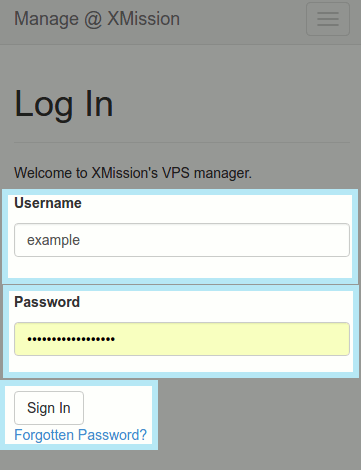
Login at https://manage.xmission.com/.
VPS Manager Tab
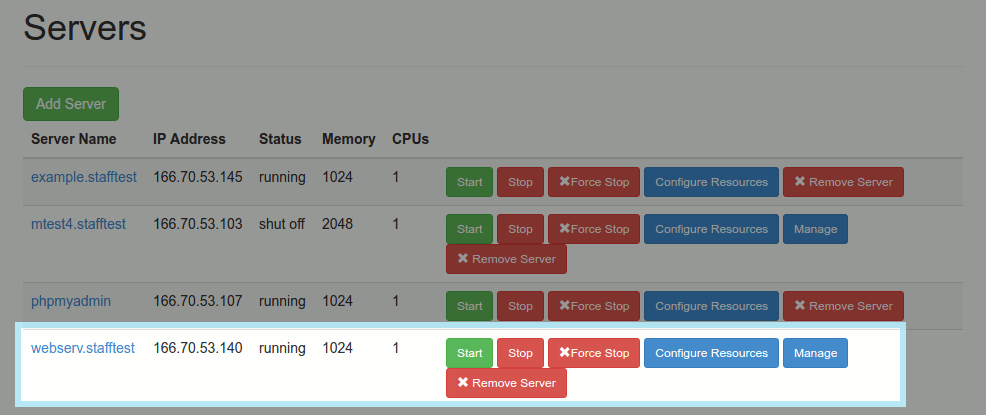
- Inside your VPS manager, you can start/stop/configure/manage resources for their server from the "VPS MANAGER" tab.
- Start will start the server
- Stop will gracefully stop the server
- Force Stop will send a kill command and ungracefully stop the server
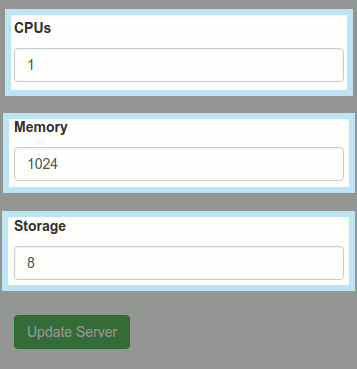
- Configure Resources allows you to configure the server's CPUs, Memory, and Storage
- Manage enables the user to change their "websites" password, PHP settings, Server Resources, SSL certs, customer created FTP users, managing Databases, uploading SSL certs, and removing the website from their VPS manager
NOTES:
- All Cloud servers come with the user "websites" which is used for FTP, SFTP, and SSH. This user is not jailed.
- All other users that are created are jailed and must connect over SFTP.
- IMPORTANT: SFTP is ALWAYS the preferred connection method
Server Resources
- You can configure the servers CPUs, Memory, and Storage using the Configure Resources button.
- Note: Adjusting these resources may require server reboot before the new settings take place.
Manage
Under the manage option for the desired server, you can edit PHP Settings, FTP users, and Databases.
Websites
Website creation enables customers to add their domains to manage the websites Aliases, FTP Users, MySQL Databases, SSL certificates, and even remove the website from their VPS manager. Under the websites tab you can:
- Change the user "websites" password
- Manage customer created FTP users and their passwords
- Managing Databases
- Upload SSL certs
- Remove the website from the VPS manager.
Create Website
- Login
- Navigate to VPS Manager Tab
- Click the blue "Manage" button
- Click the green "Create Website" button
- Enter the Domain Name followed by clicking "Create Virtual Host"
Domain Aliases
- Login
- Navigate to VPS Manager Tab
- Click the blue "Manage" button
- Under "Websites" then "Domain Aliases" choose "Manage Aliases"
- You can "Add Domain Alias" to create a new one or click the red "Remove Domain Alias" button to the right. There is currently no "Edit Alias", so they need to be removed/re-added
FTP Accounts
NOTE: FTP Users that are created currently do not have password requirements, but will in the future -- however they should follow our password guidelines located here https://xmission.com/password
- Login
- Navigate to the "VPS Manager" Tab
- Click the blue "Manage" button
- Under "Websites" then "FTP Accounts" choose "Manage FTP Users"
- Choose the green "Add FTP User" button to create a new FTP user
- Enter Username / Password / Confirm Password
- To manage an existing FTP User you can either "Change Password" or "Remove User"
NOTES:
- All Cloud servers come with the user "websites" which is used for FTP, SFTP, and SSH. This user is not jailed.
- All other users that are created are jailed and must connect over SFTP.
- IMPORTANT: SFTP is ALWAYS the preferred connection method
Manage Databases
- Login
- Navigate to the "VPS Manager" Tab
- Click the blue "Manage" button
- Under "Websites" then "MySQL Databases" choose the blue "Manage Databases" button
- Choose the green "Add MySQL DB" button to create a new database
- Enter Username / Database Name / Password/ Confirm Password
- To manage an existing database you can either "Change Password" or "Remove DB"
SSL
- Login
- Navigate to the "VPS Manager" Tab
- Click the blue "Manage" button
- Under "Websites" then "SSL" choose the yellow button to modify any existing SSL certificates. If none exist yet refer to the "SSL Certificates" option
- Only HTTPS is available. All traffic to HTTP will automatically be redirected to HTTPS.
Remove Website
- Login
- Navigate to the "VPS Manager" Tab
- Click the blue "Manage" button
- Under "Websites" then "Remove Site" choose the red "Remove Website" button to remove an existing web site
Domain Redirects
- Login
- Navigate to the "VPS Manager" Tab
- Click the blue "Manage" button
- Navigate to "Domain Redirects" Tab
- Click the green "Add Domain Redirect" button
- Enter the domain that will be redirected to the new location under the "Redirect From" field
- Enter the new destination for the redirect site in the "Redirected To' field
Nginx Proxy
By default our Cloud servers run Apache, but can allow Nginx to run in front of apache to help with RAM usage, and sometimes speed up the website. In almost all cases it will not cause any issues with your site, but if something isn't working as expected you can enable or disable the Nginx Proxy from this page.
- Login
- Navigate to the "VPS Manager" Tab
- Click the blue "Manage" button
- Click the "Nginx Proxy" Tab
- Click "Enable/Disable Nginx Proxy"
PHP Settings
- Login
- Navigate to the "VPS Manager" Tab
- Click the blue "Manage" button
- Click the "PHP Settings" Tab
- Click the green "Add PHP Setting" button
- Enter the username in the "Username" field for the PHP Key
- Enter the value in the "Value" field
- Click the white "Create" button
Server Resources
- Login
- Navigate to the "VPS Manager" Tab
- Modify the Server Resources
SSL Certificates
1. Login
2. Navigate to the VPS Manager Tab
3. Click the blue "Manage" button
4. Click "SSL Certificates" tab:
Websites | Wordpress | Domain Redirects | NGINX Proxy | PHP Settings | Server Resources | SSL Certificates | PhpMyAdmin
5. Click "Add SSL Cert"
6. Name SSL Cert and enter Private Key/CSR then click "Add"
7. Navigate back to the "Websites" tab:
Websites | Wordpress | Domain Redirects | NGINX Proxy | PHP Settings | Server Resources | SSL Certificates | PhpMyAdmin
8. Find the Domain Name that you recently added your SSL Certificate for, and under the SSL Column click the "SSL" button.
9. Under the drop down box, choose your recently added SSL Certificate.
10. Choose between HTTP and HTTPS traffic, or just HTTPS traffic.
11. Finish by clicking "Save SSL Settings for your domain".
DNS Tab
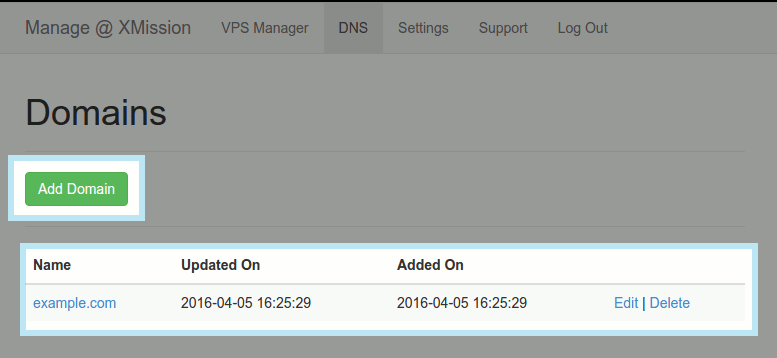
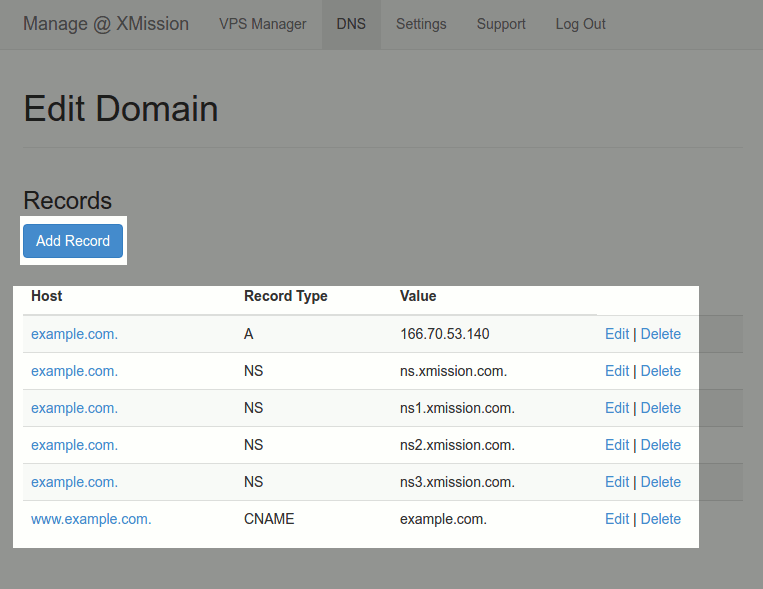
Cloud customers can manage their own DNS and domains from the "DNS" tab. Here, they can add domains as well as Edit and Delete.
- Login
- Navigate to the "DNS" Tab
- Choose the green "Add Domain" button to add a new domain
- To "Edit" or "Delete" an existing domain, choose those options to the right of the listed domain
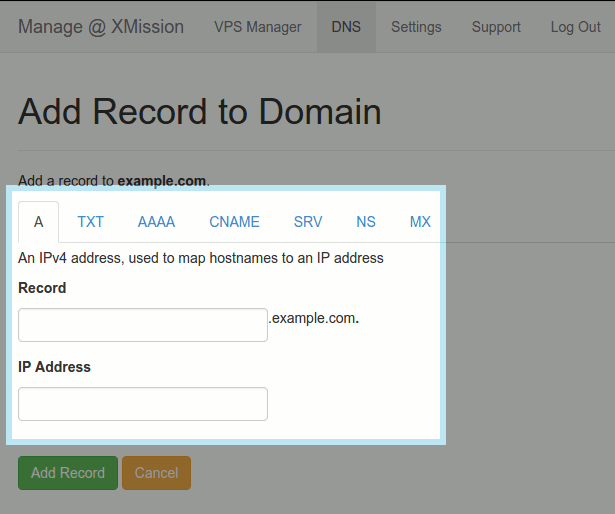
- A Record = An IPv4 address, used to map hostnames to an IP address. Where the content of the website is located at.
- TXT Record = Arbitrary text in a DNS record. An example would be an SPF record.
- AAAA Record = An IPv6 address, used to map hostnames to an IP address. Just like the A record, but for IPv6 IP addresses.
- CNAME = Alias of one name to another. This can be done when aliasing "www.<domain.tld>" to the non www "<domain.tld>".
- SRV Record = Generalized service location record. _service._proto.name. TTL class SRV priority weight port target.
- NS = Delegates a DNS zone to use the given authoritative name servers. How the Internet will find the domains DNS.
- MX = Maps a domain name to a list of message transfer agents. Where your email will be routed to.
Settings Tab
"Settings" tab provides the ability to enable "Two Factor Authentication" for your XMission account
- Login
- Navigate to the "Settings" Tab
- Choose "Two Factor Authentication"
- Choose "Google Authenticator," which is the preferred option, or "SMS (Text Messages)"
- Complete the steps as outlined
Support Tab
This section provides information about how to get support from XMission
Logs & Troubleshooting
- Error logs can be found at /var/log/apache2/error.log
tail -100 /var/log/apache2/error.log
- Access logs can be found at /var/log/apache2/access.log
tail -100 /var/log/apache2/access.log
