Difference between revisions of "AdAware"
m |
|||
| (One intermediate revision by one other user not shown) | |||
| Line 1: | Line 1: | ||
| + | {{archived}} | ||
| + | |||
==Installation== | ==Installation== | ||
#Click [http://www.lavasoft.com/support/download/#free here] to go to the Ad-Aware download page. | #Click [http://www.lavasoft.com/support/download/#free here] to go to the Ad-Aware download page. | ||
| − | #: | + | #:[[Image:ad-aware1.jpg]] |
#Click the Ad-Aware 6 link under Full Install. This will take you to the download.com download site. Click the "Download Now" link to begin the download. | #Click the Ad-Aware 6 link under Full Install. This will take you to the download.com download site. Click the "Download Now" link to begin the download. | ||
| − | #: | + | #:[[Image:ad-aware2.jpg]] |
#When prompted, click <span class="button">Save</span> to save the file to your computer. Next you will be asked where you want to save the file. The easiest place to save it is your Desktop. Click the drop down box next to "Save In" and select "Desktop". | #When prompted, click <span class="button">Save</span> to save the file to your computer. Next you will be asked where you want to save the file. The easiest place to save it is your Desktop. Click the drop down box next to "Save In" and select "Desktop". | ||
#Click <span class="button">Save</span>. | #Click <span class="button">Save</span>. | ||
#Once the Download is finished, double click on the Ad-Aware file that was downloaded to your desktop to begin installing Ad-Aware. | #Once the Download is finished, double click on the Ad-Aware file that was downloaded to your desktop to begin installing Ad-Aware. | ||
| − | #: | + | #:[[Image:ad-aware4.jpg]] |
#After double-clicking, the installation setup will begin. Click <span class="button">Next</span> | #After double-clicking, the installation setup will begin. Click <span class="button">Next</span> | ||
| − | #: | + | #:[[Image:ad-aware6.jpg]] |
#Read the License Agreement, then click <span class="button">Next</span>. | #Read the License Agreement, then click <span class="button">Next</span>. | ||
| − | #: | + | #:[[Image:ad-aware8.jpg]] |
#Select where you want to install the program, then click <span class="button">Next</span> | #Select where you want to install the program, then click <span class="button">Next</span> | ||
| − | #: | + | #:[[Image:ad-aware7.jpg]] |
#Select the components you wish to install, then click <span class="button">Next</span>. | #Select the components you wish to install, then click <span class="button">Next</span>. | ||
| − | #: | + | #:[[Image:ad-aware10.jpg]] |
#Click <span class="button">Next</span> to install Ad-Aware. | #Click <span class="button">Next</span> to install Ad-Aware. | ||
| − | #: | + | #:[[Image:ad-aware11.jpg]] |
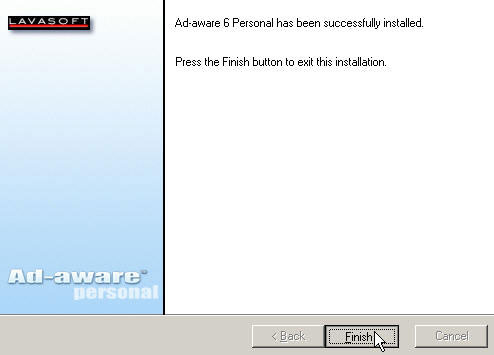
| − | #Click <span class="button">Finish</span> to complete and exit the Installation. | + | #Click <span class="button">Finish</span> to complete and exit the Installation. [[Image:ad-aware12.jpg]]</ol> |
| Line 27: | Line 29: | ||
#Open Ad-Aware and click the "Check for updates now" link. | #Open Ad-Aware and click the "Check for updates now" link. | ||
| − | #: | + | #:[[Image:ad-aware23.jpg]] |
#Next, click <span class="button">Connect</span> to check for new reference files. | #Next, click <span class="button">Connect</span> to check for new reference files. | ||
| − | #: | + | #:[[Image:ad-aware24.jpg]] |
#If there is a new update file, click <span class="button">Ok</span> to download and install the file. | #If there is a new update file, click <span class="button">Ok</span> to download and install the file. | ||
#When that is done, click <span class="button">Finish</span>. If there is no update, click <span class="button">Ok</span> then <span class="button">Finish</span>. | #When that is done, click <span class="button">Finish</span>. If there is no update, click <span class="button">Ok</span> then <span class="button">Finish</span>. | ||
| − | #: | + | #:[[Image:ad-aware25.jpg]] |
| − | #: | + | #:[[Image:ad-aware26.jpg]] |
This will complete the Ad-Aware update and you can continue with your system scan. | This will complete the Ad-Aware update and you can continue with your system scan. | ||
| Line 46: | Line 48: | ||
#Double click the Ad-Aware icon on your desktop to launch the program | #Double click the Ad-Aware icon on your desktop to launch the program | ||
#Click on the Gear icon at the top of the start screen to access the preferences/setting window. | #Click on the Gear icon at the top of the start screen to access the preferences/setting window. | ||
| − | #: | + | #:[[Image:ad-aware13.jpg]] |
#Click the <span class="button">Scanning</span> button. | #Click the <span class="button">Scanning</span> button. | ||
#Under the ''Drives & Folders'' section, mark ''Scan within Archives'' with a green check. | #Under the ''Drives & Folders'' section, mark ''Scan within Archives'' with a green check. | ||
#Under the "Memory & Registry" section, mark each option with a green check. | #Under the "Memory & Registry" section, mark each option with a green check. | ||
| − | #: | + | #:[[Image:ad-aware14.jpg]] |
#Click <span class="button">Click here to select Drives + folders</span> and place a check in the boxes next to your installed hard drives. | #Click <span class="button">Click here to select Drives + folders</span> and place a check in the boxes next to your installed hard drives. | ||
#Click <span class="button">Proceed</span> to continue. | #Click <span class="button">Proceed</span> to continue. | ||
| − | #: | + | #:[[Image:ad-aware15.jpg]] |
#Next, click <span class="button">Advanced</span>. Under ''Log-file Detail Level'', mark each option with a green check. | #Next, click <span class="button">Advanced</span>. Under ''Log-file Detail Level'', mark each option with a green check. | ||
| − | #: | + | #:[[Image:ad-aware16.jpg]] |
#Next, click <span class="button">Tweak</span>. | #Next, click <span class="button">Tweak</span>. | ||
#Click the <span class="button">+</span> symbol next to Scanning Engine and mark ''Unload recognized processes during scanning'', ''Include basic Ad-Aware settings in logfile'', and ''Include additional Ad-Aware settings in logfile'' with a green check. | #Click the <span class="button">+</span> symbol next to Scanning Engine and mark ''Unload recognized processes during scanning'', ''Include basic Ad-Aware settings in logfile'', and ''Include additional Ad-Aware settings in logfile'' with a green check. | ||
#Click the <span class="button">+</span> symbol next to ''Cleaning Engin'' and mark ''Automatically try to unregister objects prior to deletion'' and ''Let Windows remove files in use after reboot'' with a green check. | #Click the <span class="button">+</span> symbol next to ''Cleaning Engin'' and mark ''Automatically try to unregister objects prior to deletion'' and ''Let Windows remove files in use after reboot'' with a green check. | ||
| − | #: | + | #:[[Image:ad-aware17.jpg]] |
| − | #: | + | #:[[Image:ad-aware18.jpg]] |
#Click on <span class="button">Proceed</span> to save these settings. | #Click on <span class="button">Proceed</span> to save these settings. | ||
#Click <span class="button">Scan Now</span> Select ''Use custom scanning options'' | #Click <span class="button">Scan Now</span> Select ''Use custom scanning options'' | ||
#Click <span class="button">Next</span> to begin the scan. This may take several minutes to complete. | #Click <span class="button">Next</span> to begin the scan. This may take several minutes to complete. | ||
| − | #: | + | #:[[Image:ad-aware19.jpg]] |
#When the scan is finished you'll see a summary of how many objects were found, click <span class="button">Next</span> to select and remove the objects. | #When the scan is finished you'll see a summary of how many objects were found, click <span class="button">Next</span> to select and remove the objects. | ||
| − | #: | + | #:[[Image:ad-aware20.jpg]] |
#Look through the list of objects found, most likely you're going to want to delete everything you see here but just look it over to be sure. To select all of the objects at once, right click in the first checkbox in the list and click <span class="button">Select all</span>. This will select all of the objects, at this time if there is anything you don't want to delete, uncheck it and click <span class="button">Next</span>. | #Look through the list of objects found, most likely you're going to want to delete everything you see here but just look it over to be sure. To select all of the objects at once, right click in the first checkbox in the list and click <span class="button">Select all</span>. This will select all of the objects, at this time if there is anything you don't want to delete, uncheck it and click <span class="button">Next</span>. | ||
#Click <span class="button">Yes</span> to confirm deletion when prompted. | #Click <span class="button">Yes</span> to confirm deletion when prompted. | ||
| − | #: | + | #:[[Image:ad-aware21.jpg]] |
| − | #: | + | #:[[Image:ad-aware22.jpg]] |
This will complete your Custom scan. Remember to run Ad-Aware on a weekly basis using the Smart system-scan option and stay regular with updates. For more information and support on Ad-Aware, you can visit their website by clicking [http://www.lavasoft.com here]. | This will complete your Custom scan. Remember to run Ad-Aware on a weekly basis using the Smart system-scan option and stay regular with updates. For more information and support on Ad-Aware, you can visit their website by clicking [http://www.lavasoft.com here]. | ||
| − | |||
[[Category:Security|AdAware]] | [[Category:Security|AdAware]] | ||
Latest revision as of 15:43, 14 January 2020
![]()
Installation
- Click here to go to the Ad-Aware download page.
- Click the Ad-Aware 6 link under Full Install. This will take you to the download.com download site. Click the "Download Now" link to begin the download.
- When prompted, click to save the file to your computer. Next you will be asked where you want to save the file. The easiest place to save it is your Desktop. Click the drop down box next to "Save In" and select "Desktop".
- Click .
- Once the Download is finished, double click on the Ad-Aware file that was downloaded to your desktop to begin installing Ad-Aware.
- After double-clicking, the installation setup will begin. Click
- Read the License Agreement, then click .
- Select where you want to install the program, then click
- Select the components you wish to install, then click .
- Click to install Ad-Aware.
- Click to complete and exit the Installation.
 </ol>
</ol>


Updating
It's important that you stay current with Ad-Aware updates to keep your computer clean of adware and spyware. It's recommended that you run the update before each scan to be sure you have the latest reference list available. Follow the instructions below to update Ad-Aware.
- Open Ad-Aware and click the "Check for updates now" link.
- Next, click to check for new reference files.
- If there is a new update file, click to download and install the file.
- When that is done, click . If there is no update, click then .


This will complete the Ad-Aware update and you can continue with your system scan.
Configuration and scanning
Ad-Aware has two scanning options: Smart system-scan and Custom. Smart system-scan is faster, but not as comprehensive as Custom. Smart system-scan is satisfactory for routine use, but it is recommended that your first scan be a Custom scan. After a thorough Custom scan, the capabilities within Smart system-scan will be sufficient for every day use.Ad-Aware comes pre-configured with default options that are already on. The options that are on will be marked with a green check, while those that are off are maked with a red x. The following are changes that we recommend you make prepare for your first Custom scan.
- Double click the Ad-Aware icon on your desktop to launch the program
- Click on the Gear icon at the top of the start screen to access the preferences/setting window.
- Click the button.
- Under the Drives & Folders section, mark Scan within Archives with a green check.
- Under the "Memory & Registry" section, mark each option with a green check.
- Click and place a check in the boxes next to your installed hard drives.
- Click to continue.
- Next, click . Under Log-file Detail Level, mark each option with a green check.
- Next, click .
- Click the symbol next to Scanning Engine and mark Unload recognized processes during scanning, Include basic Ad-Aware settings in logfile, and Include additional Ad-Aware settings in logfile with a green check.
- Click the symbol next to Cleaning Engin and mark Automatically try to unregister objects prior to deletion and Let Windows remove files in use after reboot with a green check.
- Click on to save these settings.
- Click Select Use custom scanning options
- Click to begin the scan. This may take several minutes to complete.
- When the scan is finished you'll see a summary of how many objects were found, click to select and remove the objects.
- Look through the list of objects found, most likely you're going to want to delete everything you see here but just look it over to be sure. To select all of the objects at once, right click in the first checkbox in the list and click . This will select all of the objects, at this time if there is anything you don't want to delete, uncheck it and click .
- Click to confirm deletion when prompted.


This will complete your Custom scan. Remember to run Ad-Aware on a weekly basis using the Smart system-scan option and stay regular with updates. For more information and support on Ad-Aware, you can visit their website by clicking here.