Difference between revisions of "Hosted Email:MacMail 7.x"
From XMission Wiki
| Line 37: | Line 37: | ||
* [[Hosted Email:Calendar Sync OSX| Calendar Sync]] | * [[Hosted Email:Calendar Sync OSX| Calendar Sync]] | ||
* [[Hosted Email:Contacts Sync OSX| Contacts Sync]] | * [[Hosted Email:Contacts Sync OSX| Contacts Sync]] | ||
| + | |||
| + | [[Category:Client Email Configuration|Zimbra|MacMail 7.x]] | ||
| + | [[Category:Zimbra|MacMail 7.x]] | ||
Revision as of 16:11, 10 November 2016
Configure Mac Mail 7.X for Zimbra
- Click on APPLE ICON in the top menu bar
- Next choose SYSTEM PREFERENCES
- Choose INTERNET ACCOUNTS
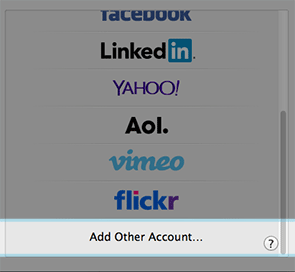
- Select Add Other Account you will have to scroll down to see it
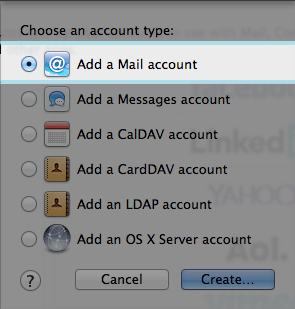
- Next choose Add a mail account
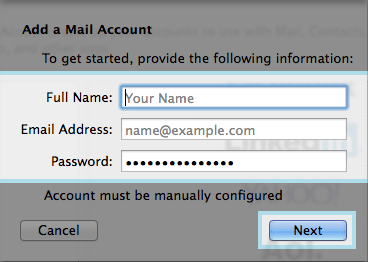
- Next you will want to fill in all the fields and click on NEXT
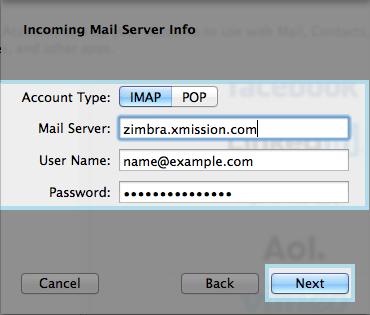
- Next you will put in the Incoming Server Information
- Account Type: - We always recommend IMAP
- Mail Server: - zimbra.xmission.com
- User Name: - your full email address
- Password: - your email password
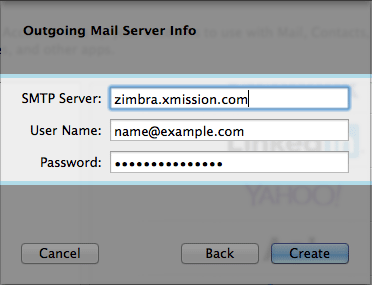
- Next you will enter the Outgoing Server Information
- SMTP Server: - zimbra.xmission.com
- User Name: - your full email address - this is not optional
- Password: - your email password - this is not optional
- After you click on Create your account will be set up.
If you have a Zimbra Business Premium or Personal Premium account and need to configure sync for:
