Difference between revisions of "Hosted Email:Outlook 2003"
| Line 1: | Line 1: | ||
| + | '''Please note:''' All Zimbra Premium and Personal Premium Zimbra account customers should use the [https://wiki.xmission.com/Hosted_Email:Outlook_Connector Zimbra Outlook Connector for Windows] | ||
| + | |||
| + | All Zimbra Base account customers should use the following instructions: | ||
| + | |||
| + | |||
1. Goto the ''Tools'' Menu and select ''Email Accounts...'' | 1. Goto the ''Tools'' Menu and select ''Email Accounts...'' | ||
:[[Image:2003-1_tools-accounts.png]] | :[[Image:2003-1_tools-accounts.png]] | ||
Revision as of 16:31, 31 July 2013
Please note: All Zimbra Premium and Personal Premium Zimbra account customers should use the Zimbra Outlook Connector for Windows
All Zimbra Base account customers should use the following instructions:
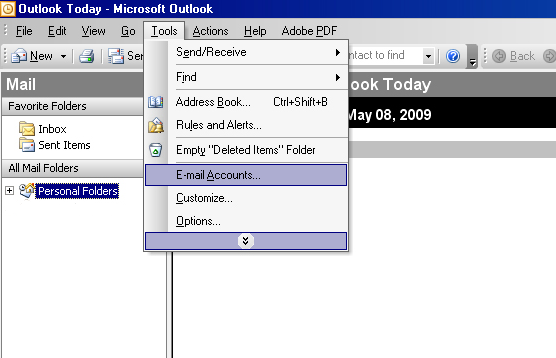
1. Goto the Tools Menu and select Email Accounts...
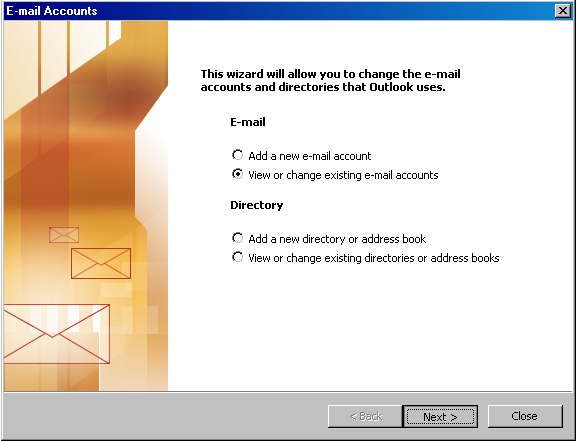
2. In the window that opens, select View or change existing email accounts and click Next.
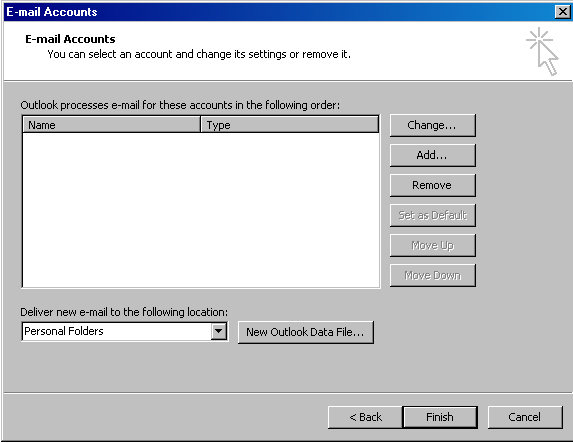
3. You should now be on the Email Accounts window. Here click the Add... button.
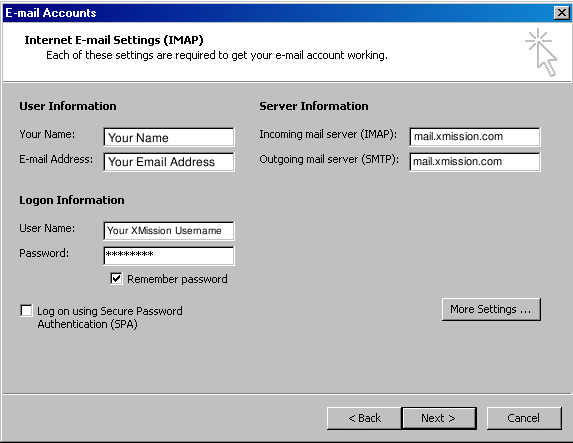
4. Fill this window out the information seen below.
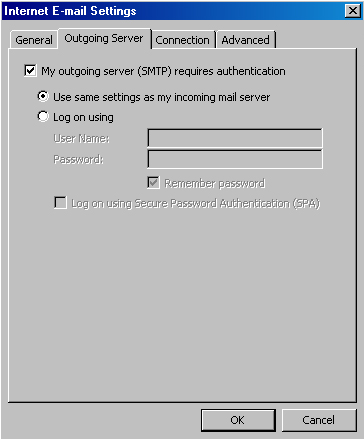
5. When finished filling out your information, click More Settings... and select the Outgoing Server tab.
Check the box that says My outgoing server (SMTP) requires authentication and make sure Use same settings as my incoming mail server is selected underneath that.
6. Hit the Ok button when finished and that should take you back to the previous menu. Click Next and then Finish. You should now be able to send and receive mail.
