Difference between revisions of "IPhone:Signature"
From XMission Wiki
(→See also) |
|||
| Line 11: | Line 11: | ||
| − | |||
| − | |||
| − | |||
[[Category:Client Email Configuration|XMission Email|iPhone Signature]] | [[Category:Client Email Configuration|XMission Email|iPhone Signature]] | ||
[[Category:XMission Email|iPhone Signature]] | [[Category:XMission Email|iPhone Signature]] | ||
Revision as of 15:31, 4 February 2014
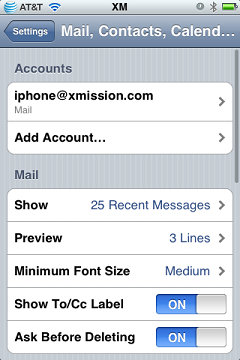
- Press the
 home button, tap on the
  Settings icon and then tap on the Mail, Contacts, Calendars option.

- In the Mail, Contacts, Calendars screen, scroll down and you should see Signature near the bottom of the screen.
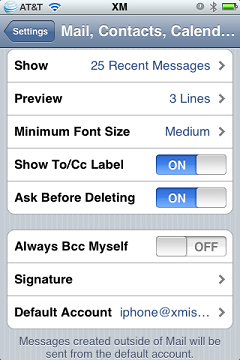
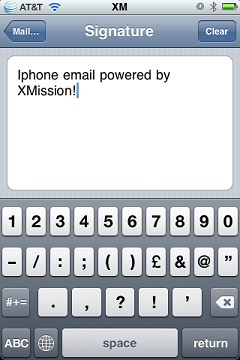
- Tap on Signature and you'll be in the signature editing screen. Tap whatever you want for your signature! Tap on the Mail... chevron to save and press the home button when you're done.
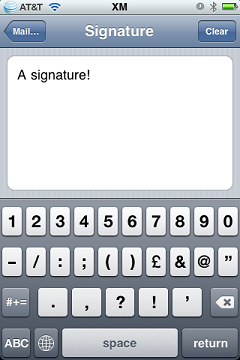


If you ever want to delete the signature, simply return to the signature editing screen and delete all of the text.