Entourage Setup
Jump to navigation
Jump to search
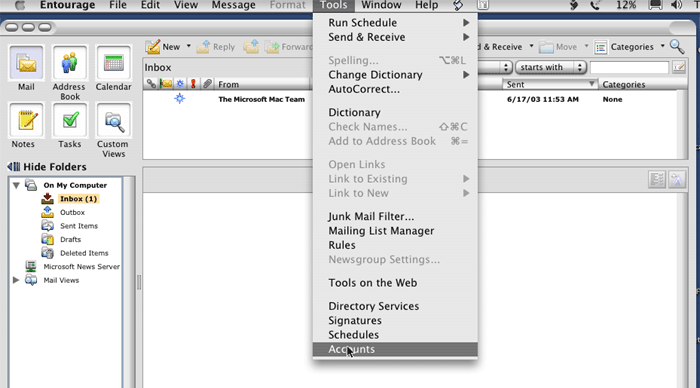
- Start Entourage. Click on , go to , go to and select .
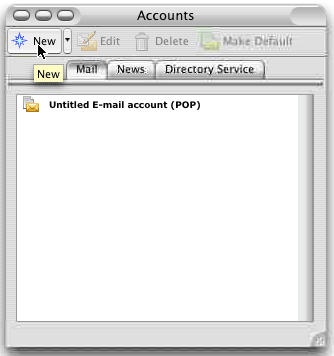
- Click and select .
- Click .
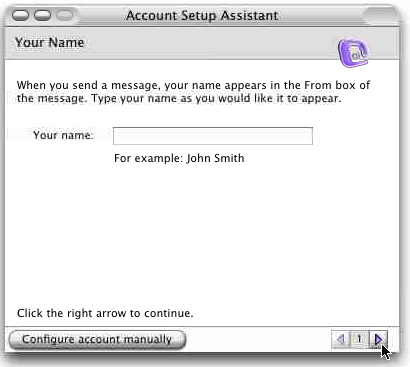
- In the field labeled , type in the name you wish to appear on your outgoing email messages.
- Click the Right Arrow at the bottom of the Assistant Window.
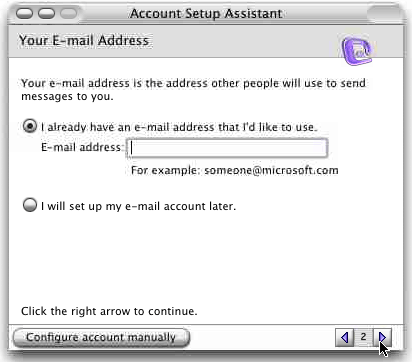
- In the field labeled , type your XMission email address
- Click the Right Arrow.
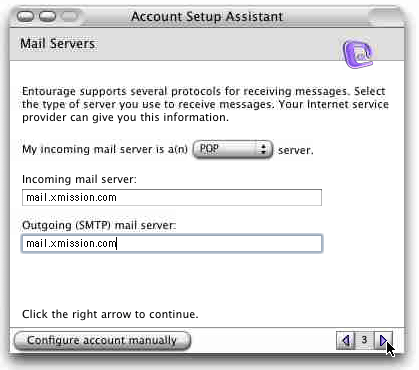
- In the field labeled , type "mail.xmission.com".
- In the field labeled , type "mail.xmission.com".
- Click the Right Arrow.
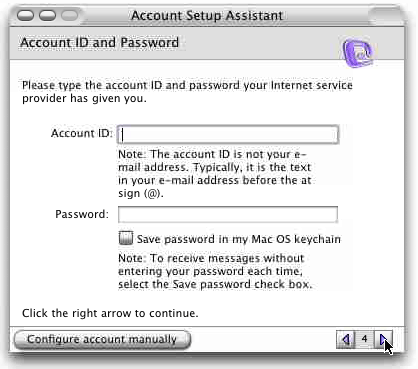
- In the field, type your XMission username (Make certain not to include @xmission.com).
- In the field, type the password for your XMission account.
- Click the Right Arrow.
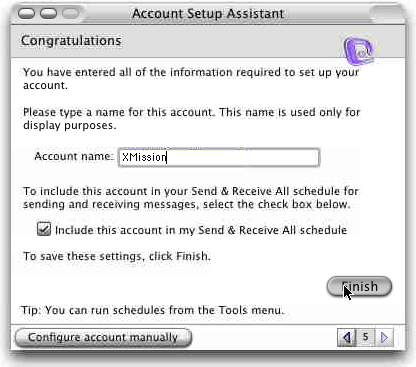
- In the field, type a name for the XMission mail account (such as XMission Email).
- Click Finish.
- Close the Accounts Window (Click on the X in the upper left hand corner).
- Click on go to , and select .
Congratulations! You should now see your Inbox. You're ready to start sending and receiving email.
