Hosted Email:Thunderbird Setup
Archived article - Please update your mail client.
While Thunderbird has consistently used nearly the exact same server settings in perpetuity we still encourage you to upgrade to a current release.
DISCLAIMER: All Archived pages are for documentation for products no longer supported by the developer. XMission will not be able to support issues regarding deprecated applications. We strongly recommend upgrading to a current version of this mail client that is well supported and compliant with modern email standards. The Zimbra webmail interface is always up to date and well supported. Please give it a try: https://zimbra.xmission.com
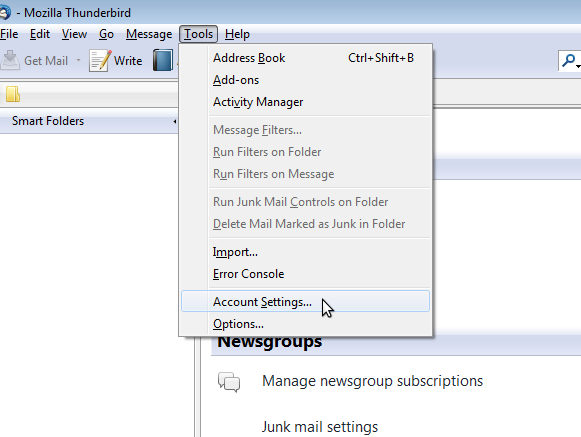
1.Open Thunderbird and click on Account Settings under the Tools menu.
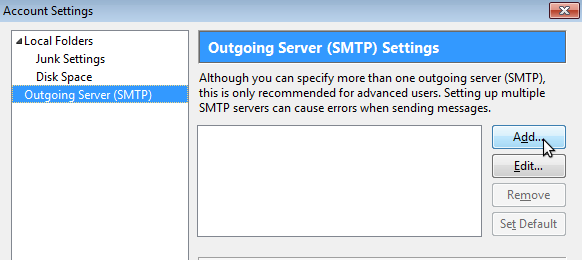
2. First click on Outgoing Server at the bottom of the left column, then click the Add... button as shown below.
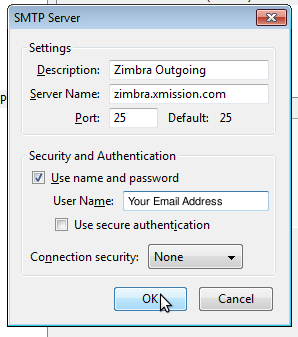
3. Fill out the SMTP Server window as shown here. 'Connection Security' can be set to SSL/TLS or none depending on your preference. When finished click OK.
Note: If Connection Security is set to none and you are having trouble sending try using the alternate port number of 587 instead of 25.
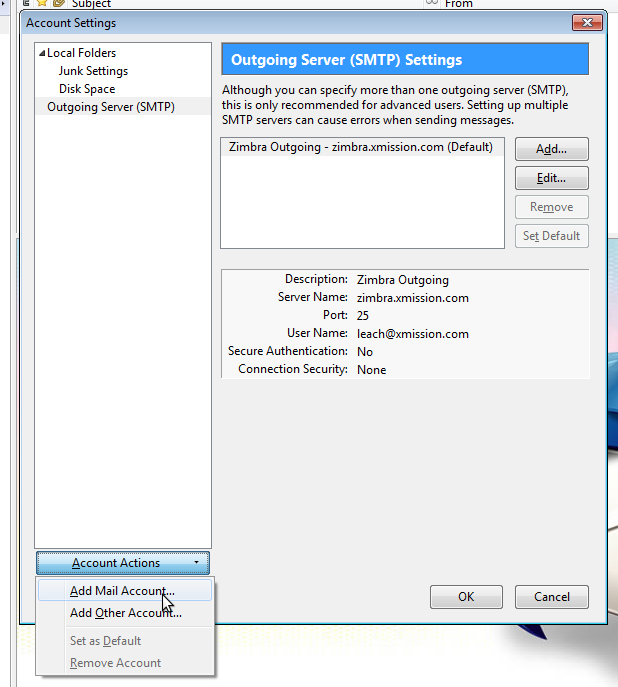
4. Now, select Add Mail Account... From the drop down menu in the lower left hand corner.
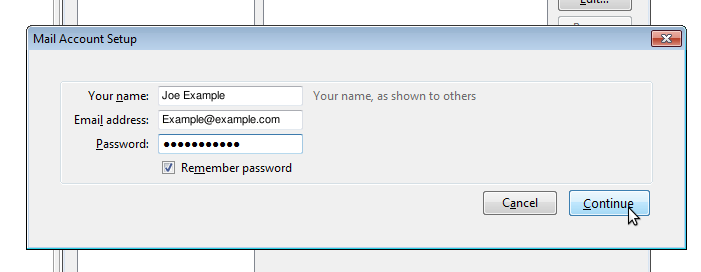
5. A dialog will open asking for your name, email address, and password. Enter your information and click Continue.
6. Thunderbird will now try and automatically detect settings. The settings it picks will be incorrect but, this is the only place in the setup where you can choose between POP and IMAP. To pick between server types, click the edit button and select your preference in server type from the drop down menu as shown below, then click the Manual Setup button.
Note:To take advantage of all Zimbra features and for maximum compatibility always choose IMAP as the server type.
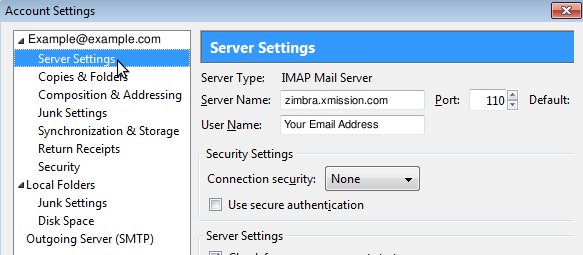
7. In following menu, click on Server Settings listed underneath your email address in the left column. Fill out the settings to match the ones shown below. Again, Connection Security can be set to SSL/TLS or none depending on your preference. When finished, click OK. You should be able to send and receive mail now.
<flvplayertwo height="660" width="696" autoplay="false">Thunderbird.flv</flvplayertwo>
