Hosted Email:Thunderbird Setup Linux
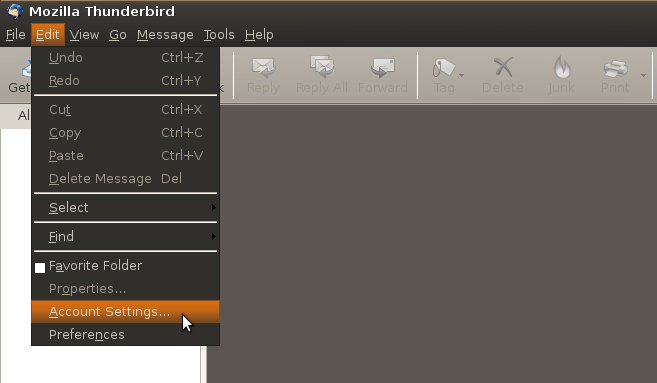
1.Open Thunderbird and click on Account Settings under the Edit menu.
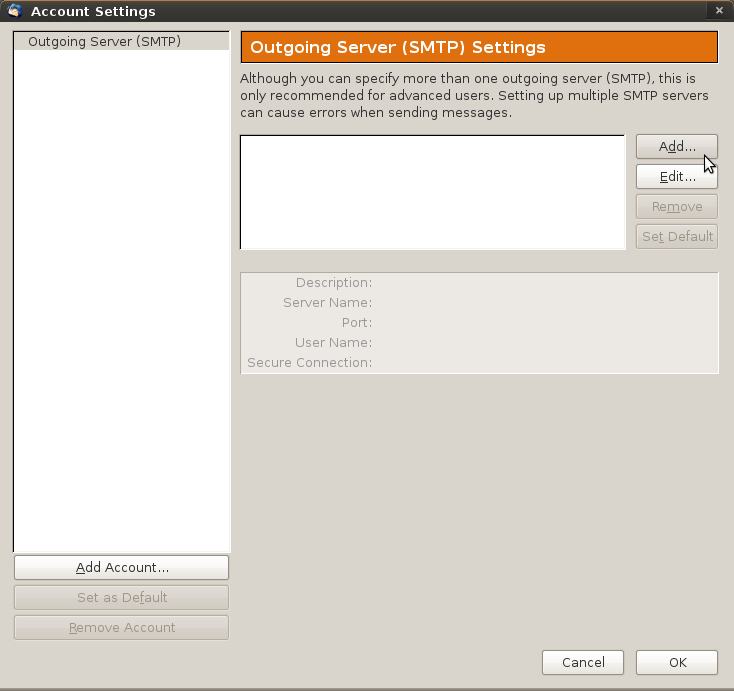
2. First click on Outgoing Server at the bottom of the left column, then click the Add... button as shown below.
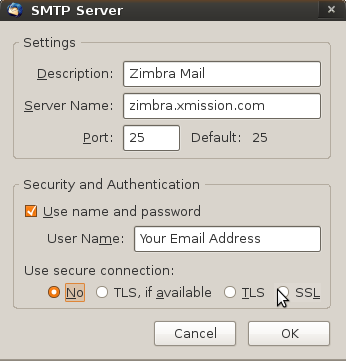
3. Fill out the SMTP Server window as shown here. Use secure connection should be set to SSL. When finished click OK.
Note: If Use secure connection is set to No and you are having trouble sending try using the alternate port number of 587 instead of 25.
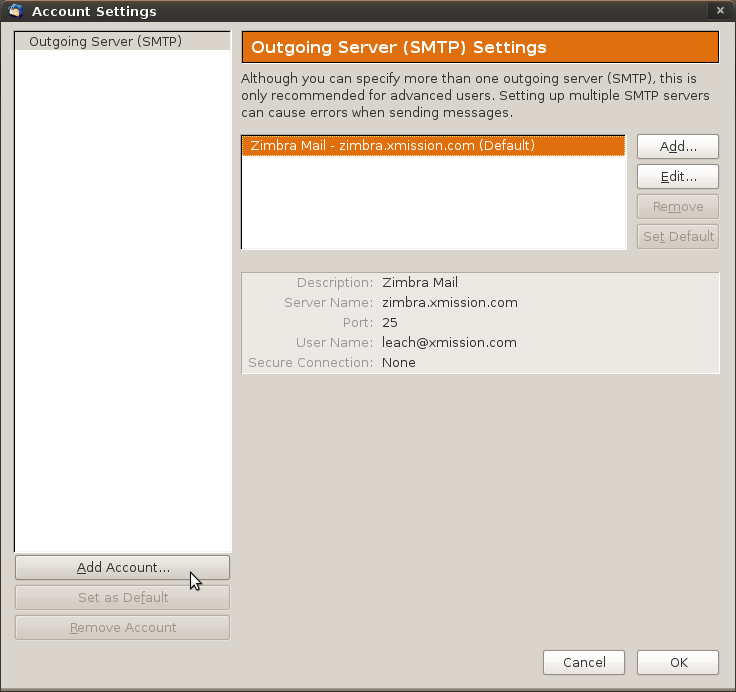
4. Now click on Add Account..., in the lower left corner.
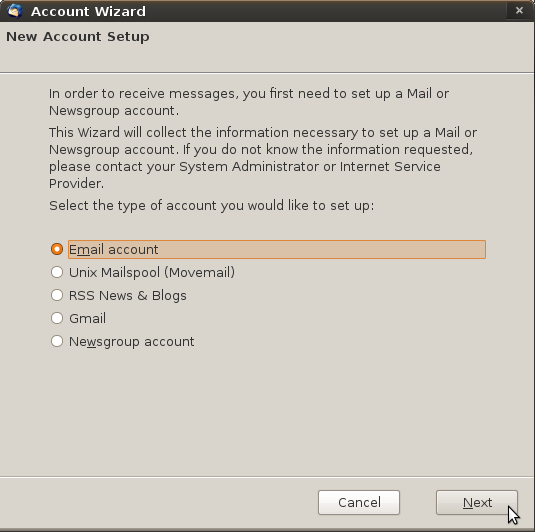
5. The Account Wizard will now open. Select Email account and click Next.
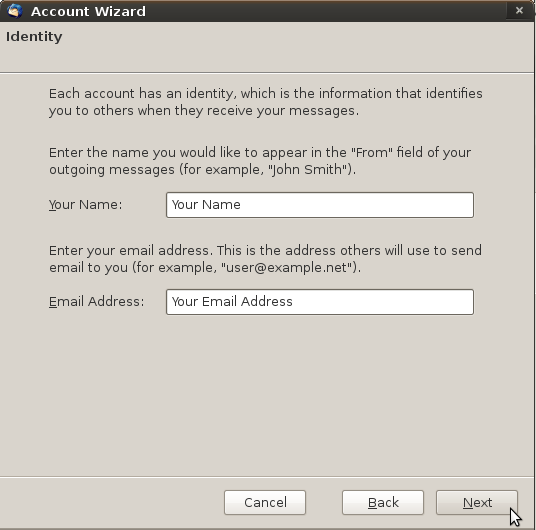
6. Fill out the Windows as shown below and hit Next.
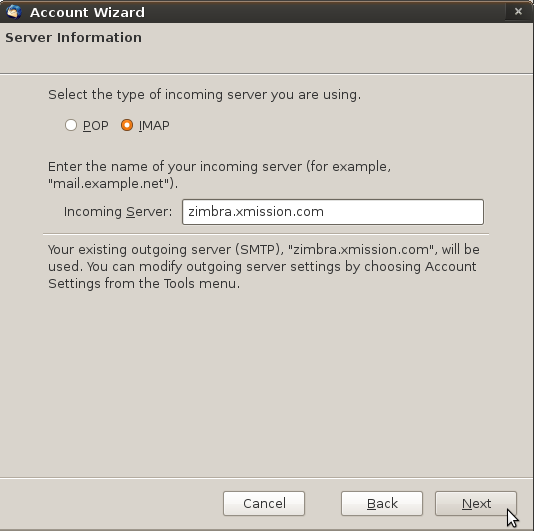
7. Select your preference for incoming mail server type and enter in the incoming server address then click Next.
Note: For maximum compatibility and additional features always select IMAP as the server type.
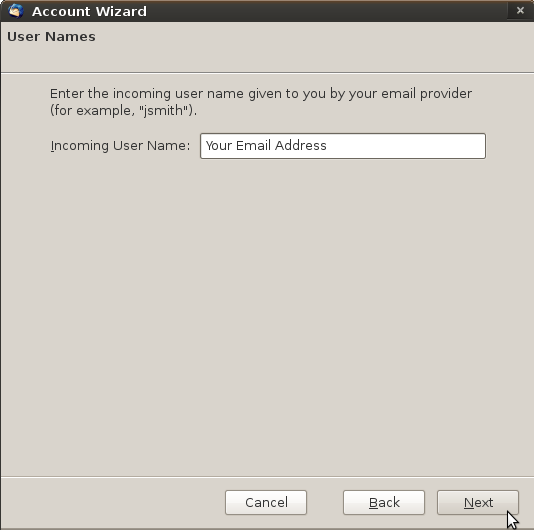
8. Enter in your full email address for Incoming User Name and click Next.
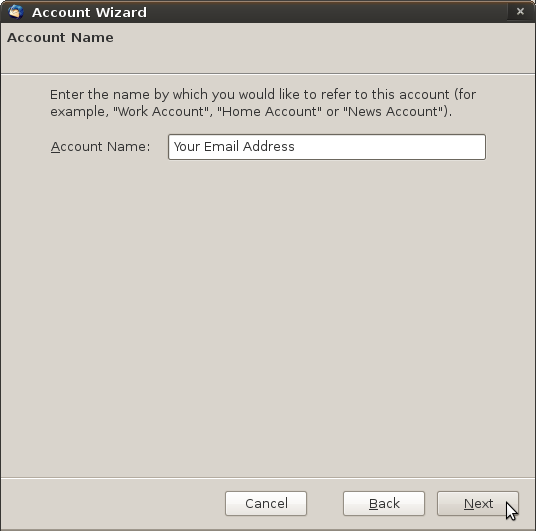
9. Enter in the name you would like this account to be called in Thunderbird. We suggest using your full email address to keep things simple. Click Next when finished.
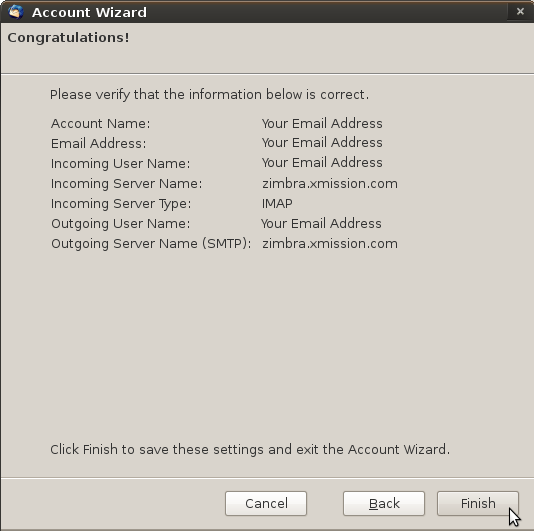
10. Review the information on this page and make sure it is correct, then click the Finish button. You should be able to send and receive messages now.
