Hosted Email:Windows Mobile
Linking your email account with your inbox
Windows Phone 8 allows you to link multiple account to show up in a single inbox.
- Click on your Mail app
- Click on "..." in the bottom right corner
- Select "Linked Inboxes"
- From here you can choose what email account you want to show up in your linked inbox.
Windows Mobile
Windows Mobile has native ActiveSync support and typically works extremely well with XMission Premium Zimbra Suite.
Based on the number number of manufacturers of Windows Mobile devices and variety of configurations available specific documentation by model and configuration is not possible.
Once you verify that ActiveSync has not been disableed on the device, we recommend using the standard configuration details, General Email Settings and follow the guideline below for configuring ActiveSync.
General instructions for ActiveSync on Windows Mobile, version 5.0 or greater.
1. On your Windows Mobile device click Start
2. Navigate to Programs
3. Select ActiveSync
4. Click Menu in the bottom right corner
5. Click Add Server Source
6. Enter Server Information
- Server Address: zimbra.xmission.com
- Check "This server requires an encrypted (SSL) connection
7. Click Next
8. Enter Server Information
- Username: XMission Zimbra email address
- Password: Your Password
- Domain: Leave domain field blank
9. Click Next
10. Verify all options are checked
11. Click Finish
Your Windows Mobile device may have optional applications for calendaring, contacts, documents, and possible options for tasks and briefcase functionality. Please follow configuration details for those applications and enter the appropriate XMission Zimbra server information where prompted.
Windows Phone 7/8
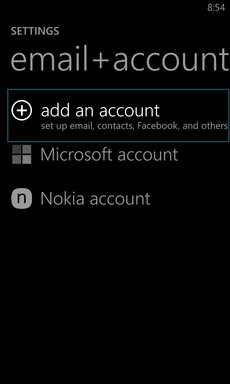
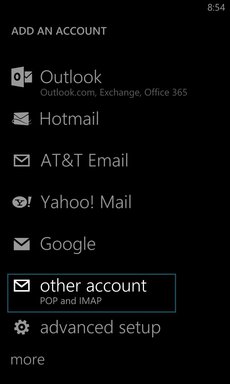
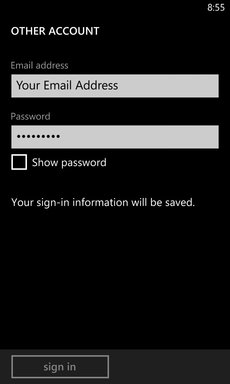
1. Tap on Settings, : go to emails+accounts, tap on add an account, and tap other account.
 :
: :
:


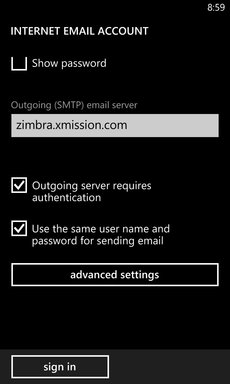
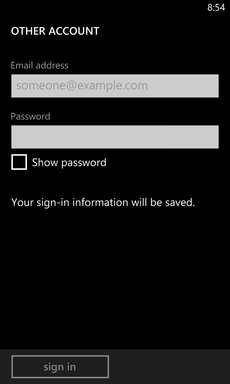
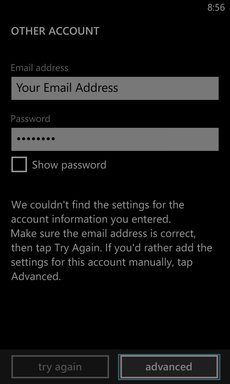
2. Fill in your Zimbra email and password. Once you tap sign in, it may not find your email account outright, so you may need to tap the advanced button:
 :
: :
:


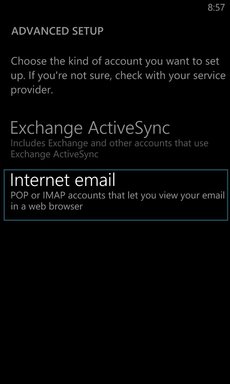
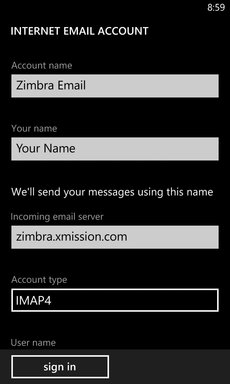
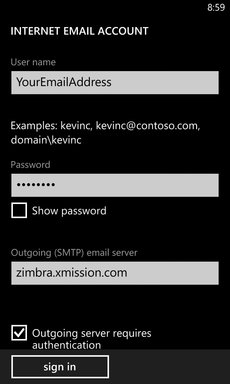
4. Tap on Internet email and fill in your information, then tap sign in, and it will return you to the emails+accounts page.
 :
: :
: :
: