Outlook 98 Setup
Jump to navigation
Jump to search
![]()
- Click and select .
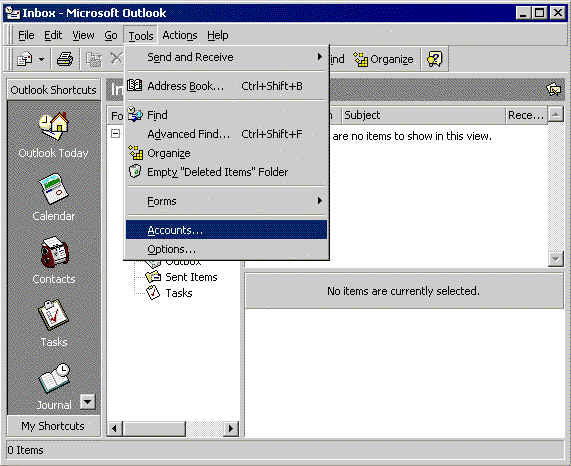
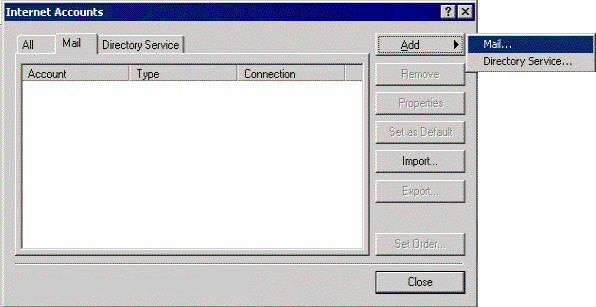
- Click and select .
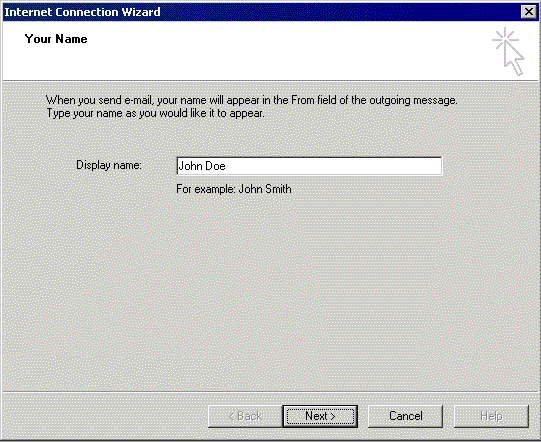
- In the field labeled , type in the name you wish to appear on your outgoing email messages.
- Click .
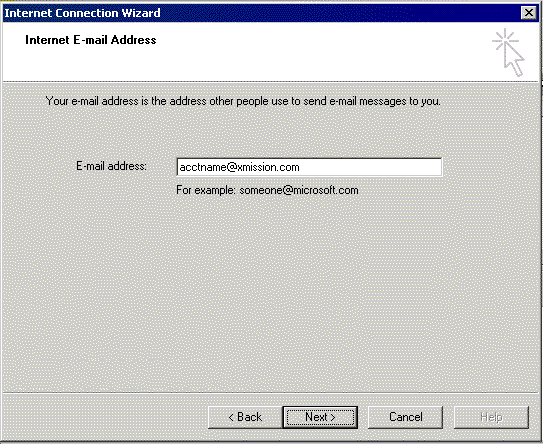
- In the field labeled , type your XMission email address
- Click .
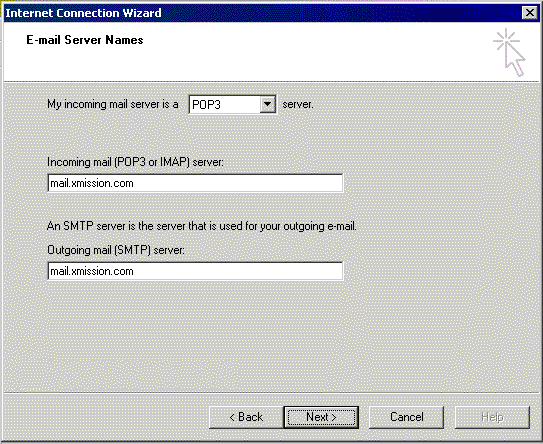
- In the field labeled , type mail.xmission.com.
- In the field labeled , type mail.xmission.com.
- Click .
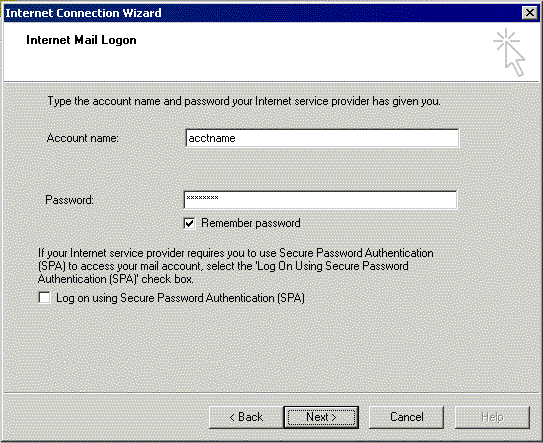
- In the field, type your XMission username.
- In the field, type the password for your XMission account.
- Click .
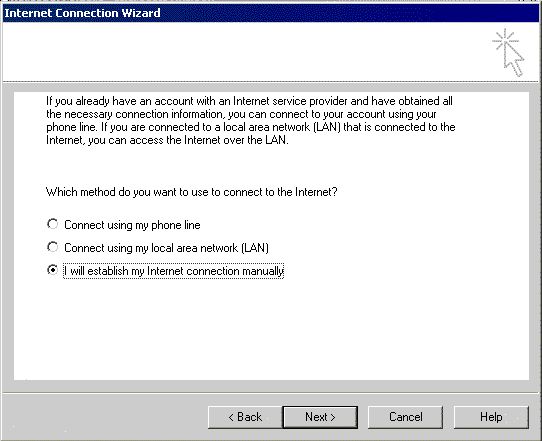
- Select , then click .
- Click , then click .
- Click on and select .


Congratulations! You should now see your Inbox. You're ready to start sending and receiving email.