Syncing Files Between Miltiple Servers
Jump to navigation
Jump to search
Syncing files between multiple servers
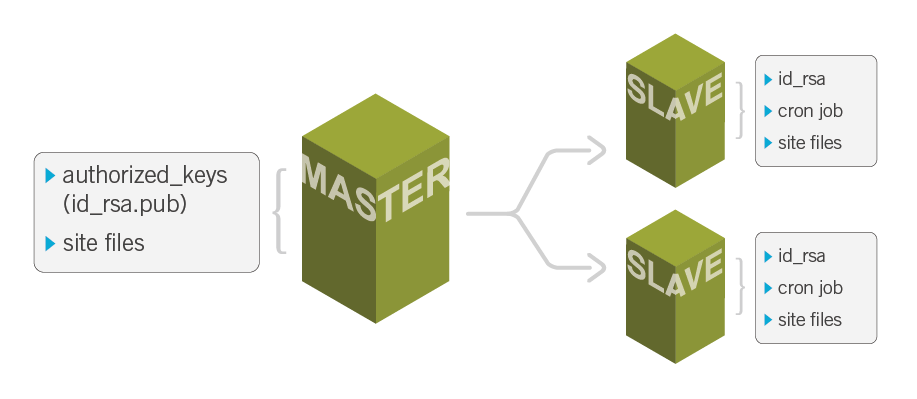
If a single site is load-balanced across multiple servers an issue may arise where the files on one server do not match the files on the others. There is a solution to this however it must be run manually whenever changes are made to files. A more efficient way of ensuring synchronous files is to make use of linux tools rsync and crontab.
The rsync Command
- Since we will be using rsync to sync files from one server to another we will need to use rsync with SSH. Rsync will be run from the server you wish to sync files to or the slave server.
$ rsync -avze ssh <master-IP>:/path/to/remote/folder/ /path/to/local/folder/
- The command above instructs rsync to ssh to the "master server", check the folder /path/to/your/folder/ and ensure that the files in the local copy of that folder match the files on the "master server".
- In running this command we notice that it prompts for a password every time. If we plan on having cron run this script for us automatically, prompting for a password is undesirable.
Generating a GPG key pair
- To get around this we will utilize a feature of SSH that allows us to create a pair of keys that servers share. This will allow us to SSH without a password prompt.
- First we will create the keys on the "slave server" and set-up the proper permissions. SSH to the "slave server" and run these commands:
[root@TestCentOS6 ~]# ssh-keygen
- Press enter at all three prompts to use defaults and no passphrase
Generating public/private rsa key pair.
Enter file in which to save the key (/root/.ssh/id_rsa):  < Hit Enter
Created directory '/root/.ssh'.
Enter passphrase (empty for no passphrase): < Hit Enter
Enter same passphrase again:  < Hit Enter
Your identification has been saved in /root/.ssh/id_rsa.
Your public key has been saved in /root/.ssh/id_rsa.pub.
The key fingerprint is:
a4:7d:27:c0:49:4c:64:9f:e3:d6:9c:b0:0f:68:92:0a root@TestCentOS6
The key's randomart image is:
+--[ RSA 2048]----+
|       +=        |Category:Cloud_Infrastructure
|       +.o .     |
|        = =      |
|       = + * .   |
|  E   + S B =    |
|   . . o o =     |
|    .       .    |
|                 |
|                 |
+-----------------+
- [root@TestCentOS6 ~]# chmod 700 ~/.ssh/
- [root@TestCentOS6 ~]# chmod go-rwx ~/.ssh/*
Sharing the key pair
- Once the keypair is created we will need to share the public key (~/.ssh/id_rsa.pub) with the "master server"
scp ~/.ssh/id_rsa.pub <master-IP>:
- Where the master-IP is the IP address of your Master Server
- Now we will need to append the public key to a special file on the "master server".
- SSH to the "master server" and run these commands:
if [ ! -d .ssh ]; then mkdir .ssh ; chmod 700 .ssh ; fi
if [ ! -f authorized_keys ]; then touch authorized_keys ; chmod 600 authorized_keys ; fi
cat /root/id_rsa.pub >> ~/.ssh/authorized_keys
Testing the key pair
Now we should be able to run rsync over ssh without a password prompt. From the "slave server run"
rsync -avze ssh <master-IP>:/path/to/remort/folder/ /path/to/local/folder/
- If everything worked correctly it should not prompt for a password and tell you how much data was transferred. If it did not work check and make sure the permissions of the files are correct and that the the file authorized_keys is spelled correctly and is in ~/.ssh
Configure the cron job
- Now that we have verified that rsync works we can set-up a cron job. A cron job simply a way of telling Linux to run a certain command at a certain time. To set-up a cron job type on the "slave server"
crontab -e
- Now we will need to tell crontab what to run and when to run it. To do this add a line like the following to the file.
- /5 * * * * rsync -avze ssh <master-IP>:/remote/directory /local/directory
Once this line is added save and exit the file. This will tells cron to run the rsync command every 5 minutes.
At this point, the "slave server" is syncing with the "master server" every 5 minutes! Now we just need to repeat this process for any other "slave servers" we have.
