DSL Actiontec Subnet Setup: Difference between revisions
Jump to navigation
Jump to search
No edit summary |
|||
| (8 intermediate revisions by 3 users not shown) | |||
| Line 3: | Line 3: | ||
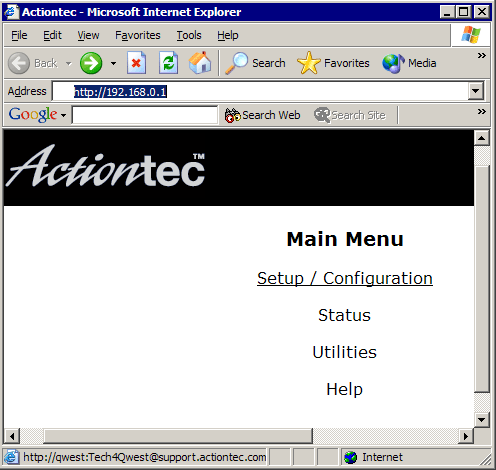
#Open up a web browser and go to <pre>http://192.168.0.1</pre> | #Open up a web browser and go to <pre>http://192.168.0.1</pre> | ||
#Click on <span class="button">Setup / Configuration</span> in the Actiontec menu. | #Click on <span class="button">Setup / Configuration</span> in the Actiontec menu. | ||
#: | #:[[Image:Enter-Address.png]] | ||
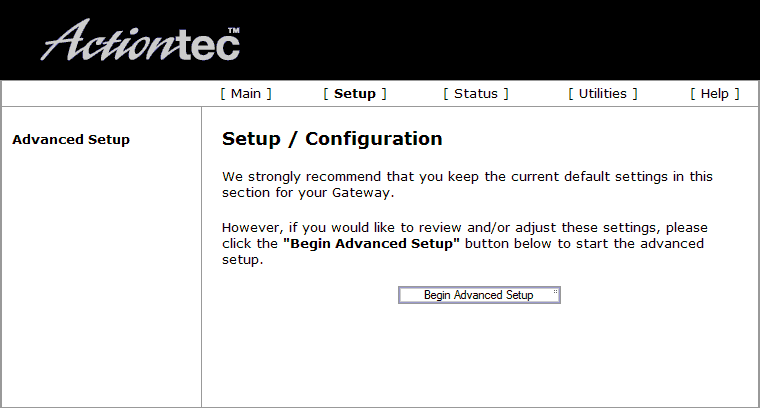
#Click on <span class="button">Advanced Setup</span>. | #Click on <span class="button">Advanced Setup</span>. | ||
#: | #:[[Image:Setup.png]] | ||
#Click the <span class="button">Begin Advanced Setup</span> button. | #Click the <span class="button">Begin Advanced Setup</span> button. | ||
#: | #:[[Image:Advanced1.png]] | ||
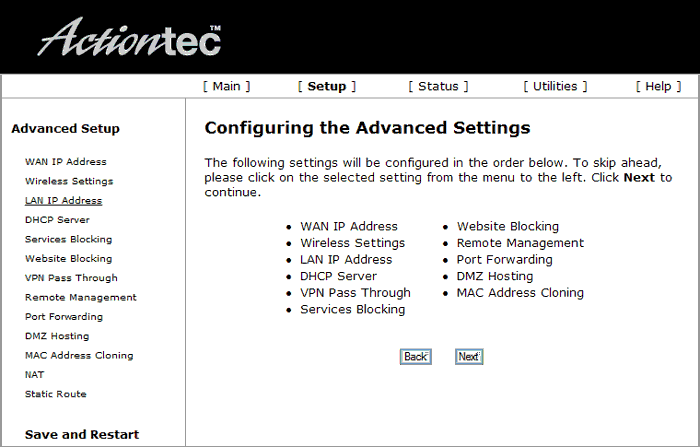
#Click on <span class="button">LAN IP Address</span>. | #Click on <span class="button">LAN IP Address</span>. | ||
#: | #:[[Image:Advanced2.png]] | ||
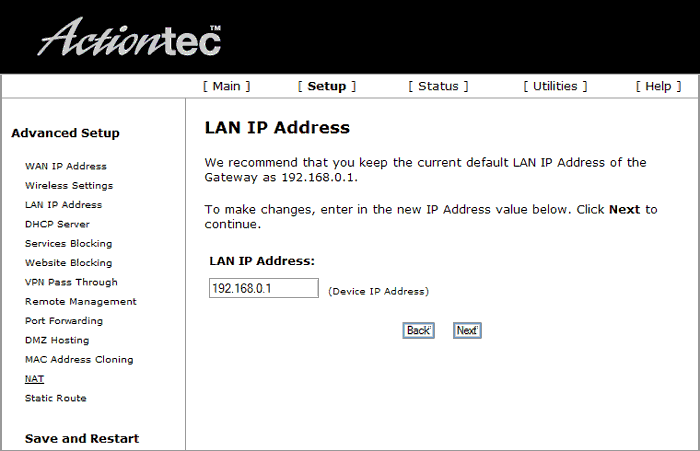
#Type in your LAN IP Address (The second IP address of the subnet). | #Type in your LAN IP Address (The second IP address of the subnet). | ||
#Select <span class="button">NAT</span>. | #Select <span class="button">NAT</span>. | ||
#: | #:[[Image:Advanced-lan.png]] | ||
#Select <span class="button">Off</span> for NAT. | #Select <span class="button">Off</span> for NAT. | ||
#Select <span class="button">Next</span>. | #Select <span class="button">Next</span>. | ||
#: | #:[[Image:Advanced-nat.png]] | ||
#Type in the first IP of your subnet in <span class="button">Subnet IP</span>. | #Type in the first IP of your subnet in <span class="button">Subnet IP</span>. | ||
#Type in your Subnet Mask in <span class="button">Subnet Mask</span>. | #Type in your Subnet Mask in <span class="button">Subnet Mask</span>. | ||
#Leave the <span class="button">Gateway IP</span> blank. | #Leave the <span class="button">Gateway IP</span> blank. | ||
#Select <span class="button">Next</span>. | #Select <span class="button">Next</span>. | ||
#: | #:[[Image:Advanced-route.png]] | ||
<div class="messagebox metadata">'''Note''': At this point the configuration for your Actiontec is complete. Shortly after the Internet light on your Actiontec becomes solid you should be able to access the Internet.</div> | <div class="messagebox metadata">'''Note''': At this point the configuration for your Actiontec is complete. Shortly after the Internet light on your Actiontec becomes solid you should be able to access the Internet.</div> | ||
[[Category:DSL | |||
[[Category:DSL Troubleshooting|Actiontec Subnet Setup]] | |||
[[Category:DSL]] | [[Category:DSL]] | ||
[[Category:PPPoA]] | |||
Latest revision as of 12:46, 6 June 2019
- Open up a web browser and go to
http://192.168.0.1
- Click on in the Actiontec menu.
- Click on .
- Click the button.
- Click on .
- Type in your LAN IP Address (The second IP address of the subnet).
- Select .
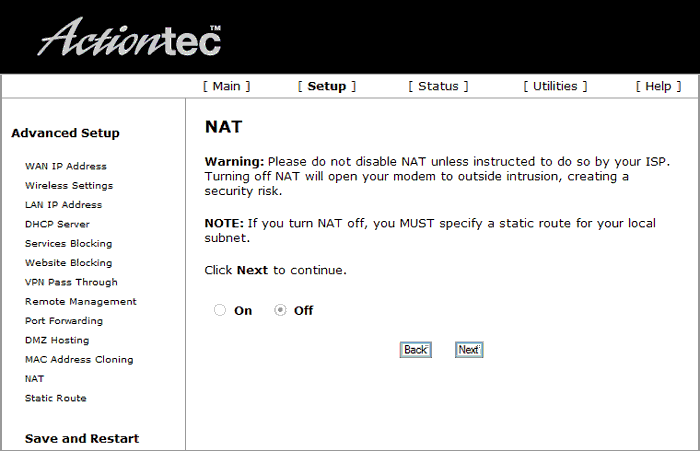
- Select for NAT.
- Select .
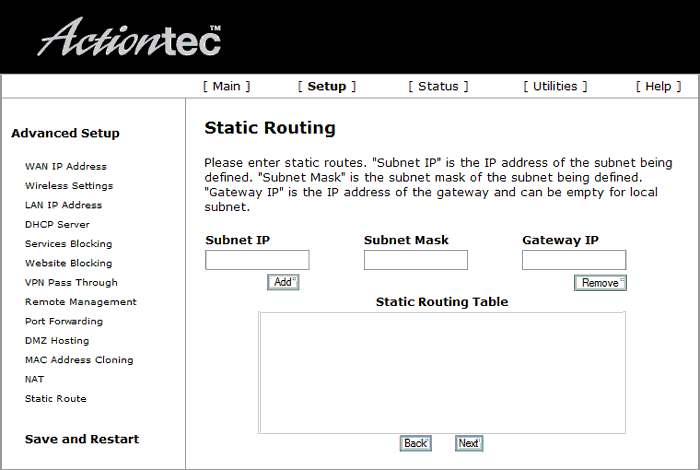
- Type in the first IP of your subnet in .
- Type in your Subnet Mask in .
- Leave the blank.
- Select .
