PK5001z: Difference between revisions
Jump to navigation
Jump to search
No edit summary |
No edit summary |
||
| (4 intermediate revisions by the same user not shown) | |||
| Line 1: | Line 1: | ||
{{archived}} | |||
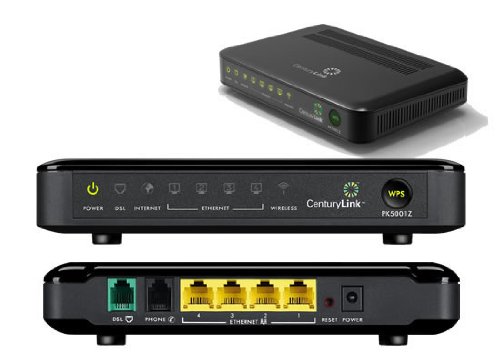
==PK5001z DSL Modem== | ==PK5001z DSL Modem== | ||
[[File:Pk5001z.jpg]] | [[File:Pk5001z.jpg]] | ||
===Setup Instructions=== | |||
* In your browser window enter 192.168.0.1 in the URL bar. ( You can press F6 on your keyboard to highlight it ) | |||
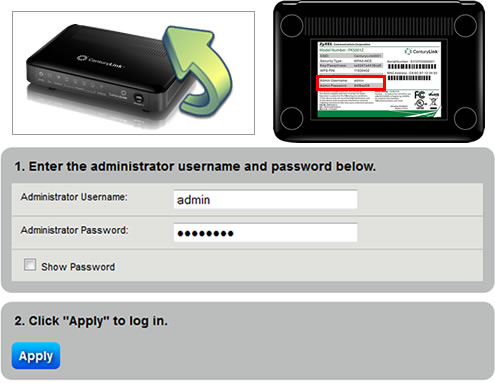
* Next enter the Administrator username (admin) and password ( This will be found on the bottom of the modem | |||
[[File:Login-01.jpg]] | |||
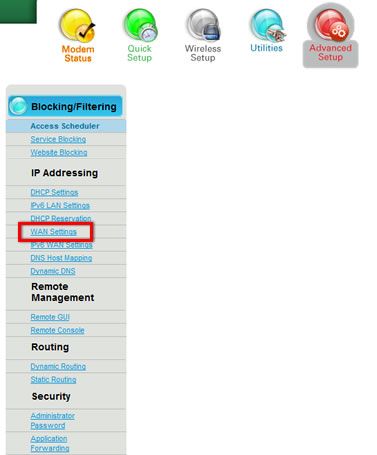
* Next click on Advance Settings | |||
[[File:Login-02.jpg]] | |||
*On the left choose WAN Settings | |||
[[File:Login-03.jpg]] | |||
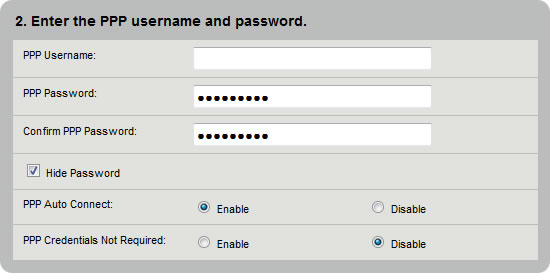
*Next put in your PPP Username (this is your XMission username ) and your Password | |||
[[File:Login-05.jpg]] | |||
* All other settings can remain the same, there is no need to change anything else. Just click Apply and you should be online | |||
[[Category:DSL_Troubleshooting]] | |||
[[Category: DSL]] | |||
Latest revision as of 12:52, 6 June 2019
PK5001z DSL Modem
Setup Instructions
- In your browser window enter 192.168.0.1 in the URL bar. ( You can press F6 on your keyboard to highlight it )
- Next enter the Administrator username (admin) and password ( This will be found on the bottom of the modem
- Next click on Advance Settings
- On the left choose WAN Settings
- Next put in your PPP Username (this is your XMission username ) and your Password
- All other settings can remain the same, there is no need to change anything else. Just click Apply and you should be online


