Difference between revisions of "Adding a Domain"
From XMission Wiki
| Line 16: | Line 16: | ||
*DNS Server Configuration: ''Most likely, you will be using XMission for DNS and so the box shown above should be selected.'' | *DNS Server Configuration: ''Most likely, you will be using XMission for DNS and so the box shown above should be selected.'' | ||
*Hosting Type: ''If you are designing a new website, you will want to select the first option as seen above. If, however, you simply want this domain to forward to another, you would select the second option. If you only want the domain available for E-Mail addresses, you would select the third option.'' | *Hosting Type: ''If you are designing a new website, you will want to select the first option as seen above. If, however, you simply want this domain to forward to another, you would select the second option. If you only want the domain available for E-Mail addresses, you would select the third option.'' | ||
| − | *Document root: ''This is the folder where you will build your new website. In this example, we have simply named it " | + | *Document root: ''This is the folder where you will build your new website. In this example, we have simply named it "test-domain". We do recommend you name your folder specific to each domain.'' '''Please note: It is highly recommended you create a separate rooted directory for each domain, as opposed to pointing your domain to a subdirectory.''' |
Revision as of 15:04, 26 November 2012
Plesk Unlimited Hosting: Adding a Domain
You can create additional domains for use with your Unlimited Hosting account. First, ensure you are logged into your account at http://hosting.xmission.com.
- From the Control Panel, click on the "Websites & Domains" tab near the top of the screen.
- Near the bottom of the screen, click the "Add New Domain" button.
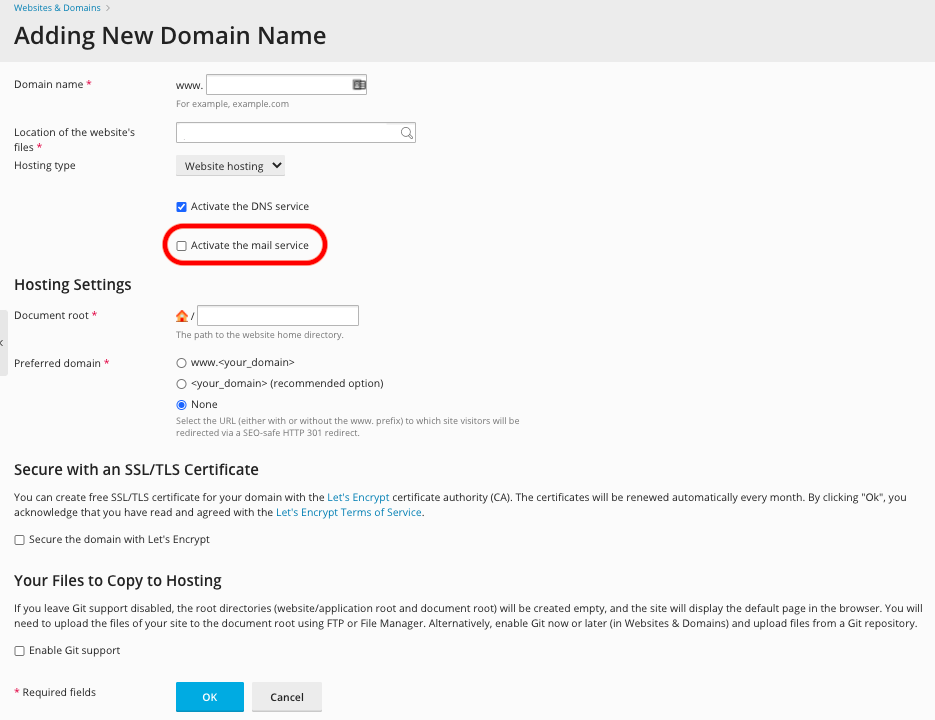
- On this screen, you will need to enter the following highlighted pieces of information. A brief description of each follows the image.
- Domain name: This is the name of your new domain. In this example, we would be adding the domain "test-domain.com."
- DNS Server Configuration: Most likely, you will be using XMission for DNS and so the box shown above should be selected.
- Hosting Type: If you are designing a new website, you will want to select the first option as seen above. If, however, you simply want this domain to forward to another, you would select the second option. If you only want the domain available for E-Mail addresses, you would select the third option.
- Document root: This is the folder where you will build your new website. In this example, we have simply named it "test-domain". We do recommend you name your folder specific to each domain. Please note: It is highly recommended you create a separate rooted directory for each domain, as opposed to pointing your domain to a subdirectory.
- Once you've entered the correct information for your new domain, simply click "OK." You will see the following text indicating your new domain has been created successfully!
Continue onto...
