Adding a Domain Alias: Difference between revisions
Jump to navigation
Jump to search
No edit summary |
|||
| (9 intermediate revisions by 5 users not shown) | |||
| Line 1: | Line 1: | ||
= Plesk Shared Hosting: Adding a Domain Alias = | |||
You can create additional aliases for use with any domains in your | You can create additional aliases for use with any domains in your Shared Hosting account. This can only be used to go to a new domain’s main page. To go to a specific page on another website, that requires an advanced setup in a .htaccess file. We recommend independent research for such advanced needs. First, ensure you are logged into your account at the [http://hosting.xmission.com Shared Hosting login page.] | ||
*From the Control Panel, click on the "'''Websites & Domains'''" tab near the top of the screen. | |||
[[File:Plesk_tabs_new.png]] | |||
*Near the bottom of the screen, click the "'''Add New Domain Alias'''" button. | |||
*Near the bottom of the screen, click the "Add New Domain Alias" button. | |||
[[File:1adddomainalias.png]] | [[File:1adddomainalias.png]] | ||
*On this screen, you will need to complete the following information. A brief description of each follows the image. | |||
[[File:PleskAddDomainAlias-1.png|600px]] | |||
*'''Domain alias name''': This is the name of the domain that will be aliased to your existing site. In this example, we would be adding "xdesign.org" which would alias to "xdesign.com". | |||
*'''Synchronize DNS zone with the primary domain''': As this is an alias, you will likely want this checked so any DNS changes (e.g. subdomains) made to your primary domain work with your new domain alias. | |||
*'''Mail service''': Check this box if you would like your domain alias to redirect emails to your actual domain. For example, if this box is checked, someone could email "example@xdesign.org" and it would be delivered to the account "example@xdesign.com" | |||
*'''Web service''': Check this box if you would like the web content from your primary domain to be visible at the new domain alias. | |||
*'''Redirect with HTTP 301''': When visitors open the alias's URL, they will be redirected to the URL of the primary domain. Panel uses the search engine friendly HTTP 301 redirection, which means the search engine ranking will not be split between the URLs. | |||
* | *Once you've entered the correct information for your new domain, simply click "OK." You will see the following text indicating your new domain alias has been created successfully! | ||
[[File:3adddomainalias.png]] | |||
[[File:3adddomainalias.png]] | |||
{{:Shared_Hosting}} | |||
[[Category:Shared Hosting|Domain Alias]] | |||
Latest revision as of 09:08, 8 December 2022
You can create additional aliases for use with any domains in your Shared Hosting account. This can only be used to go to a new domain’s main page. To go to a specific page on another website, that requires an advanced setup in a .htaccess file. We recommend independent research for such advanced needs. First, ensure you are logged into your account at the Shared Hosting login page.
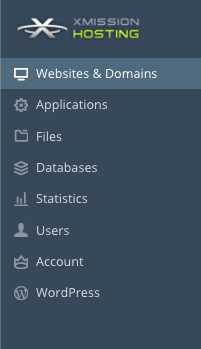
- From the Control Panel, click on the "Websites & Domains" tab near the top of the screen.
- Near the bottom of the screen, click the "Add New Domain Alias" button.
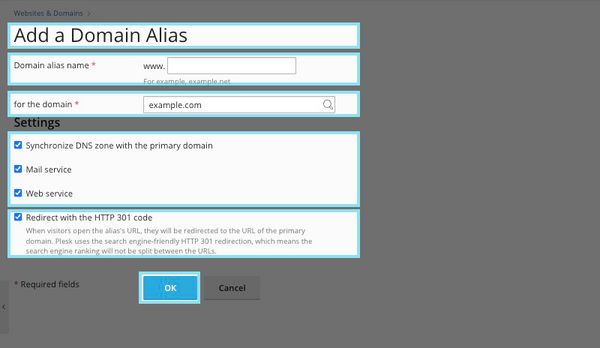
- On this screen, you will need to complete the following information. A brief description of each follows the image.
- Domain alias name: This is the name of the domain that will be aliased to your existing site. In this example, we would be adding "xdesign.org" which would alias to "xdesign.com".
- Synchronize DNS zone with the primary domain: As this is an alias, you will likely want this checked so any DNS changes (e.g. subdomains) made to your primary domain work with your new domain alias.
- Mail service: Check this box if you would like your domain alias to redirect emails to your actual domain. For example, if this box is checked, someone could email "example@xdesign.org" and it would be delivered to the account "example@xdesign.com"
- Web service: Check this box if you would like the web content from your primary domain to be visible at the new domain alias.
- Redirect with HTTP 301: When visitors open the alias's URL, they will be redirected to the URL of the primary domain. Panel uses the search engine friendly HTTP 301 redirection, which means the search engine ranking will not be split between the URLs.
- Once you've entered the correct information for your new domain, simply click "OK." You will see the following text indicating your new domain alias has been created successfully!
- Administration/Logging in
- Adding a Domain
- Adding MySQL Databases
- Adding/Managing DNS Records
- Managing Domain/Users
- Managing FTP Access/Users
- PHP Settings
- Previewing the Website
- Secure Your Sites
- Web Statistics
Additional Development Help
Applications
Domain Management

