Difference between revisions of "WordPress"
(→Advanced Setup) |
(→Moving an Existing Wordpress to XMission Hosting) |
||
| Line 96: | Line 96: | ||
<br><br> | <br><br> | ||
[[4]] Click on Databases <br> | [[4]] Click on Databases <br> | ||
| − | + | ||
<br><br> | <br><br> | ||
[[5]] Choose the Database that reflects your Wordpress Install <br> | [[5]] Choose the Database that reflects your Wordpress Install <br> | ||
| − | [[File: | + | [[File:PleskMySQL-3.png|600px]]<br> |
<br><br> | <br><br> | ||
| − | [[6]] | + | [[6]] Click on the phpMyAdmin button<br> |
| − | + | ||
<br><br> | <br><br> | ||
[[7]] Once in PHPMyAdmin - select Database from the menu<br> | [[7]] Once in PHPMyAdmin - select Database from the menu<br> | ||
| − | [[File:phpmyadmin_database.png]]<br> | + | [[File:phpmyadmin_database.png|600px]]<br> |
<br><br> | <br><br> | ||
[[8]] Next Select your Database<br> | [[8]] Next Select your Database<br> | ||
| Line 119: | Line 119: | ||
<br><br> | <br><br> | ||
[[12]] Now choose Import from the menu bar<br> | [[12]] Now choose Import from the menu bar<br> | ||
| − | [[File:phpmyadmin_database.png]]<br> | + | [[File:phpmyadmin_database.png|600px]]<br> |
<br><br> | <br><br> | ||
[[13]] In the Section File to Import: Click on Choose File so you can select your database to import. <br> | [[13]] In the Section File to Import: Click on Choose File so you can select your database to import. <br> | ||
| Line 126: | Line 126: | ||
[[14]] Once you have imported your database - you can then FTP your files to your new server. Use an FTP program like [http://filezilla-project.org/ FileZIlla] that is free and will work for Mac, Windows, and Linux<br> | [[14]] Once you have imported your database - you can then FTP your files to your new server. Use an FTP program like [http://filezilla-project.org/ FileZIlla] that is free and will work for Mac, Windows, and Linux<br> | ||
* IF you are using FileZilla fill in the following information:<br> | * IF you are using FileZilla fill in the following information:<br> | ||
| − | [[File:filezilla.png]]<br> | + | [[File:filezilla.png|600px]]<br> |
** '''Host Name''' - your domain name (i.e. domain.com ) | ** '''Host Name''' - your domain name (i.e. domain.com ) | ||
** '''Username''' - your FTP username | ** '''Username''' - your FTP username | ||
Revision as of 12:12, 8 December 2022
Contents
Wordpress one click install
Video
Easy Install
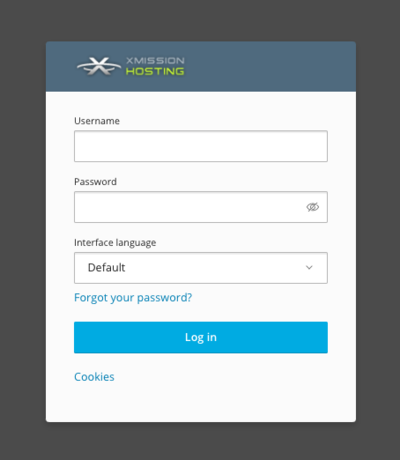
- To utilize the Wordpress once click install you will need to Login to your control panel.
- Go to http://hosting.xmission.com
- Enter your Username and Password
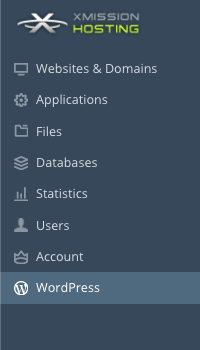
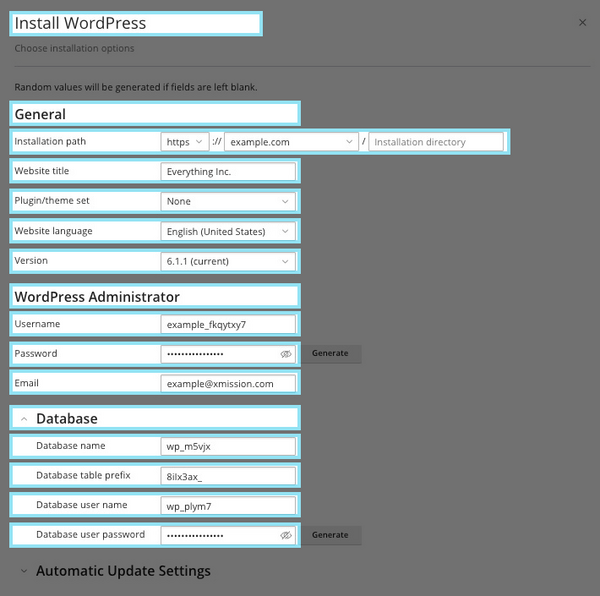
- Next select WordPress from the menu
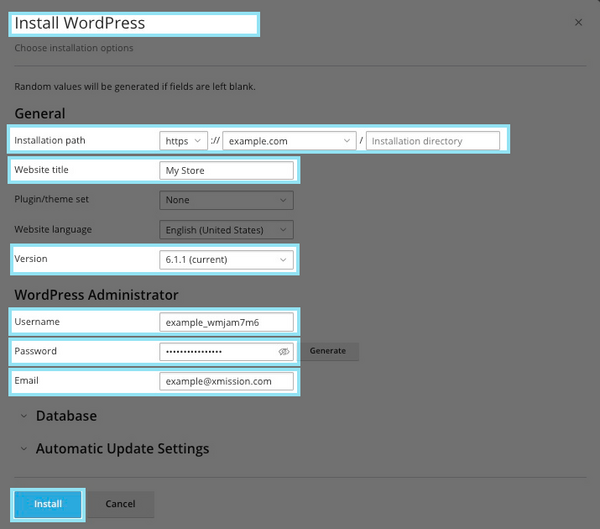
- Next choose Install
- Next you will choose the domain wish to install WordPress
NOTE: Pay attention to this section - The installation path is where WordPress is installed, leaving this field blank will ensure WordPress installs in the domain's root directory. If you want WordPress in a sub-directory put in the file name such as /wordpress, this will have your domain look like: domain.tld/wordpress.
- WordPress Administrator, Database and Automatic Update Settings are auto completed by the server.
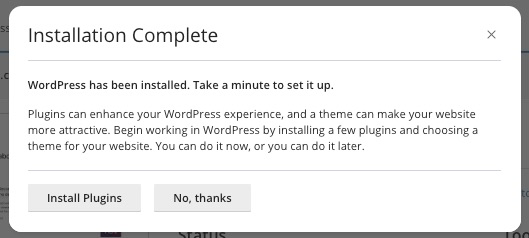
- Next just click Install and your setup is complete.
- There are some packaged Plugins available or you can skip and log in to WordPress.
XMission’s Shared Hosting Platform has the WordPress Toolkit enabled on all servers. The WordPress Toolkit is a single management interface that allows you to easily install, configure, and manage your WordPress Development.
Through the WordPress Toolkit you can:
- New WordPress installs
- Sync and Import current WordPress development
- Detach and Remove current WordPress development
- Migrate development from other hosts
To get started using the WordPress Toolkit
Advanced Setup
- Next select WordPress from the menu
- Next choose Install
- Next you will choose the domain wish to install WordPress
NOTE: Pay attention to this section - The installation path is where WordPress is installed, leaving this field blank will ensure WordPress installs in the domain's root directory. If you want WordPress in a sub-directory put in the file name such as /wordpress, this will have your domain look like: domain.tld/wordpress.
- Version - You are able to install older versions if you'd like, however we do not recommend it.
- WordPress Administrator -automatically fills in, however you are able customize this information
- Database - Click here to customize your database do your liking, it is automatically filled in
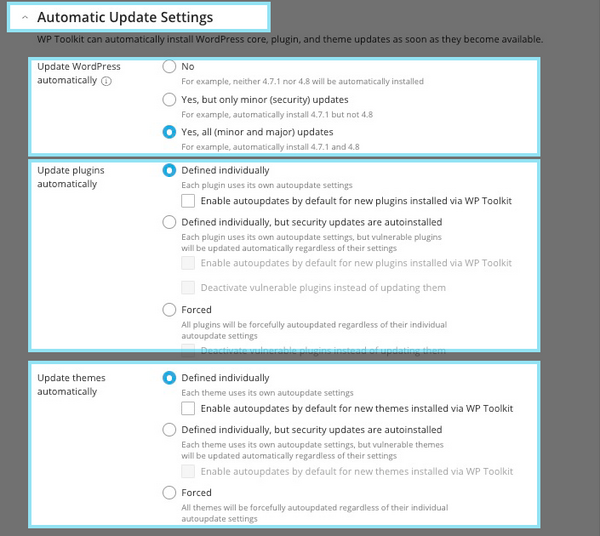
- We recommend that you keep automatic updates on to keep your site secure.
- Update WordPress Automatically - Yes, all minor updates will keep your WordPress version updated
- Update plugins automatically - Define individually
- Update themes automatically - Define individually
- Next just click Install and your setup is complete.
XMission’s Shared Hosting Platform has the WordPress Toolkit enabled on all servers. The WordPress Toolkit is a single management interface that allows you to easily install, configure, and manage your WordPress Development.
Through the WordPress Toolkit you can:
- New WordPress installs
- Sync and Import current WordPress development
- Detach and Remove current WordPress development
- Migrate development from other hosts
To get started using the WordPress Toolkit
Moving an Existing Wordpress to XMission Hosting
1 Follow the above section
2 Export the Database for your WordPress and save it to your local computer
- Most Hosting companies will use PHPMyAdmin - you can log into this and export your database.
3 Once your Database has been exported you will log into your control panel as stated above in Step 2 then click on Websites & Domains as in Step 3
4 Click on Databases
5 Choose the Database that reflects your Wordpress Install
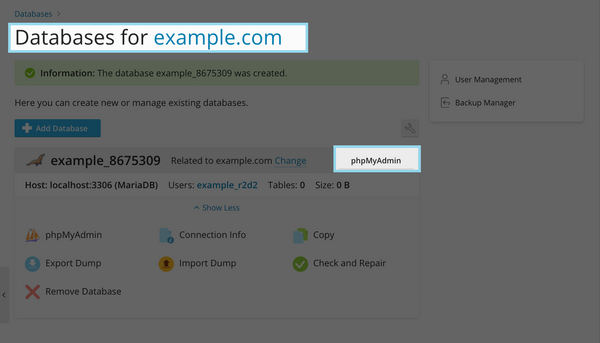
6 Click on the phpMyAdmin button
7 Once in PHPMyAdmin - select Database from the menu
![]()
8 Next Select your Database

9 Choose Check All under all the tables -
![]()
10 Where is says With Selected choose Drop
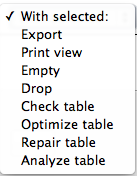
11 Choose Yes after you select Drop this will remove all the tables that the Pre-Installed WordPress has created and allow you to import your database.
12 Now choose Import from the menu bar
![]()
13 In the Section File to Import: Click on Choose File so you can select your database to import.

14 Once you have imported your database - you can then FTP your files to your new server. Use an FTP program like FileZIlla that is free and will work for Mac, Windows, and Linux
- IF you are using FileZilla fill in the following information:
- Host Name - your domain name (i.e. domain.com )
- Username - your FTP username
- Password - your FTP password
- When you FTP your files to your new Hosting - DO NOT include the wp-config.php or the .htaccess files
15 Once you have FTP'd all of your files - you can then log in to your Admin panel (i.e. http://domain.com/wp-admin/) you can log in with the same username and password that you always have.
- Once you have logged in you will want to Click on Settings > Permalinks make sure it is currently set to Default .. click Save .. This will crate a .htaccess file. Now you can set the Permalinks the way you want.
Your Site should now be up and running the way it was at your old host.
Moving your wordpress from one Domain to Another
1 Follow the sections above - However After Step 13 follow these instructions
2 Choose SQL from the menu bar
![]()
3 Insert the following:
UPDATE wp_options SET option_value = 'http://www.domain.com' WHERE option_name IN ('siteurl', 'home')
Insert that SQL query in the giant ‘Run SQL query/queries on database…’ field and change the http://www.domain.com to reflect the root level of the site you’re transferring to (so, if you’re moving WordPress to www.domain.com/bar make sure that the /bar is appended here)

4 Next you will want to run another SQL command:
UPDATE wp_posts SET post_content=(REPLACE (post_content, '{old url}','{new url}'))
If you’re moving from http://www.olddomain.com/blog to http://www.newdomain.com you’ll want {old url} to say ‘www.olddomain.com/blog’ and {new url} to say ‘www.newdomain.com’.)

- After you run the above commands your WordPress site should now reflect your new domain.
- Continue steps 14 and 15 above as you will also want to edit your settings in Wordpress to reflect your new Domain name
- Administration/Logging in
- Adding a Domain
- Adding MySQL Databases
- Adding/Managing DNS Records
- Managing Domain/Users
- Managing FTP Access/Users
- PHP Settings
- Previewing the Website
- Secure Your Sites
- Web Statistics
Additional Development Help
Applications
Domain Management
